There is a way to create a new installation CD that incorporates the latest service pack into the version that came on your installation CD. The process is called "slipstreaming".
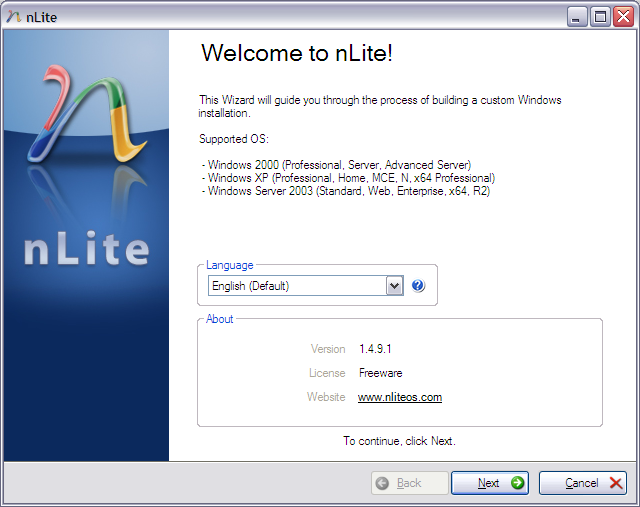
There are various pieces of software that you can use to assist you in creating a slipstream CD. Here, I'm going to cover the steps you can take using nLite, a deployment tool for creating bootable unattended windows installation CDs. The instructions were written for nLite version 1.4.9.1; other versions will likely require similar steps.
First you need to download the latest service pack for your operating system. Currently that is Windows XP Service Pack 3 Network Installation Package for IT Professionals and Developers. You also need to download nLite and install it on the system you will use to create the slipstream CD.
When you start nLite, you will be asked to pick the language you wish to use. Click Next once you have selected the appropriate language.
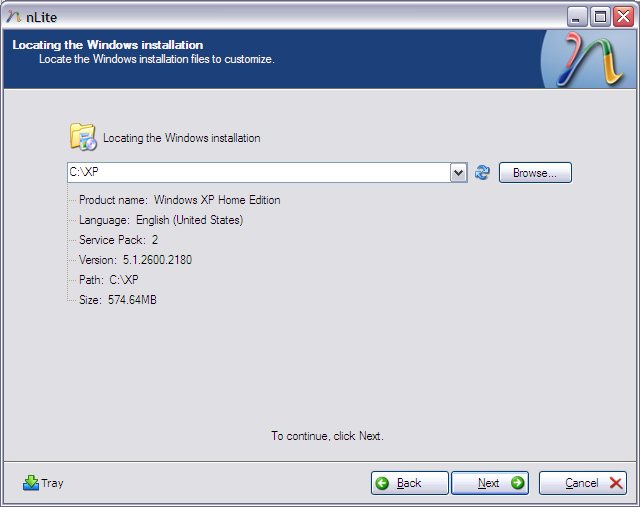
You will then be asked to select the Windows installation location.
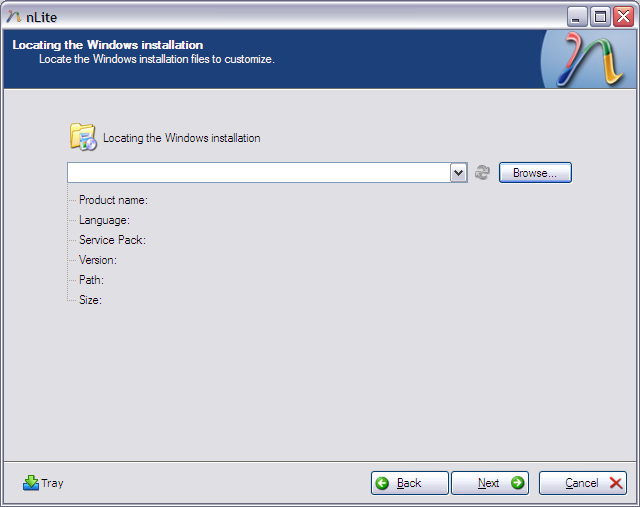
E.g., if you have a Windows XP installation CD in your CD-ROM drive, you would browse to that location and pick that drive as the location. You will then be prompted to "Select where to save the CD installation files for modification. Choose or create an empty folder."
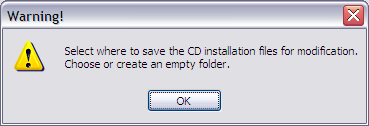
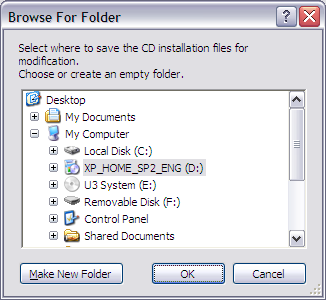
Click on OK and you will then be prompted to browse
to a folder where the installation files from the CD will be saved.
That folder will be updated with the service pack files.
Click on New Folder to create a new folder for storing
those files, e.g. you could create c:\XP.
You will need enough free space on the destination drive.
to hold the contents of the installation CD, e.g. about 604 MB
for Windows XP Home Edition with Service Pack 2.
The nLite window will then show its progress as it copies files from the installation CD to the destination location.
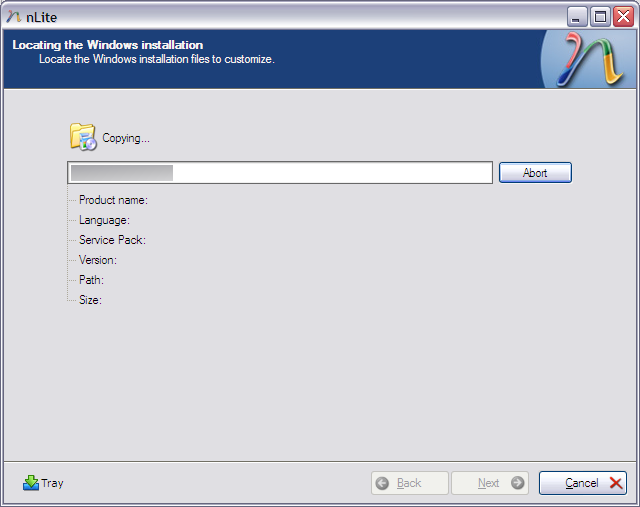
When the contents of the installation CD have been copied to the destination location, nLite will inform you of the version and service pack level for the version of Windows you have copied from the installation CD.
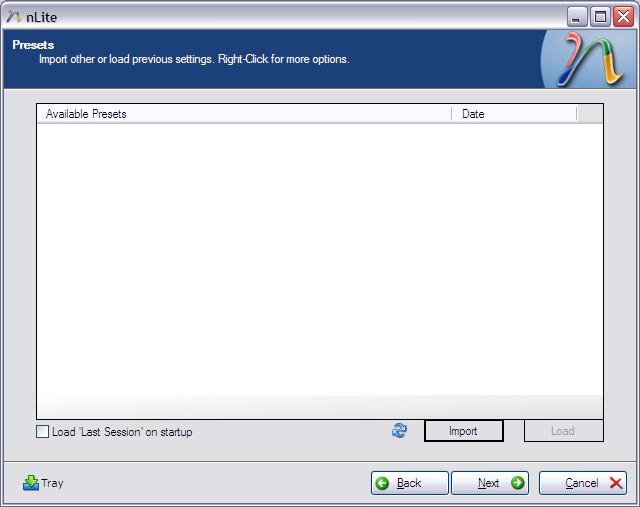
Click on Next to proceed. You will then be given the option to load "presets". Just click on Next at this point.
You will then be at the "Task Selection" screen. Click on the Service Pack button to incorporate the service pack files into the Windows XP destination directory.
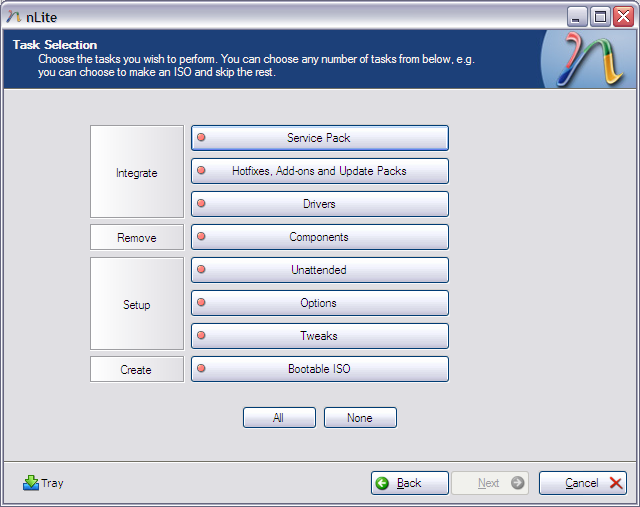
When you click on the Service Pack button, the button's color will change from pink to green, indicating it has been selected. We'll assume that you don't have any other hotfixes, add-ons, update packs, or drivers that you want to include. If you did need to incorporate any of those, you would click on their buttons in the "Integrate" section of the "Task Selection" window. Also click on Bootable ISO in the "Create" section of the window. Then click on Next.

You will then be give the option to "select the service pack for integration."
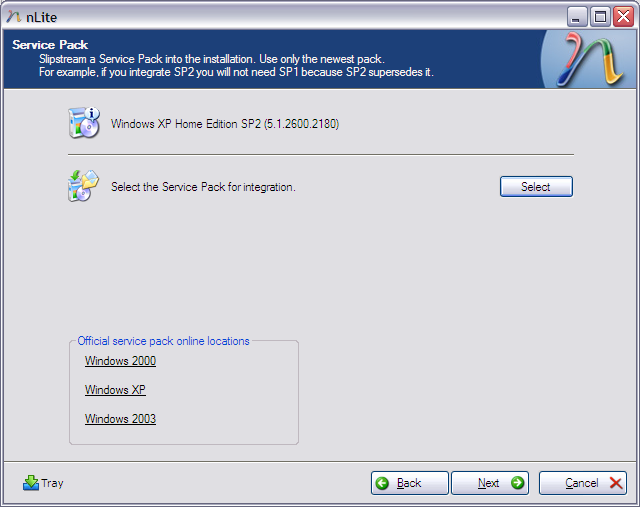
If you had not already downloaded the latest service pack for your version of Windows, there are "official service pack online locations" links on this window for Windows 2000, XP, and 2003. Clicking on one of those would open a browser window where you could download the latest service pack for your operating sysem.
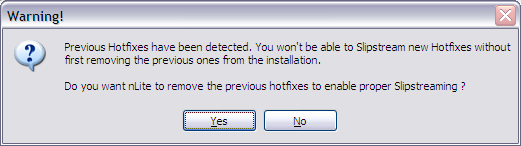
When you click on the Select button to select the service pack files location, you may see a warning stating "Previous Hotfixes have been detected. You won't be able to Slipstream new Hotfixes without first removing the previous ones from the installation. Do you want nLite to remove the previous hotfixes to enable proper Slipsteaming ?" Click on Yes.
You will then see a prompt to "select a service pack executable (.EXE) or 'i386\update\update.exe'". Click on OK.
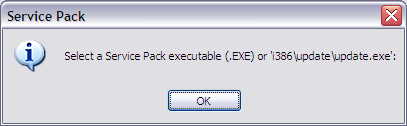
You can then select the service pack file you downloaded
from Microsoft. Or, if you had already extracted the contents
of that file to a directory on your hard drive, e.g.
C:\SP3, you could locate the
i386\update\update.exe file within it.
You can extract the contents of the XP Service Pack 3 file
to a directory named C:\SP3 using the command
windowsxp-kb936929-sp3-x86-enu.exe -x:c:\sp3.
But you can just point nLite to the downloaded service pack
file windowsxp-kb936929-sp3-x86-enu.exe as well.
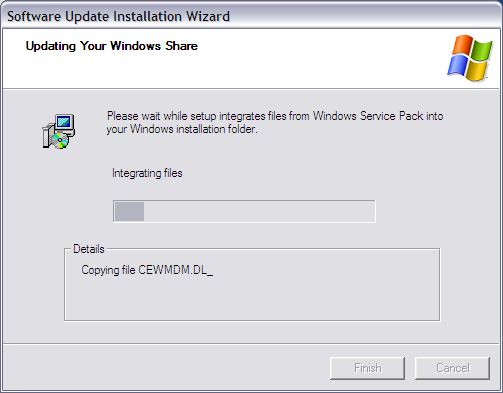
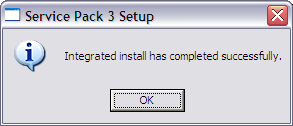
nLite will show a "Software Update Installation Wizard" showing its progress in incorporating the service pack into the Windows installation files.
You should see an "Integrated install has completed successfully" window when the process is completed. Click on OK in that window.
You will be returned to the "Service Pack" window and can click on Next there. You will then be given the chance to create a bootable ISO file.

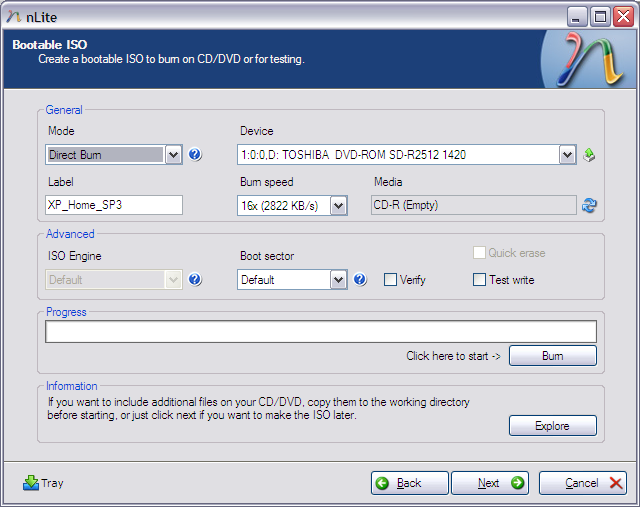
The default label for the disc you can create from that ISO file is "WinLite". You can change that to something that matches what you will have on the disc, e.g. "XP_Home_SP3" (you can't put spaces in the label). Click Next to create the ISO file on your hard disk. You can then later use whatever CD writing software came with your system, Nero, the free ISO Recorder, etc. to burn the .iso file to a CD. Or you can click on Make ISO with the "mode" set to "Create Image" and then, once the .iso file is created, change the mode to "Burn Image" and select the .iso file you just created to burn to disc.
Or, if you have a CD writer in the system you are using to create the slipstreamed version of Windows, you can change the "mode" from "Create Image" to "Direct Burn" and then click on the Burn button to immediately burn the slipstreamed CD that will contain the operating system plus the service pack files. Note: until you insert a blank CD in the CD burner, the Burn button will be grayed out.
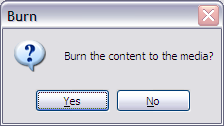
When you click on the Burn button, you will be asked to confirm that you want to burn the content to the media. Make sure you have a blank CD in the CD/DVD writer, then click on Yes.
You will see "write successful" in the information section of the window when the burn operation successfully completes.
When you are finished using nLite, click on Next. You will see the "Customization Finished" window.
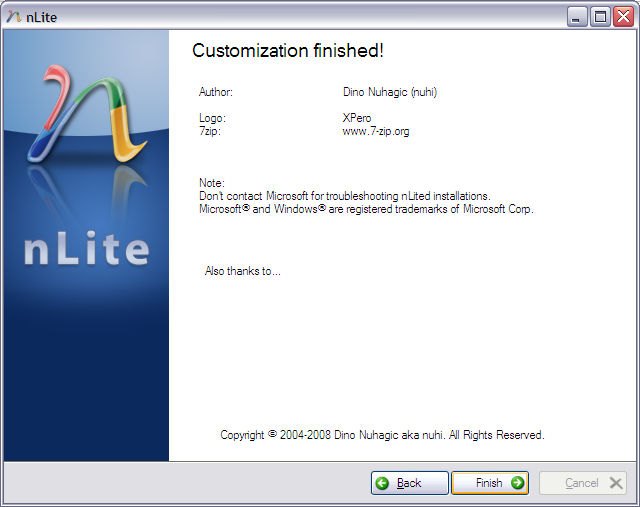
Click on the Finish button.
| nLite | XP SP3 |
|---|---|
| Developer website | Microsoft website |
References:
![]()
Created: Monday April 27, 2009