
The following procedures for freeing disk space are geared towards a Windows XP system, though some may work on other versions of the Windows operating system as well.
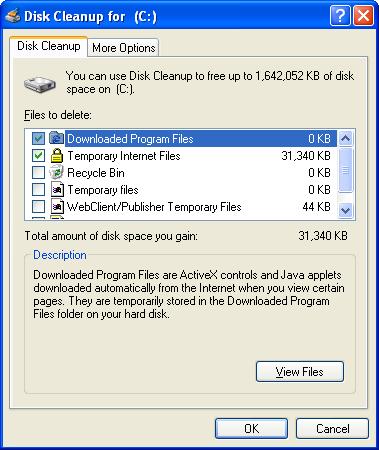
You can click on the More Options to see additional options for reclaiming disk space.
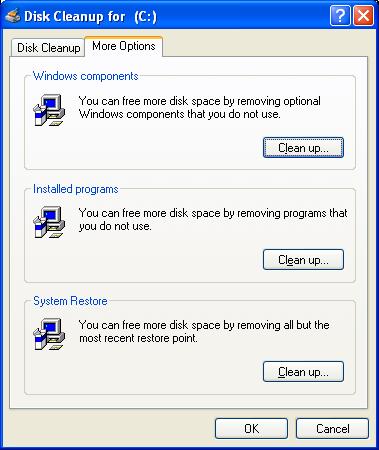
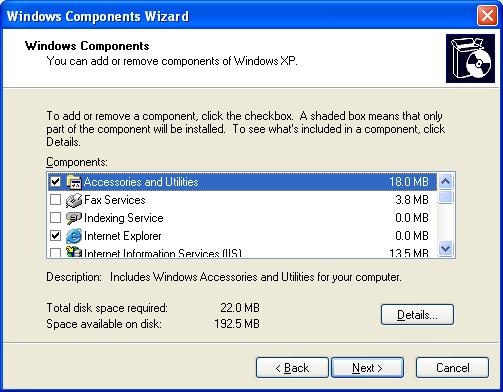
If you click on the Cleanup button for Windows Components, you will be shown a list of Windows components which can be deleted from the system. Be careful you don't delete something you may actually need.
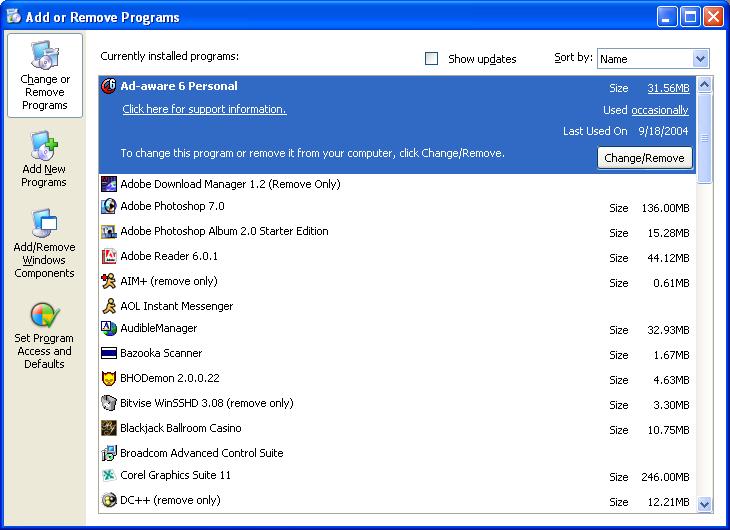
If you click on the Cleanup button for Installed Programs, the Add or Remove Programs window will open and you will see a list of programs installed on the system. Be careful you don't delete something you may actually need.
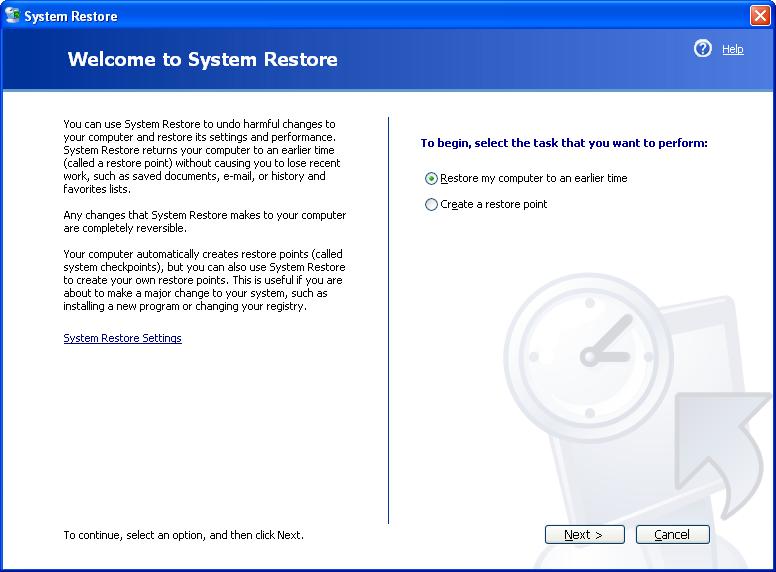
If you click on the Cleanup button for System Restore, the Add or Remove Programs window will open and you will be asked if you want to delete all but the most recent system restore point. System restore points allow you to revert the system to a previous state. In most cases only the most recent one is needed unless you have made a lot of recent changes in a short time.
When you have made your choices and click on OK, you will be asked "Are you sure you want to perform these actions?". If you are sure, click Yes.
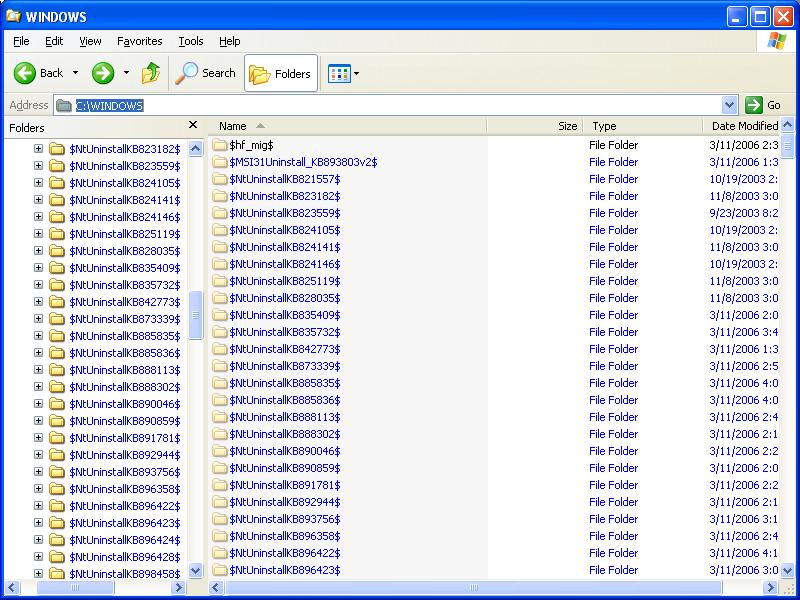
$NtUninstallKBnnnnnn$, where n is some digit, e.g.
$NtUninstallKB912919$. Other names may be in the form
$NtUninstallQnnnnnn$, e.g. $NtUninstallQ814033$.
Basically, you can delete any folders beginning with $NtUninstall.
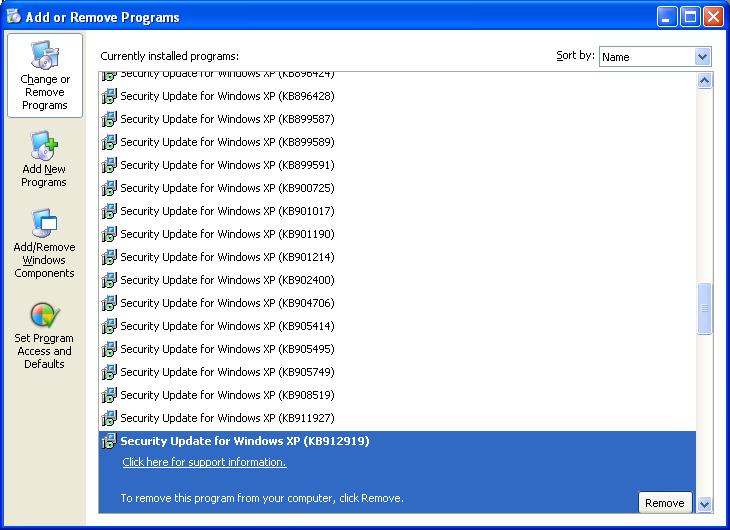
After deleting a folder associated with a hotfix, you should go into
Add or Remove Programs, which is accessible by clicking
on Start and then Control Panel. Under
Add or Remove Programs select a hotfix you have removed.
For instance the name associated with the folder $NtUninstallKBnnnnnn$
is Security Update for Windows XP (KB912919). The KB912919
is associated with a unique Id for a Microsoft Knowledgebase article, which is
why there is a "KB" at the beginning of the name.
When you click on the hotfix name, you will see a Remove button. Click on it. You will see an "Uninstaller Error" window appear, since you have already deleted the folder associated with the entry. The text in the error message will be similar to what is listed below.
An error occurred while trying to remove Security Update for WIndows (XP)
(KB912919). It may have already been uninstalled. Would you like to remove
Security Update for Windows XP (KB912919) from the Add or Remove programs
list?".

Click on Yes.
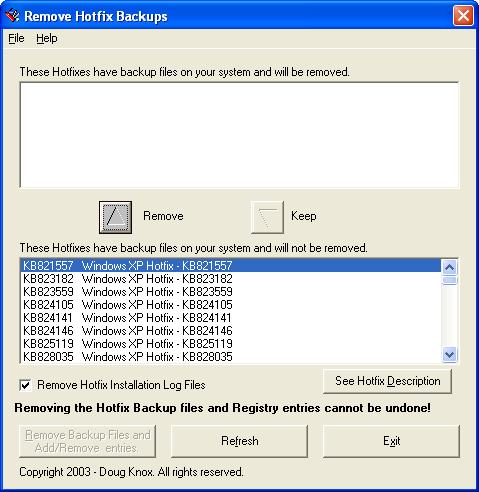
Or an alternative is to use a program like Remove Hotfix Backups by Doug Knox. You can download and use the program for free. The unregistered version will remove all hotfix backup files and their registry entries. The registered version will allow you to select which ones you want to delete and which ones you want to keep. It only costs $5 to register the software via PayPal, which I think is reasonably priced for the time it can save, especially since you can select a hotfix by clicking on it and then click on the See Hotfix Description button to have the program take you to the Microsoft webpage with information on that hotfix.
And, I think it is safer to advise a user who may not be expert in dealing with problems on his PC to download and use such a utility rather than have them try to delete the appropriate folders and Add or Reomve Program entries manually.
If you haven't registered the program, you will see all of the hotfixes listed in the top portion of the Remove Hotfix Backups. You can then simply click on the Remove Backup Files and Add/Remove entries button to have all hotfix backup folders removed.
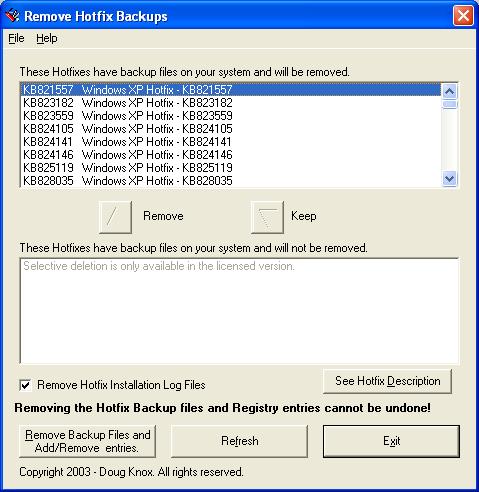
If you refresh the Windows Explorer view, you should then see that the folders have been removed.
NOTE: This utility will NOT remove application specific hotfix backups (Internet Explorer, Outlook Express, Media player and etc.). It will only remove hotfix backups that are specific to the Windows XP operating system. It will also not remove a Service Pack install folder, e.g. %WINDIR%\$NtServicePackUninstall$
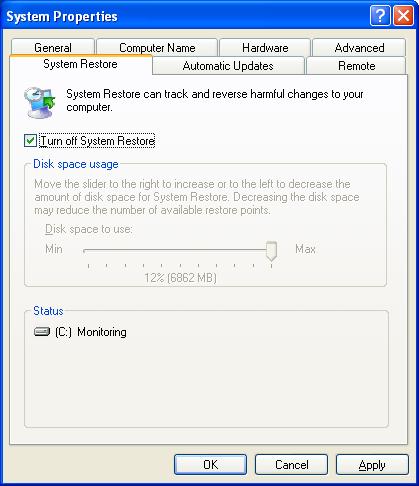
Additionally, you may not notice an immediate recovery of disk space. This is because the backup files are protected by System Restore. When they are deleted, if System Restore is enabled on the system, which is the default setting for Windows XP, System Restore places a copy of these files in the most recent or a new restore point when you delete them. As older restore points are flushed out and new ones created, you'll see the space gain. Or you can follow the System Restore Points instructions below for unenabling the System Restore feature, at least temporarily. It you do unenable it to remove all system restore points, it is advisable to turn it back on to gain the protection it offers in the event of system problems which you might be able to correct by reverting to an earlier restore point.
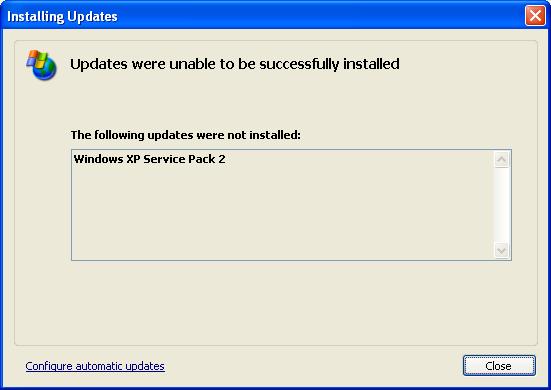
If you've installed a Service Pack, the $NtServicePackUninstall$ directory will likely be taking a considerable amount of space.
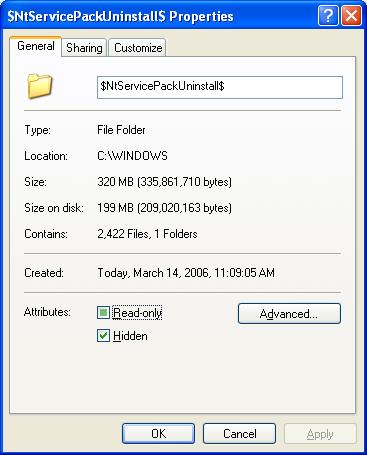
You can delete the %WINDIR%\$NtServicePackUninstall$ directory. If you hold down the shift key while right-clicking on it and selecting Delete, it won't go into the Recycle Bin, saving you the step of deleting it from that folder. When you have deleted it, go to Add or Remove Programs, which is accessible by clicking on Start and then Control Panel. Under Add or Remove Programs select the service pack, e.g. Windows XP Service Pack 2 and then click on the Remove button. Click on Yes When you get the Uninstaller Error window stating "An error occurred while trying to remove Windows XP Service Pack 2. It my have already been uninstalled. Would you like to remove Windows XP Service Pack 2 from the Add or Remove programs list?"
To delete the files in this directory take the steps below.
| 1. | Click Start, click Run, type services.msc, and then click OK. |
| 2. | In the Services (Local) pane, right-click Automatic Updates, and then click Stop. |
| 3. | Minimize the Services (local) window. |
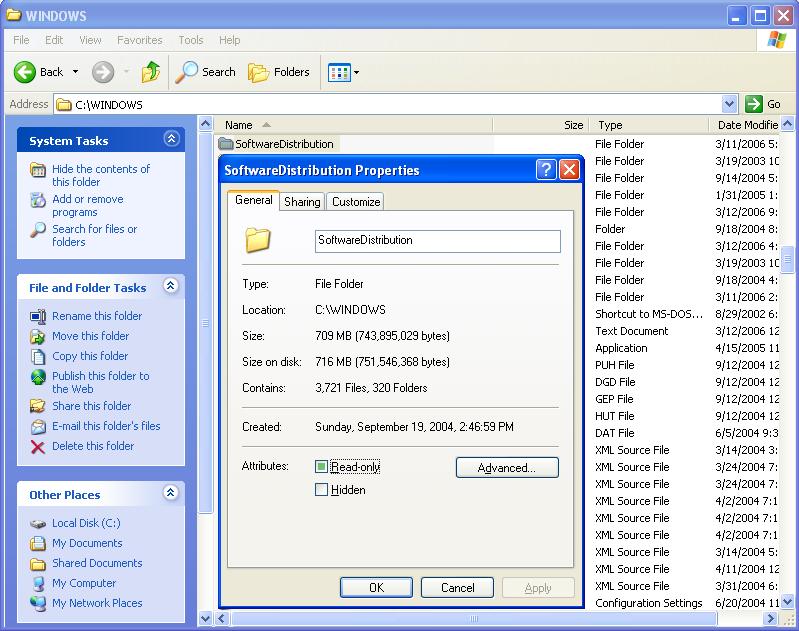
| 4. | Select all the contents of the Windows distribution folder, and then
delete them. Note By default, the Windows distribution folder is located in the drive:\Windows\SoftwareDistribution folder. In this location, drive is a placeholder for the drive where Windows is installed. |
| 5. | Make sure that the Windows distribution folder is empty, and then maximize the Services (local) window. |
| 6. | In the Services (Local) pane, right-click Automatic Updates, and then click Start. |
| 7. | Restart the computer, and then run Windows Update again. You can run Windows Update by opening Internet Explorer and then clicking on Tools then selecting Windows Update |
c:\windows\downloaded installations\ folder holds
the installers for some programs you downloaded and installed.
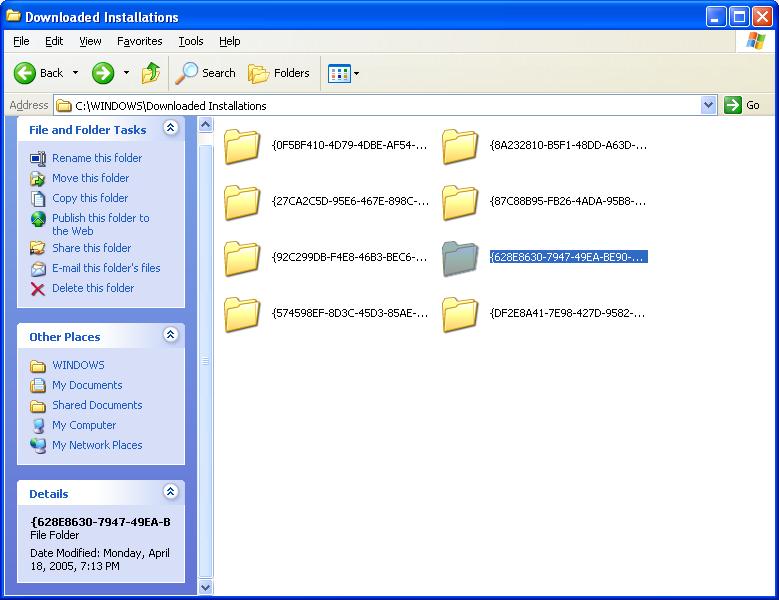
The installers in this folder are available for use for repairs or updating components later. As an example, Apple's iTunes will place an installer in this folder. Deleting subdirectories within this one should not cause any problems, but you may want to look inside the subdirectories first to attempt to determine what they hold. You likely won't be able to tell from the subfolder names, but if you look inside particular ones, you may then be able to tell. For instance in the case of iTunes, you will see a setup file named iTunes, which is a Windows Installer Packager.
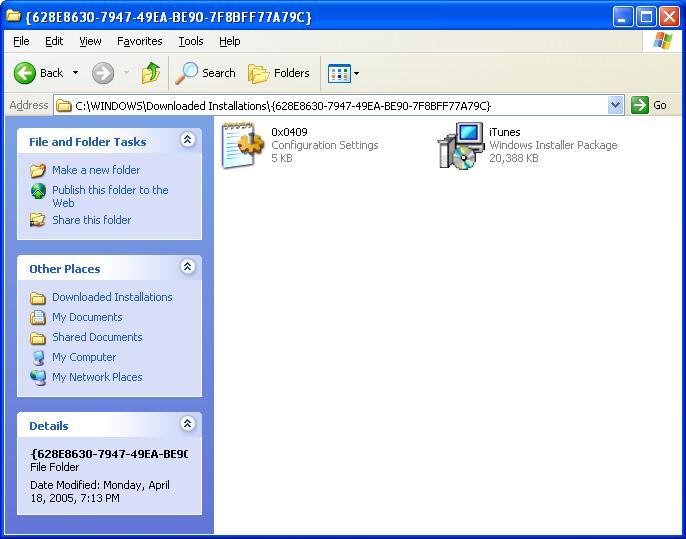
It is possible that you may have several subfolders within this folder for different versions of a particular program, such as iTunes.
You can delete all of the folders in c:\windows\downloaded installations\ or just certain ones, if you prefer.
You can also adjust the amount of space allocated for system restore points downwards, so that less space on the hard drive is consumed by them.
You can get the latest version of the Java software from Download Java Software. Since many websites use Java, I would advise installing the software on your system, but you don't need earlier versions remaining on your system.
References:
![]()
Created: March 21, 2006