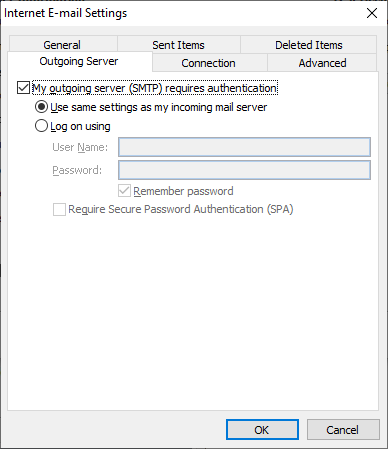

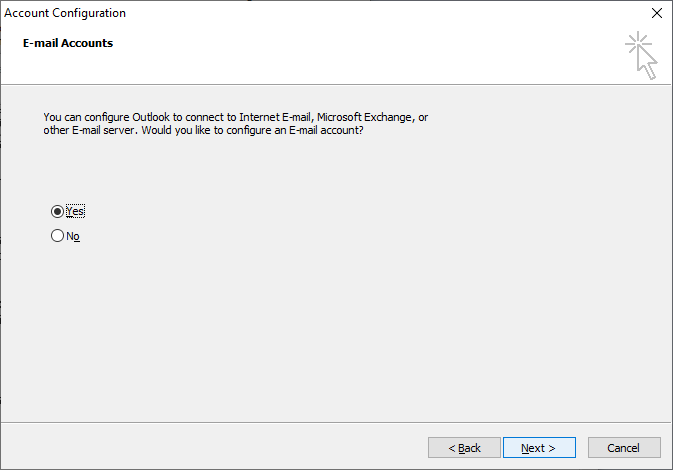
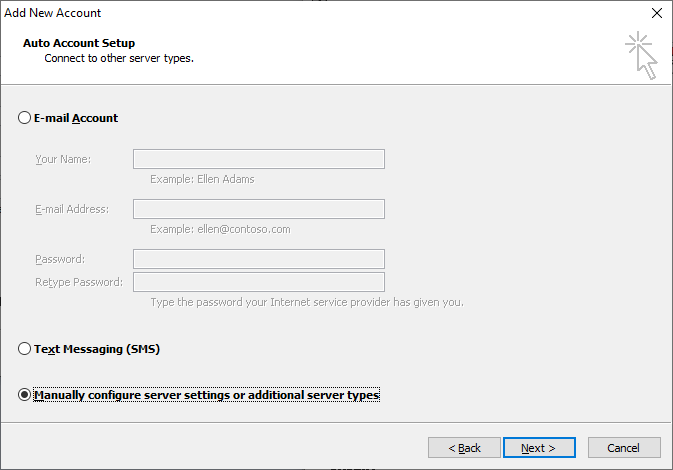
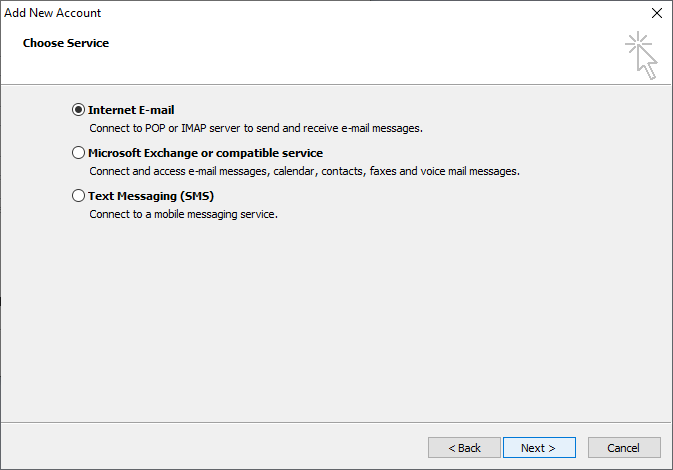
At the Internet E-mail Settings window, you will need to provide the relevant information for your AOL email account. In the username field, include "@aol.com" as part of the user name, e.g., jdoe@aol.com. You will also need to choose whether you will access your AOL email account using the Post Office Protocol (POP) or the Internet Message Access Protocol (IMAP). The default option is POP3, version 3 of POP. With that option, the email in your inbox will be downloaded to Outbox and deleted from the server after a specified period of time; by default Outlook will leave it on the server for 14 days. If you log into the AOL website to check your email after you've downloaded it with Outlook and delete a message while viewing your email in a browser, it won't be available to download with Outlook, if you subsequently check your AOL email with Outlook, although that may not matter to you. A disadvantage of using the POP protocol is that it only downloads email from the inbox, not any other folders you may have created to hold specific email messages. Also, by default email is deleted from the email server after you download it to Outlook, so email you've already downloaded won't be visible to you if you check your email through a web browser at a later time—by default Outlook will leave the email there for 14 days, though. You can change that setting, though, once you've filled in account information by clicking on the More Settings button, then clicking on the Advanced tab and choosing how long a copy of messages should be left on the server.
If you select IMAP for the account type, you can view email in other folders besides the inbox and Outlook's view of the email in your account is synchronized with the email messages maintained on the AOL email server, so you can check with a web browser or with Outlook and see the same messages in your email folders. You could also set up Outlook on another system and select IMAP there as well to see the same email messages on a separate system where you are using Outlook.
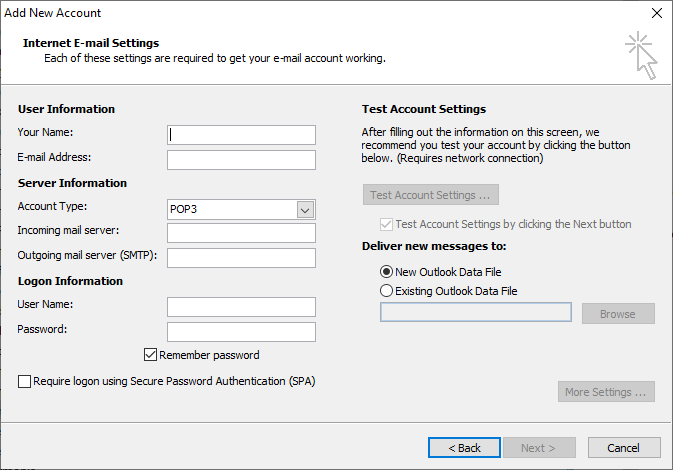
The information you should put in the incoming mail server and outgoing mail server fields is as follows:
| Protocol | Server | Port Settings |
|---|---|---|
| POP3 | Incoming mail server (POP3): pop.aol.com Outgoing mail server (SMTP): smtp.aol.com |
POP3: 995-SSL SMTP: 465-SSL |
| IMAP | Incoming mail server (IMAP): imap.aol.com Outgoing mail server (SMTP): smtp.aol.com |
IMAP: 993-SSL SMTP: 465-SSL |
Put a check mark in the "Remember password" check box, if you don't want to have to enter your password every time you open Outlook to check your email.
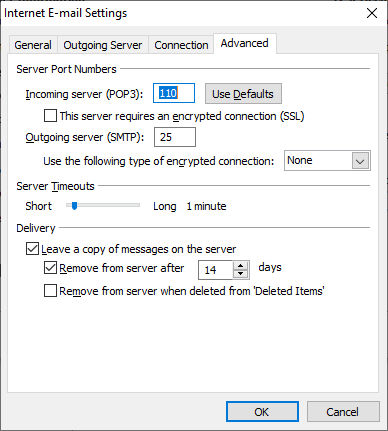
You would need to change the incoming POP3 server port from 110 to 995 and the the outgoing Simple Mail Transfer Protocol (SMTP) port from 25 to 465. At this window, you could also choose whether Outlook would leave a copy of messages on the email server for a specified period of time and whether you want Outlook to immediately delete an email message from the server if you delete it from within Outlook rather than wait for the specified period of time.
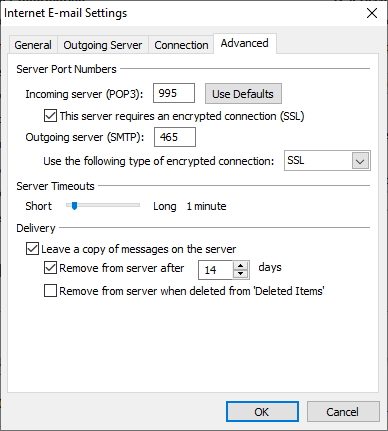
You will also need to select Secure Sockets Layer (SSL) for the "Use the following type of encrypted connection" value for the outgoing servers and check the box next to "This server requires an encrypted connection (SSL)" for the incoming server. After specifying SSL, make sure you have ports 995 (incoming) and 465 (outgoing) set before going on to the next step. Your configuration settings should be as shown below, except for any change you might prefer on when Outlook deletes email from the AOL email server.
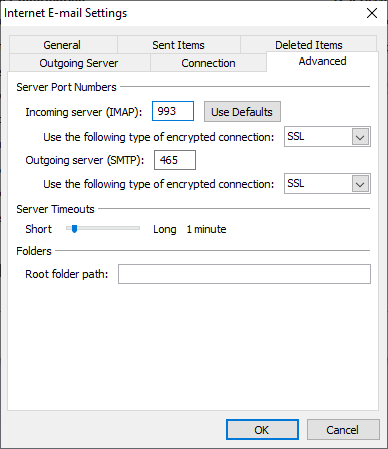
If you chose IMAP for the protocol, you would see the default IMAP port for incoming email as port 143. You should change it to 993 and also change the outgoing port, i.e., the one to which Outlook will send messages you wish to transmit to others, to port 465.
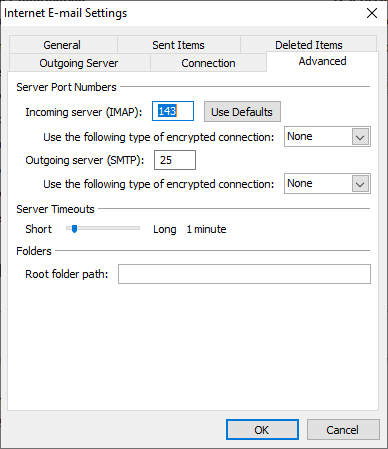
You will also need to select Secure Sockets Layer (SSL) for the "Use the following type of encrypted connection" values for both the incoming and outgoing servers. When you select SSL for those fields, Outlook may revert the port numbers back to the default values. Make sure they are 993 for the incoming port and 465 for the outgoing port. The new settings would be as shown below.
