Configuring Microsoft Exchange to Use a Smart Host
If your Microsoft Exchange server has an IP address that doesn't have an
associated PTR record or sits behind a router using
NAT that doesn't have
a PTR record associated with its IP address, some other email servers may
reject email from the Exchange server. Some other email servers, such as AOL
or Comcast servers will look at the IP address of a server attempting to
send email to them and attempt to do a reverse lookup on that IP address, i.e.
they will attempt to match the IP address to a name such as server.example.com.
You can deal with this problem by configuring Exchange to use a
"smart host". I.e., you configure Exchange to route all outgoing email through
another email server, such as your ISP's email server. You can do so by
the following steps for a Microsoft Exchange 2003 server on a Windows Small
Business Server (SBS) 2003 system.
- Click on Start.
- Select All Programs.
- Select Microsoft Exchange.
- Select System Manager.
- Click on the plus sign to the left of Connectors to expand the
list of connectors.
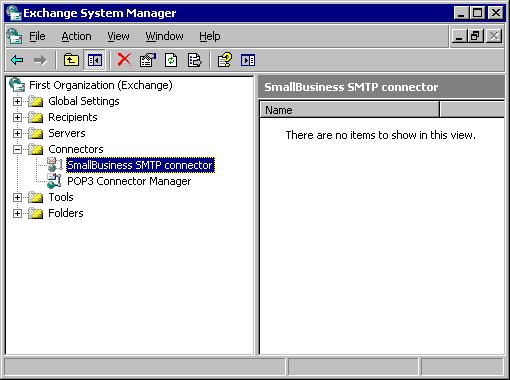
- Right-click on SmallBusiness SMTP Connector and select
Properties.
- In the "Forward all mail through this connector to the following
smart hosts" field, put the Fully Qualified Domain Name (FQDN) of the
smart host, e.g. smtp.example.com.
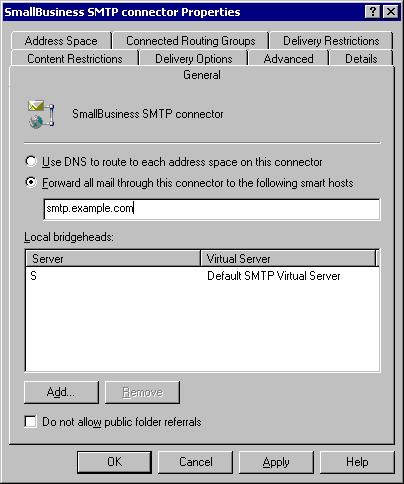
- Click on the Advanced button.
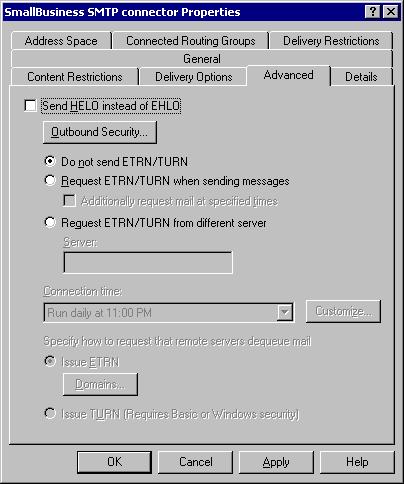
- Click on the Outbound Security button.
- For the Basic authentication field, click on the Modify
button.
- Put the username for the account to be used on the smart host in the
User field, e.g. the username for your ISP-provided SMTP server.
Put the password for that account in the Password and Confirm
password fields of the Outbound Connection Credentials window.
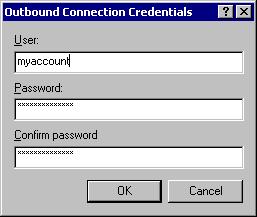
- Click on OK.
- Click on OK again to close the Outbound Security window.
- Click on OK again.
- At the main Exchange System Manager window, click on the
plus sign to the left of Servers to expand the list of servers.
- Click on the plus sign to the left of Protocols to expand
the list of protocols.
- Click on the plus sign to the left of SMTP to expand the list
of entries beneath it.
- Right-click on "Default SMTP Virtual Server" and click on Stop.
- Right-click on "Default SMTP Virtual Server" again and click on Start
.
Exchange is now configured to route outgoing email via the smart host.
If you ever want to stop using the smart host, start the Exchange
System Manager again, right-click on SmallBusiness SMTP Connector
, select Properties, and then select "Use DNS to route each
address space on this connector" rather than "Forward all email through this
connector to the following smart hosts." Change the Outbound Security
setting under the Advanced tab back to "Anonymous access", i.e.
"no user name or password required." Then start and stop the "Default Virtual
SMTP Server" as above to activate the change.
