Creating an Audio CD from MP3 Files in iTunes


To create an audio CD that you can play in a car CD player or elsewhere
by burning MP3 files to a CD-R in iTunes, you can take the following steps in
iTunes on a Mac OS X system:
- Click on File.
- Select Add to Library, if the MP3 files
aren't already in your iTunes library.
- Browse to the location of the MP3 files on the hard
drive or other media that you want to burn to the CD.
- Select all of the files you wish to burn to the CD and
click on Open.
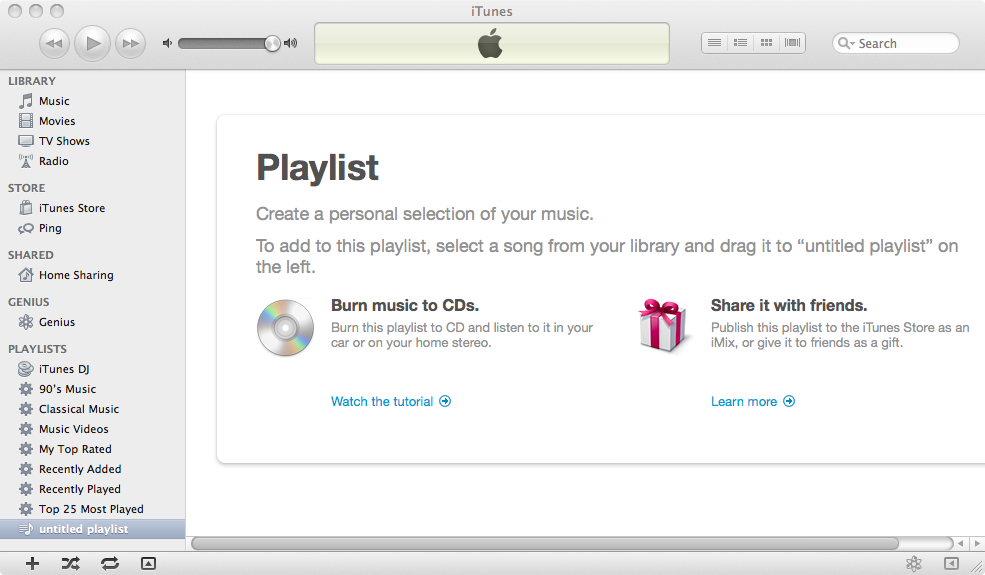
- Select New Playlist

You will see an untitled playlist on the left side of the
iTunes window.
- Select Music under LIBRARY on the
top left of the iTunes window.
- Select the files you wish to burn to the CD.
Note: look at the times listed for the files. A CD typically can only hold a
maximum of 74 minutes or 80 minutes of music. If you look at the top side
of the CD, you may see something like "700MB 80min" for a CD that can
hold 80 minutes of music.
-
Drag the file or files you've selected to untitled playlist on the
left of the window. If you are dragging more than one file, you need to drag
them in the order you want to have them played, if you drag them individually.
-
Click on untitled playlist, which will show you the MP3 files
you will be burning to disc in the order in which you will hear them when
the CD is played. If the order isn't what you want, you can click on a file
and drag it into the position you want it to play.
-
Click on File and select Burn Playlist to Disc. Note:
this option appears under File when you have untitled playlist
selected. You won't see it if you have LIBRARY selected.
-
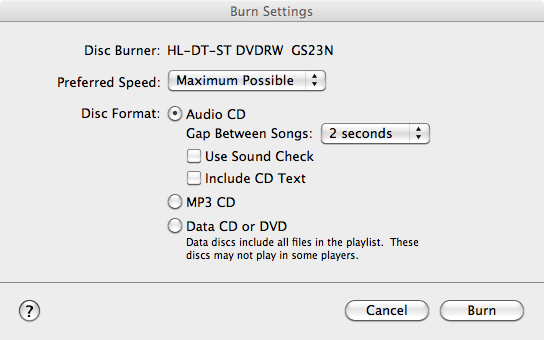
A Burn Settings window will appear. Leave Audio CD selected
and click on Burn

The disc should be ejected when the burning process is completed. You
should be able to insert it in any card CD player or similar device and
listen to the music, audio book files, etc. that you have placed on it.

Created: Wednesday May 23, 2012


