
The Disk Management utility that comes with Microsoft Windows operating
systems can be used to view details of drives and partitions in the system
and attached to the system via
USB. To start the utility,
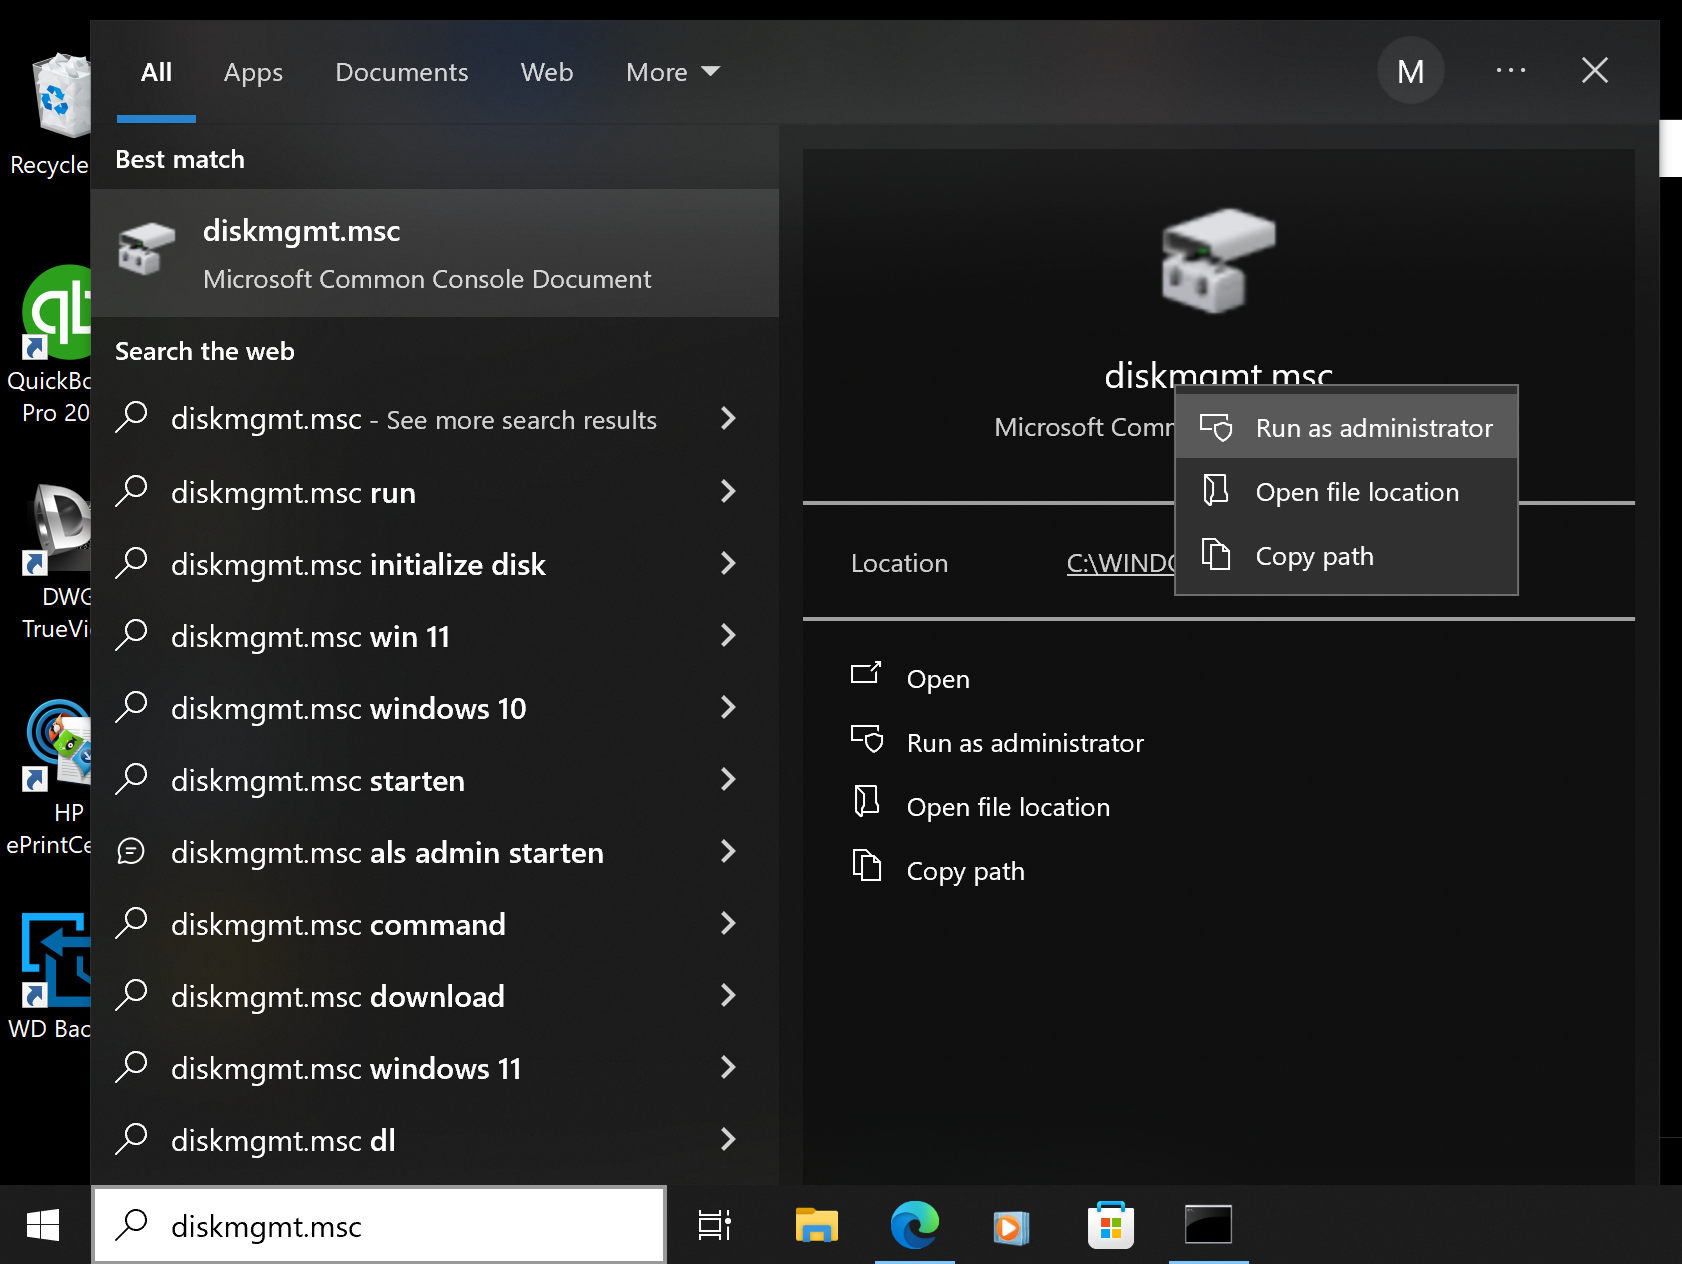
you can type diskmgmt.msc in the Windows search field, which you
can access by clicking on the magnifying glass icon at the bottom of the screen
on a Windows 11 system or by typing diskmgmt.msc in the
Type here to search field on a Windows 10 system. To use the utility,
you must run it as an administrator, so if you are not logged into an
administrator account, you need to right-click on the utility when you see it
returned in the search results and choose "Run as administrator".
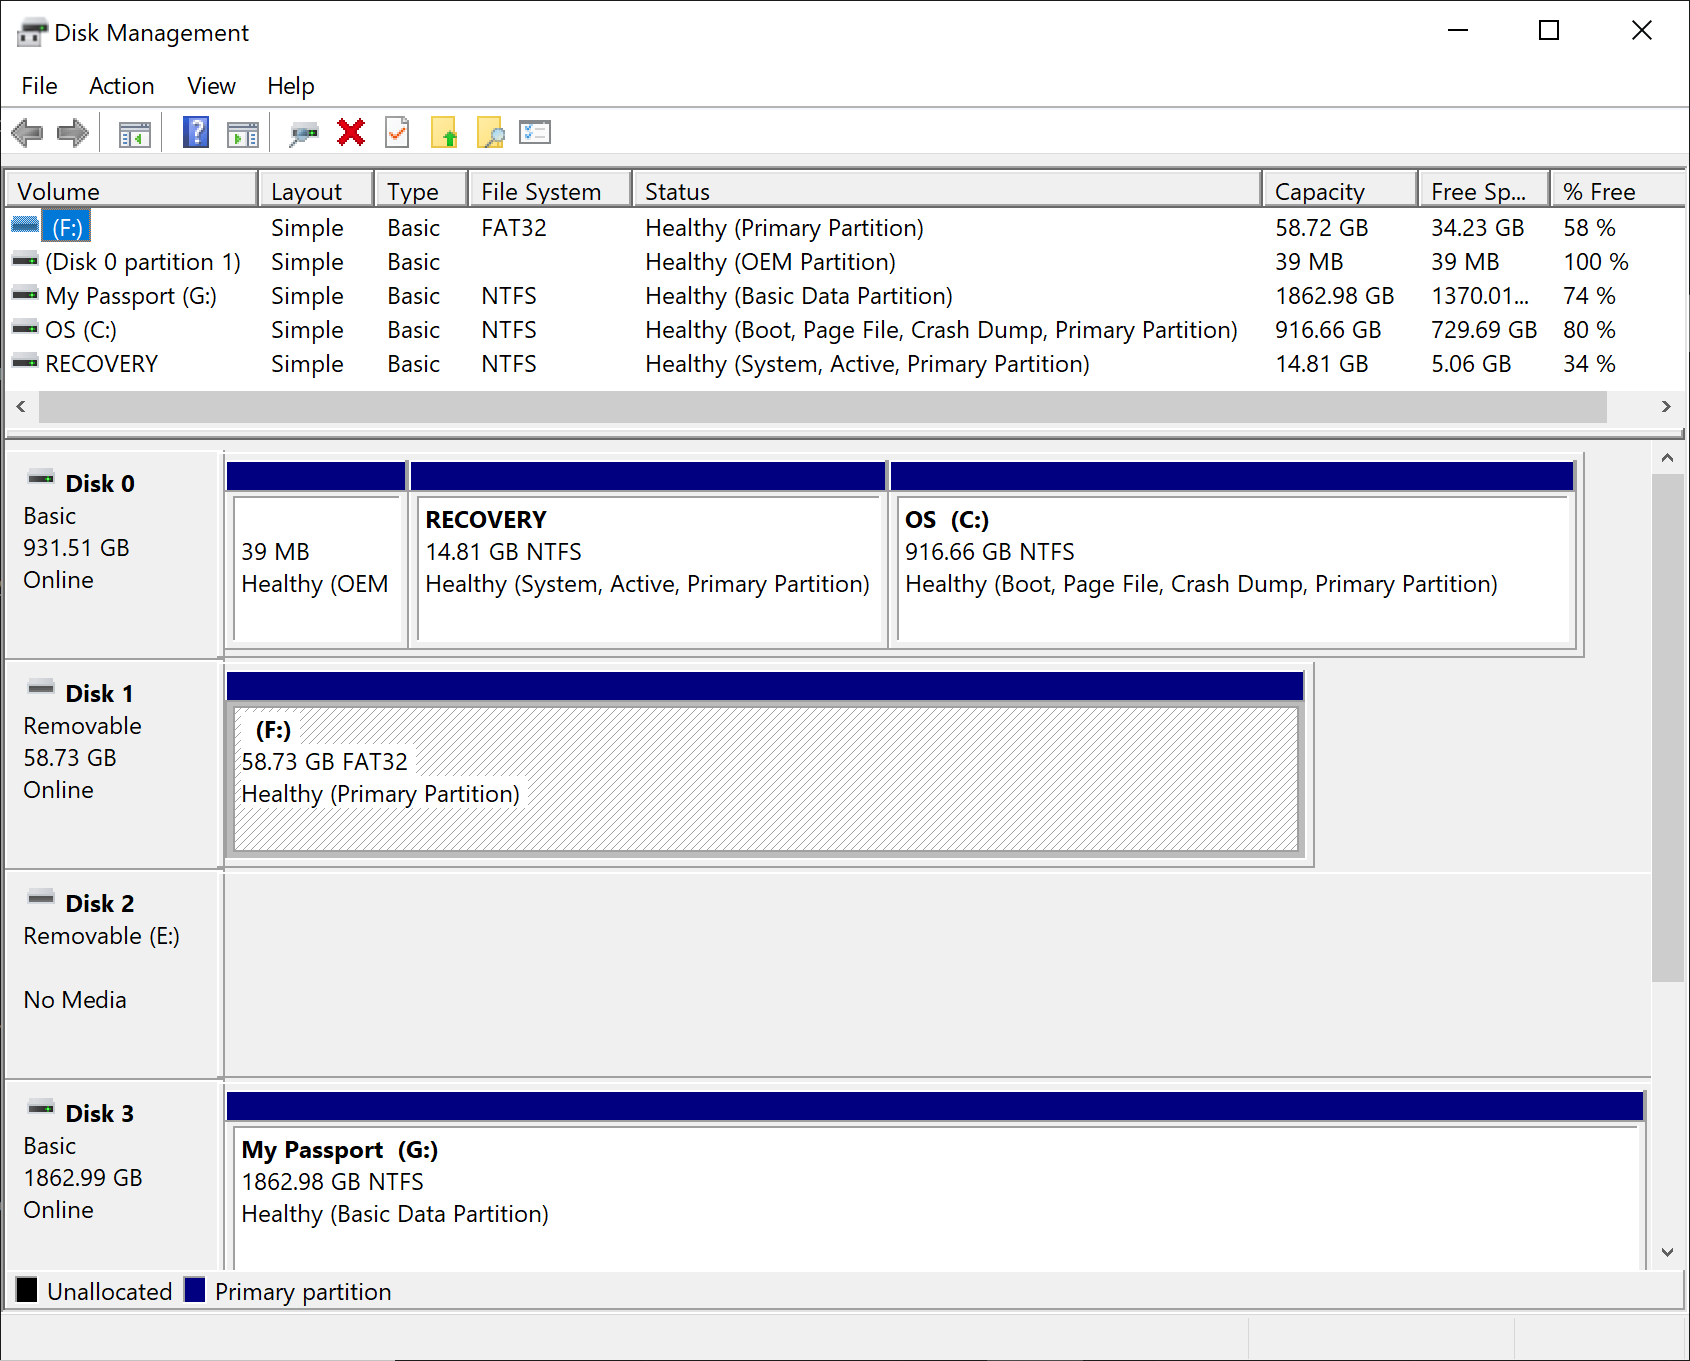
When the utility opens, you will see the drives listed along with the partitions on each drive as shown below.
You can start the Disk Management utility from a command-line
interface (CLI) by
opening a command prompt window
as an administrator and typing diskmgmt.msc and then hitting
Enter.
Microsoft Windows [Version 10.0.19045.4046]
(c) Microsoft Corporation. All rights reserved.

C:\WINDOWS\system32>diskmgmt.msc

C:\WINDOWS\system32>
Related: