Fri, Jul 17, 2026 9:30 pm
Renaming a Windows system and joining a Windows domain with PowerShell
You can view the current name of a system running a Microsoft Windows
operating system
(OS) using the hostname command in a
PowerShell or
command prompt window.
You can change the name of the
host by opening
a PowerShell window with administrator privileges by choosing "Run as
administrator" when opening the window and then using the PowerShell command
Rename-Computer -NewName "name" where name is the
new name you wish to assign to the system. Note: names must be 15 or fewer
characters due to NetBIOS
limitations and should only use standard alphanumeric characters, i.e, A-Z,
0-9, and hyphens (-). Spaces and most special characters are invalid and will
cause an error.
PS C:\Windows\system32> hostname
DESKTOP-PNS32H3
PS C:\Windows\system32> Rename-Computer -NewName "Jamestown"
WARNING: The changes will take effect after you restart the computer DESKTOP-PNS32H3.
PS C:\Windows\system32>
You will need to reboot to have the new name go into effect; you can
add the -Restart option to the command to restart automatically.
E.g., Rename-Computer -NewName "TheNewName" -Restart.
To join a Windows
domain from a
command-line interface (CLI), you can issue the command
Add-Computer -DomainName "YourDomainName" -Credential
(Get-Credential) -Restart
— replace YourDomainName with
the name of the Windows domain. If you don't want to automatically reboot, omit
the -Restart option.
Add-Computer -DomainName "ad.example.com" -Credential (Get-Credential) -Restart

cmdlet Get-Credential at command pipeline postion 1
Supply values for the following parameters:
Credential
You will see a "Windows PowerShell credential request" window open where
you can provide a user name and password for an account in the domain
administrators group. The system will automatically reboot if you have
added the -Restart parameter.
[/os/windows/PowerShell]
permanent link
Thu, Jul 16, 2026 6:53 pm
Querying and setting network settings with PowerShell
To determine the IP
address of a Microsoft Windows system from a
command-line
interface (CLI) you can
open a command prompt window and
use the ipconfig command
ipconfig /all. If you only need the IPv4 address you can
pipe
the output into find
or findstr. Alternatively,
you can use a netsh command.
C:\>ipconfig /all | find "IPv4 Address"
   IPv4 Address. . . . . . . . . . . : 192.168.0.8(Preferred)

C:\>ipconfig | findstr /C:"IPv4"
   IPv4 Address. . . . . . . . . . . : 192.168.0.8

C:\>netsh interface ip show addresses

Configuration for interface "Ethernet"
    DHCP enabled:                         Yes
    IP Address:                           192.168.0.8
    Subnet Prefix:                        192.168.0.0/24 (mask 255.255.255.0)
    Default Gateway:                      192.168.0.1
    Gateway Metric:                       0
    InterfaceMetric:                      25

Configuration for interface "Loopback Pseudo-Interface 1"
    DHCP enabled:                         No
    IP Address:                           127.0.0.1
    Subnet Prefix:                        127.0.0.0/8 (mask 255.0.0.0)
    InterfaceMetric:                      75


C:\>
You can also use a
PowerShell cmdlet to view the IP address.
PS C:\> Get-NetIPAddress -AddressFamily IPv4


IPAddress         : 192.168.0.8
InterfaceIndex    : 5
InterfaceAlias    : Ethernet
AddressFamily     : IPv4
Type              : Unicast
PrefixLength      : 24
PrefixOrigin      : Dhcp
SuffixOrigin      : Dhcp
AddressState      : Preferred
ValidLifetime     : 15:58:12
PreferredLifetime : 15:58:12
SkipAsSource      : False
PolicyStore       : ActiveStore

IPAddress         : 127.0.0.1
InterfaceIndex    : 1
InterfaceAlias    : Loopback Pseudo-Interface 1
AddressFamily     : IPv4
Type              : Unicast
PrefixLength      : 8
PrefixOrigin      : WellKnown
SuffixOrigin      : WellKnown
AddressState      : Preferred
ValidLifetime     : Infinite ([TimeSpan]::MaxValue)
PreferredLifetime : Infinite ([TimeSpan]::MaxValue)
SkipAsSource      : False
PolicyStore       : ActiveStore


PS C:\>
You can get a more concise version showing the interface and address
with Get-NetIPAddress -AddressFamily IPv4 |Select-Object InterfaceAlias,
IPAddress.
PS C:\> Get-NetIPAddress -AddressFamily IPv4 | Select-Object InterfaceAlias, IPAddress

InterfaceAlias              IPAddress
--------------              ---------
Ethernet                    192.168.0.8
Loopback Pseudo-Interface 1 127.0.0.1


PS C:\>
[ More
Info ]
[/os/windows/PowerShell]
permanent link
Wed, Mar 25, 2026 4:39 pm
Ejecting a Disc with PowerShell
I needed to eject a
optical disc
drive tray from a
command-line
interface (CLI) on a system running Microsoft Windows 11 so that
I could insert a DVD in the drive. That can be done using the
Powershell
command powershell (New-Object -ComObject
WMPlayer.OCX.7).cdromCollection.item(0).Eject(), which will
eject the tray of the first optical drive found by Windows Media Player's
COM object.
PS C:\> powershell (New-Object -ComObject WMPlayer.OCX.7).cdromCollection.item(0).Eject()
Windows PowerShell
Copyright (C) Microsoft Corporation. All rights reserved.

Install the latest PowerShell for new features and improvements! https://aka.ms/PSWindows

PS C:\>
[/os/windows/PowerShell]
permanent link
Mon, Nov 24, 2025 7:46 pm
Determining the location of a user's "My Documents" folder with PowerShell
I needed to move some files from one Windows 11 system that is no longer
being used, as the user is no longer working for the company, to another
Windows 11 system where the user of that system, Pam, is now handling a task
formerly handled by the prior employee, but while logged onto the account for
the user now handling the task on her system, I noticed that her
Documents folder was empty. The
Windows domain name
changed at that business a few years ago, so I thought that perhaps she
might be using a Documents directory associated with her account under
the prior domain name rather than the new one created for her new domain
login. You can determine the location of a user's "My Documents" directory,
which can be redirected to another location, including a network share
or another drive, by issuing the PowerShell command
[Environment]::GetFolderPath("MyDocuments"). E.g.:
Windows PowerShell
Copyright (C) Microsoft Corporation. All rights reserved.

Try the new cross-platform PowerShell https://aka.ms/pscore6

PS C:\Users\Pam> [Environment]::GetFolderPath("MyDocuments")
C:\Users\Pam\Documents
PS C:\Users\Pam>
The command utilizes the GetFolderPath method from the
System.Environment class to retrieve the path of special folders,
including "MyDocuments," for the user under whose context the script or command
is executed. This method correctly identifies the mapped location even if the
Documents folder has been redirected or moved from the default location.
In this case, I found that her "My Documents" directory was pointing to
the directory associated with the old domain name. Her "home" folder
was also pointing to the home folder that was in use for her account
in the old domain. You can type $home in a PowerShell window to
see that value. Or you can use $env:USERPROFILE to see the same
information.
PS C:\Users\Pam> $Home
C:\Users\Pam
PS C:\Users\Pam >$env:userprofile
C:\Users\Pam
PS C:\Users\Pam>
[/os/windows/PowerShell]
permanent link
Sat, Nov 22, 2025 10:12 pm
PowerShell cmdlets to check remote connectivity and firewall rules
When I tried to establish a
Secure Shell (SSH)
connection to a Windows 11 PC at a remote location today, I was unable to
do so. I usually connect to the
Windows
domain controller at the location and establish the SSH connection
to the user's Windows 11 system through it, but that was not working. I thought
the problem was likely due to
McAfee stopping providing
firewall protection for incoming connections to ports on PCs as part of
their antivirus software, since the antivirus
software on PCs at that location was
McAfee Antivirus
Plus. When McAfee stopped providing that firewall service as part of
McAfee AntiVirus Plus, the software reverted firewall protection for incoming
connections to Microsoft's default firewall software,
Microsoft Defender
Firewall, aka Windows Firewall. When I check firewall protection on a
Windows system running McAfee AntiVirus Plus, I now see the following message:
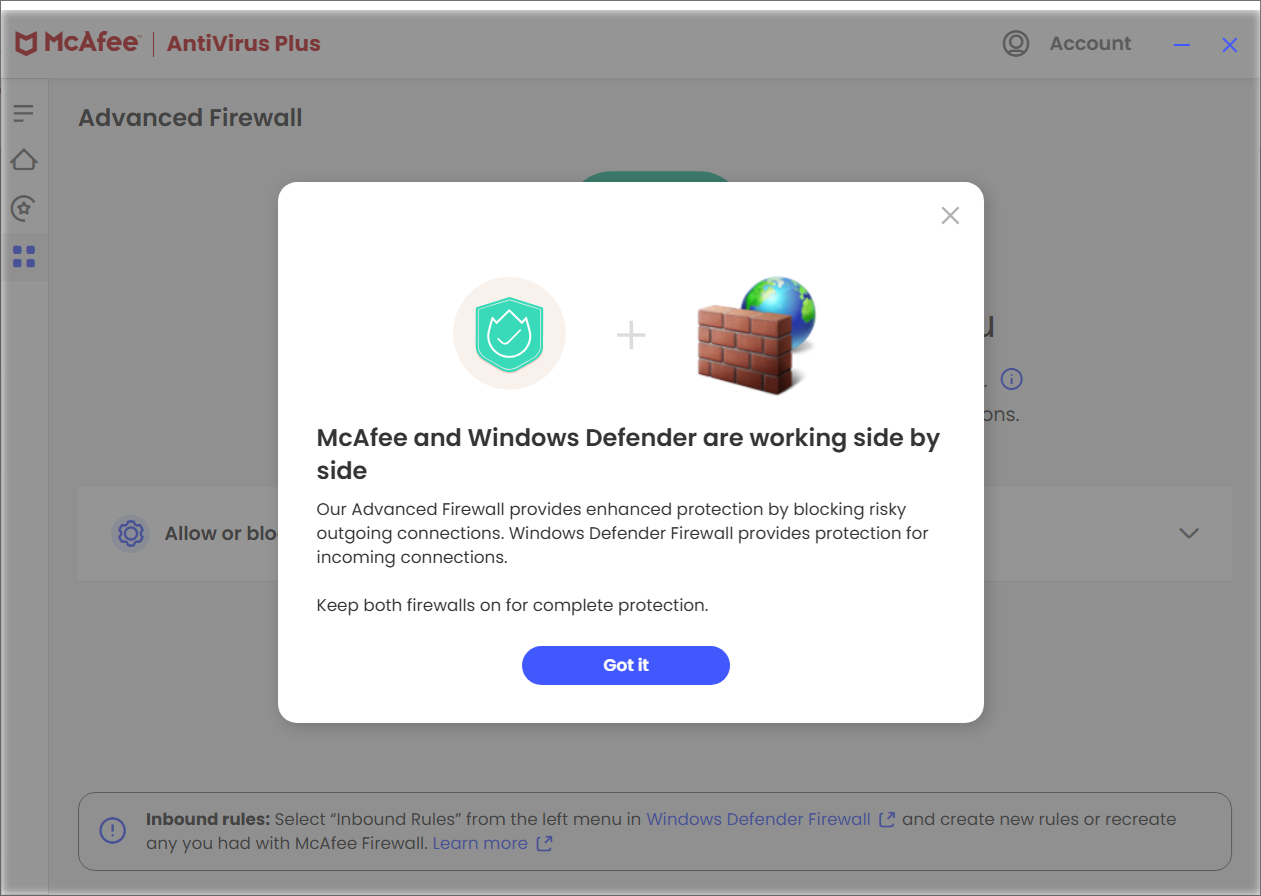
McAfee and Windows Defender are now working side by side
Our Advanced Firewall provides enhanced protection by blocking risky
outgoing connections. Windows Defender Firewall provides protection for
incoming connections.
Keep both firewalls on for complete protection.
So I thought I likely needed to create similar firewall rules for
incoming connections in the Windows Firewall software as had existed
previously in the McAfee firewall software.
[ More Info ]
[/os/windows/PowerShell]
permanent link
Sun, Jun 30, 2024 9:12 pm
Determining the version of a PDF document
If you have a Portable Document
Format (PDF) file and wish to determine the version of the PDF standard
used for the document, that information is stored in the first line of the
file. You can open the file with a
text editor, such
as the Windows
Notepad application on a Microsoft Windows system and view
the first line to determine the PDF version used for the file.
You will see %PDF-x.y where x.y is the
version of the PDF standard used in the creation of the file,
e.g., %PDF-1.7 for version 1.7.
On a Microsoft Windows system, you could also open a
PowerShell window (you can type PowerShell
in the Windows Search field and click on the
application when you see it returned in the list of
results) and use the Get-Content
cmdlet
and the -First parameter followed by the number one.
E.g.:
PS C:\> Get-Content "July 2024 Newsletter.pdf" -First 1
%PDF-1.7
PS C:\>
Related:
-
PowerShell Get-Content equivalents to Linux head and tail commands
Date: March 22, 2024
[/os/windows/PowerShell]
permanent link
Mon, Apr 15, 2024 9:01 pm
Calculating a hash value for a file with Get-FileHash
The PowerShell cmdlet
Get-FileHash provides a
cryptographic hash function that will allow you to determine a
hash value of a file on a Microsoft Windows system. By default,
the cmdlet
uses the SHA-256 hash
function, but you can specify other functions, such as
MD5, using the
-Algorithm parameter. You can change the output to a list
format by
piping the output
of the cmdlet to Format-List.
PS C:\users\public\downloads> Get-FileHash ".\rel_x64_Xming-7-7-1-1-setup.exe"

Algorithm       Hash                                                                   Path
---------       ----                                                                   ----
SHA256          B7B4C0A191E315686A2481DCC8BBB27D6D7A156FBF689768E48CF08207B86560       C:\users\public\downloads\rel...


PS C:\users\public\downloads> Get-FileHash ".\rel_x64_Xming-7-7-1-1-setup.exe" | Format-List


Algorithm : SHA256
Hash      : B7B4C0A191E315686A2481DCC8BBB27D6D7A156FBF689768E48CF08207B86560
Path      : C:\users\public\downloads\rel_x64_Xming-7-7-1-1-setup.exe


PS C:\users\public\downloads> Get-FileHash -Algorithm MD5 ".\rel_x64_Xming-7-7-1-1-setup.exe"

Algorithm       Hash                                                                   Path
---------       ----                                                                   ----
MD5             BA200636A596A84E0877901CE89D1C2E                                       C:\users\public\downloads\rel...


PS C:\users\public\downloads>
[ More Info ]
[/os/windows/PowerShell]
permanent link
Fri, Mar 22, 2024 9:44 pm
PowerShell Get-Content equivalents to Linux head and tail commands
The Windows
PowerShell
Get-Content
cmdlet can provide the equivalent to the Unix/Linux
head and
tail commands.
E.g., suppose a file named
somefile.txt contains the following
ten lines:
line 1
line 2
line 3
line 4
line 5
line 6
line 7
line 8
line 9
line 10
The following Get-Content commands could be used to obtain the first 5
and the last 5 lines in the file.
PS C:\Users\Arnold\Documents> Get-Content somefile.txt -Head 5
line 1
line 2
line 3
line 4
line 5
PS C:\Users\Arnold\Documents> Get-Content somefile.txt -Tail 5
line 6
line 7
line 8
line 9
line 10
PS C:\Users\Arnold\Documents> Get-Content somefile.txt -TotalCount 5
line 1
line 2
line 3
line 4
line 5
C:\Users\Arnold\Documents>
The TotalCount parameter can function like the
Head parameter and will return the first x number of
lines specified with x being 5 in the example above. You can also
use it to obtain a specific line, though. E.g., if you wished to see the
7th line in the file, you could use the command below.
PS C:\Users\Arnold\Documents> (Get-Content Somefile.txt -TotalCount 7)[-1]
line 7
PS C:\Users\Arnold\Documents>
By default the delimiter for lines is the
newline, aka end-of-line
character, \n, but you can change that with the -Delimiter
parameter.
References:
-
Get-Content
Microsoft Learn
[/os/windows/PowerShell]
permanent link
Fri, Sep 15, 2023 5:14 pm
Determining the Serial Number of a Disk Drive with PowerShell
If you need to determine the serial number of a hard disk drive (HDD)
attached to a Microsoft Windows system, you can do so from a
PowerShell
window using the cmdlet Get-Disk (you can open a
PowerShell window by typing PowerShell in the Windows "Type here to
search field on a Windows 10 system and then selecting the app when it is
returned in the list of search results). If you just want a list of drives
attached to the system by a USB
connection, you can pipe
the output of the cmdlet to the
Where-Object cmdlet where you can filter on just drives that have a USB
connection as shown below.
PS C:\> Get-Disk | Where-Object -FilterScript {$_.Bustype -Eq "USB"}
Number Friendly Name Serial Number                    HealthStatus         OperationalStatus      Total Size Partition
                                                                                                             Style
------ ------------- -------------                    ------------         -----------------      ---------- ----------
1      SanDisk Cr... 03025228050421082418             Healthy              No Media                      0 B RAW
2      USB2.0 Car... 606569746800                     Healthy              No Media                      0 B RAW
4      USB2.0 Car... 606569746802                     Healthy              No Media                      0 B RAW
5      USB2.0 Car... 606569746803                     Healthy              No Media                      0 B RAW
3      USB2.0 Car... 606569746801                     Healthy              No Media                      0 B RAW
6      WD My Pass... WXM1A375CKEZ                     Healthy              Online                  931.48 GB GPT


PS C:\>
[ More Info ]
[/os/windows/PowerShell]
permanent link
Wed, Sep 13, 2023 10:22 pm
Filtering Windows Updates by a Specific Date
When I logged into a user's Microsoft Windows 10 system to check on a problem,
I found the system had rebooted late the night before, September 12, 2003, at
a time much later than I would expect the user to be working, so I didn't think
she had rebooted it. I didn't know if the reboot might be related to the
problem she reported to me or could possibly just be Microsoft Windows
rebooting because of an automatically installed update. From a
command prompt window, you can
obtain the last time the system was rebooted using the
systeminfo
command. To see just the last reboot time and not all of the other output
it provides, you can filter the output with the
find command
by
piping the output of the
systeminfo command to the
find command. You can check on updates that have been
installed using the
Windows Management Instrumentation Command-line (WMIC) command
wmic qfe list ("qfe" stands for "Quick Fix Engineering").
Since that command can also generate a lot of output for updates on dates
you may not be interested in, you can also filter that output
with the
find command.
[ More Info
]
[/os/windows/PowerShell]
permanent link

Privacy Policy
Contact