←July→
| Sun |
Mon |
Tue |
Wed |
Thu |
Fri |
Sat |
| |
|
|
1 |
2 |
3 |
4 |
| 5 |
6 |
7 |
8 |
9 |
10 |
11 |
| 12 |
13 |
14 |
15 |
16 |
17 |
18 |
| 19 |
20 |
21 |
22 |
23 |
24 |
25 |
| 26 |
27 |
28 |
29 |
30 |
31 |
|
|
|
Thu, Jul 09, 2026 2:50 pm
Installing Python on a Microsoft Windows system using winget
If you would like to use the
Python
programming language on a Microsoft Windows system, one way to install
Python software is to use the
Windows
Package Manager, aka winget. Open
a command prompt and enter the command winget install python.
After the software is installed, you can view information on the Python
package with the command winget show python.
C:\>winget install python
The `msstore` source requires that you view the following agreements before using.
Terms of Transaction: https://aka.ms/microsoft-store-terms-of-transaction
The source requires the current machine's 2-letter geographic region to be sent to the backend service to function properly (ex. "US").
Do you agree to all the source agreements terms?
[Y] Yes [N] No: Y
Found Python 3.12 [9NCVDN91XZQP] Version Unknown
This package is provided through Microsoft Store. WinGet may need to acquire the package from Microsoft Store on behalf of the current user.
Agreements for Python 3.12 [9NCVDN91XZQP] Version Unknown
Version: Unknown
Publisher: Python Software Foundation
Publisher Url: https://www.python.org/
Publisher Support Url: https://www.python.org/doc/
License: https://docs.python.org/3.12/license.html
Privacy Url: https://www.python.org/privacy
Copyright: (c) Python Software Foundation
Agreements:
Category: Developer tools
Pricing: Free
Free Trial: No
Terms of Transaction: https://aka.ms/microsoft-store-terms-of-transaction
Seizure Warning: https://aka.ms/microsoft-store-seizure-warning
Store License Terms: https://aka.ms/microsoft-store-license
The publisher requires that you view the above information and accept the agreements before installing.
Do you agree to the terms?
[Y] Yes [N] No: Y
Starting package install...
██████████████████████████████ 100%
Successfully installed
C:\>winget show python
Found Python 3.12 [9NCVDN91XZQP]
Version: Unknown
Publisher: Python Software Foundation
Publisher Url: https://www.python.org/
Publisher Support Url: https://www.python.org/doc/
Description:
Python is an easy to learn, powerful programming language. It has efficient high-level data structures and a simple but effective approach to object-oriented programming. Python’s elegant syntax and dynamic typing, together with its interpreted nature, make it an ideal language for scripting and rapid application development in many areas on most platforms.
The Python interpreter and the extensive standard library are freely available in source or binary form for all major platforms from the Python web site, https://www.python.org/, and may be freely distributed. The same site also contains distributions of and pointers to many free third party Python modules, programs and tools, and additional documentation.
The Python interpreter is easily extended with new functions and data types implemented in C or C++ (or other languages callable from C). Python is also suitable as an extension language for customizable applications.
License: https://docs.python.org/3.12/license.html
Privacy Url: https://www.python.org/privacy
Copyright: (c) Python Software Foundation
Agreements:
Category: Developer tools
Pricing: Free
Free Trial: No
Terms of Transaction: https://aka.ms/microsoft-store-terms-of-transaction
Seizure Warning: https://aka.ms/microsoft-store-seizure-warning
Store License Terms: https://aka.ms/microsoft-store-license
Installer:
Installer Type: msstore
Store Product Id: 9NCVDN91XZQP
Offline Distribution Supported: true
C:\>
You can then type python in a command prompt window to
open the Python interpreter where you can enter commands. E.g., in the
example below it is being used as a calculator. You can exit the program
by typing exit(). You can run Python
scripts from
the command prompt window using commands in the form python
example.py.
C:\>python
Python 3.12.10 (tags/v3.12.10:0cc8128, Apr 8 2025, 12:21:36) [MSC v.1943 64 bit (AMD64)] on win32
Type "help", "copyright", "credits" or "license" for more information.
>>> 99 / 4
24.75
>>> 12 * 13
156
>>> exit()
C:\>
Related articles:
-
Obtaining a command prompt in
Windows 11
Date: August 14, 2023
-
Obtaining a command prompt in Windows
10
Date: February 18, 2017
-
WinPython - Python for Microsoft
Windows
Date: May 13, 2018
-
Installing new packages for WinPython
Date: May 18, 2018
[/languages/python]
permanent link
Thu, Jul 02, 2026 9:42 pm
DVDFab 13 - Unload debugger
My wife had been using
DVDFab 13 under Microsoft
Windows 11 and wanted to continue to use it for
ripping DVDs after we
converted her desktop PC to
Ubuntu Linux. DVDFab 13
seemed to be working fine after I installed it using
Wine until after I
updated Wine to version 11.0 (you can see which version of Wine is present
by issuing the command wine --version in a
Terminal window).
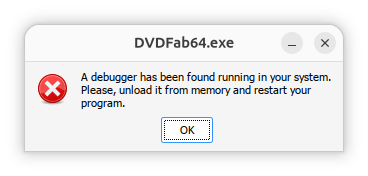
When I tried to run DVDFab afterwards, though, I saw the message
“A debugger has been found running in your system. Please, unload
it from memory and restart your program.”
When I queried
ChatGPT about the
issue, it replied “This error is usually not caused by an actual
debugger running on Ubuntu. DVDFab contains anti-debugging / anti-tamper
checks, and under Wine or Proton those checks can sometimes incorrectly
conclude that a debugger is attached.” It also stated that, for
DVDFab 13 specifically, there is an issue when trying to run the program on
later versions of Wine with the problem appearing with version 10.3 or
later. The problem occurs on newer versions, even when no
debugger is running.
I decided to install the application under Bottles, which I had previously
installed on the system with Flatpak, to see if the problem might not occur
if I tried to run the application under
Bottles, but the problem still occurred. I.e., I saw the "A debugger
has been found running in your system. Please, unload it from memory and
restart your program.” message. It took me a considerable amount of time
to resolve the problem, but I was finally able to fix the issue by disabling
DXVK and VKD3D in the settings for the DVDFab bottle.
[ More Info ]
[/os/unix/linux/ubuntu/DVDFab]
permanent link
Wed, Jul 01, 2026 9:13 pm
Remove a Flatpak
To see the Flatpaks
installed on a Linux system, you can issue the command flatpak list
in a terminal window. To remove a Flatpak from a system, find the Application
ID of the software by issuing the command flatpak list --app.
Once you have the Application ID, you can uninstall the Flatpak with the
command flatpak uninstall AppID where AppID is
the relevant Application ID. To remove all of the application's local settings
and configuration files, add the --delete-data option. E.g.,
to remove the
Bottles Flatpak, I could use the command
flatpak uninstall --delete-data com.usebottles.bottles.
alice@Wonderland:~$ flatpak list
Name             Application ID              Version Branch       Installation
Bottles          com.usebottles.bottles      63.2    stable       system
i386             …sktop.Platform.Compat.i386         25.08        system
Mesa             …esktop.Platform.GL.default 26.0.6  25.08        system
Mesa (Extra)     …esktop.Platform.GL.default 26.0.6  25.08-extra  system
nvidia-580-159-… …tform.GL.nvidia-580-159-03         1.4          system
Mesa             …ktop.Platform.GL32.default 26.0.6  25.08        system
Mesa (Extra)     …ktop.Platform.GL32.default 26.0.6  25.08-extra  system
nvidia-580-159-… …orm.GL32.nvidia-580-159-03         1.4          system
Nvidia VAAPI dr… …ktop.Platform.VAAPI.nvidia         25.08        system
Codecs Extra Ex… …ktop.Platform.codecs-extra         25.08-extra  system
i386             …Platform.codecs_extra.i386         25.08-extra  system
GNOME Applicati… org.gnome.Platform                  49           system
Yaru Gtk Theme   org.gtk.Gtk3theme.Yaru              3.22         system
gecko            org.winehq.Wine.gecko               stable-25.08 system
mono             org.winehq.Wine.mono                stable-25.08 system
alice@Wonderland:~$ flatpak list --app
Name        Application ID             Version     Branch     Installation
Bottles     com.usebottles.bottles     63.2        stable     system
alice@Wonderland:~$ flatpak uninstall --delete-data com.usebottles.bottles


        ID                                    Branch         Op
 1. [-] com.usebottles.bottles                stable         r
 2. [-] com.usebottles.bottles.Locale         stable         r

Uninstall complete.
Delete data for com.usebottles.bottles? [y/n]: y
alice@Wonderland:~$
A Flatpack may required shared "runtimes" components. When you delete
the application, those runtimes can become "orphaned", but still occupy
space on the system. You can, optionally, use the command
flatpak uninstall --unused afterwards, if that is a concern.
[/os/unix/linux]
permanent link
Sun, Jun 28, 2026 3:16 pm
Determining the default file manager application under Ubuntu
The file command
can be used on a Linux
system to determine what type of data a file holds, e.g.,
file Untitled.png. You can determine the
media type, aka
MIME type, by using
the --mime-type option for the file command. E.g.,
file --mime-type Untitled.png. You can determine which application
is the default application for opening files of that
file type using the
xdg-mime
command — the
xdg-mime program is a command line tool that can be used to determine
what application handles a particular file type. E.g., xdg-mime
query default image/png — you need to specify the filetype
in the "minor/major" format that xdg-mime expects, which is what you see
in the output of the file --mime-type command.
$ file Documents/Untitled.png
Documents/Untitled.png: PNG image data, 597 x 113, 8-bit/color RGBA, non-interlaced
$ file Documents/tea.html
Documents/tea.html: ASCII text, with very long lines (6229)
$ file --mime-type Documents/Untitled.png
Documents/Untitled.png: image/png
$ xdg-mime query default image/png
org.gnome.Loupe.desktop
$ file --mime-type Documents/Cocoa-Lead.odt
Documents/Cocoa-Lead.odt: application/vnd.oasis.opendocument.text
$ xdg-mime query default application/vnd.oasis.opendocument.text
libreoffice-writer.desktop
$
The default file
manager for Ubuntu
Linux is GNOME Files.
You can make another application the default file manager, if you like.
Some alternatives are
Thunar,
Nemo,
Krusader, or
Dolphin.
You can determine which application is the default file manager with the
command xdg-mime query default inode/directory. You can set
the default file manager with the command xdg-mime default
fmgr.desktop where fmgr is the filemanager you wish to
use.
[ More Info ]
[/os/unix/linux/ubuntu]
permanent link
Fri, Jun 26, 2026 1:55 pm
Turning off Autocorrect on an Android phone
I have a Google Pixel 9
phone which uses the
Android
operating system. Though I have been happy with the phone, I find its
autocorrection feature to be awful. When I'm typing in the
Google Keep Notes
application and in text messages, the autocorrection feature will replace
correctly spelled English words with other words that are unrelated to
what I'm trying to write. Often the replacement word leads to a sentence
making no sense or giving it a meaning I don't intend. I consider the
Google autocorrection feature to be far more of an annoyance than a help.
The feature can be turned off by the following steps:
-
Drag your finger down from the top of the screen until you see a menu
of options.
-
Tap on the gear icon at the bottom, right-hand corner of the screen to
get to the settings menu.
-
Tap System.
-
Tap Keyboard under Interaction.
-
Tap On-screen keyboard.
-
Tap Gboard.
-
Tap Corrections & suggestions.
-
Tap Turn off autocorrect.
-
When you've changed the setting you can exit from the options
selection.
[ More Info ]
[/os/android]
permanent link
Wed, Jun 17, 2026 9:08 pm
Unable to access minimized Collectorz windows
My wife and I have been using the Microsoft Windows desktop versions
of CLZ's database programs for managing
book, comic, and movie collections for many years. We've found the Collectorz
database programs to be
well-designed and very useful, but we've encountered some issues getting the
programs to work correctly on her
Ubuntu Linux system, though
I would note that the software was developed for Microsoft Windows
operating systems
and the company doesn't indicate they are supported under Linux.
One problem we encountered is that after installing the programs under
Wine, when she
opened one of the programs, e.g., Movie Collector, and then minimized it
or switched to another application with Alt-Tab, she was unable to
switch back to the Collectorz program. Alt-Tab would not work nor
would the
Super key plus Tab key combination. There would be a small window
at the upper, left-hand corner of the screen indicating the program was
running, but clicking on it would not allow her to enlarge the window to
work in the application again and there didn't appear to be any way to
enlarge or maximize the window.

I was able to resolve the problem with minimizing the application or
switching from it without re-creating a problem opening files by checking the
Emulate a virtual desktop option under the Graphics
tab for winecfg instead.
[ More Info ]
[/os/unix/linux/wine/collectorz]
permanent link
Sun, Jun 14, 2026 10:43 pm
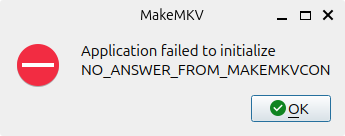
Application failed to initialize NO_ANSWER_FROM_MAKEMKVCON
I had installed
MakeMKV from source files on an Ubuntu Linux system . It had been
working then, but when I tried to run the program today, I saw the
message "Application failed to initialize NO_ANSWER_FROM_MAKEMKVCON".
I had updated the operating system and other applications on the system
in the intervening months, so I knew it was possible that the upgrade changed or
removed libraries that makemkvcon depends on. I had upgraded the operating
system from Ubuntu
25.10 (Questing Quokka) to 26.04
LTS (Resolute Racoon). The error means the MakeMKV graphical
user interface (GUI) can't communicate with its backend console
process, makemkvcon. I.e., the GUI is waiting for a response from
makemkvcon and that process isn't starting or is crashing, possibly because
of a missing required dependency such as a missing or changed library file.
To try to determine if that was the case and, if so, which library might be
associated with the problem, I ran makemkvcon from a terminal window.
alice@Wonderland:~$ which makemkvcon
/usr/bin/makemkvcon
alice@Wonderland:~$ makemkvcon
makemkvcon: error while loading shared libraries: libavcodec.so.61: cannot open shared object file: No such file or directory
alice@Wonderland:~$
I was able to resolve the problem by reinstalling
MakeMKV from the source files. When I did
that and re-registered the application, it started normally.
[ More Info ]
[/os/unix/linux/ubuntu/MakeMKV]
permanent link
Fri, Jun 12, 2026 1:55 pm
Thunar on Ubuntu
My wife was dissatisfied with the default
file manager,
GNOME Files, aka
Nautilus, on her Ubuntu
Linux desktop system. You can determine the default file manager from a
terminal window
by issuing the command xdg-mime query default inode/directory,
which will show you what application opers directories.
$ xdg-mime query default inode/directory
org.gnome.Nautilus.desktop
$
You can also check on whether one of several common file managers, such
as Nautilus, Thunar,
Dolphin, or
Nemo, which is a
fork of
Nautilus, is currently running with ps aux | grep -E
'nautilus|thunar|dolphin|nemo'. I saw that I had previously
installed the Krusader file manager when I checked for file manager
desktop entries with grep -l "inode/directory"
/usr/share/applications/*.desktop.
$ grep -l "inode/directory" /usr/share/applications/*.desktop
/usr/share/applications/org.gnome.baobab.desktop
/usr/share/applications/org.gnome.Nautilus.desktop
/usr/share/applications/org.kde.krusader.desktop
$
But I didn't think the
Krusader interface would appeal to her as she wanted a file manager
that provided an interface more similar to the one for the Windows Fle Explorer
that she had on her Windows 11 system, so I issued the command
sudo apt update and then sudo apt install thunar,
which installed thunar 4.20.7 — after installation, you can check the
version of Thunar with thunar --version.
I then made Thunar the default file manager with
xdg-mime default thunar.desktop inode/directory. If you run
the command xdg-mime query default inode/directory, you should
see thunar listed when it has been made the default handler for directories.
$ xdg-mime default thunar.desktop inode/directory
$ xdg-mime query default inode/directory
thunar.desktop
$
I then unpinned the GNOME Files (Nautilus) app by right-clicking on the
icon for it and selecting Unpin. I then pressed the
Super
key along with the "A" key, and typed thunar in the "Type to
search" filed and then right-clicked on thunar when I saw it returned
and selected "Pin to Dock" so she could open it the way she was opening
GNOME Files.
To make the left pane of the Thunar window act like Explorer on Microsoft
Windows operating systems, I configured it to expand a directory to show
subdirectories if she clicked on it. To do so, I changed Thunar's
sidebar style from the default "Shortcuts" to "Tree, which can be done
by selecting View, then Side Pane and then selecting
Tree, which changes the left pane to provide an expandable
directory tree. As with the Windows File Explorer, you can toggle
the display of hidden files. I turned that option on by pressing the
Ctrl and H keys simultaneously — the option can
be toggled off again by using the same key combination.
[ More Info ]
[/os/unix/linux/ubuntu]
permanent link
Sun, Jun 07, 2026 8:35 pm
Wine Iexplore unable to access webpages via HTTPS and Collectorz database programs
Wine allows
you to run programs developed for Microsoft Windows systems under
Linux. It comes with its
own version of the
Internet Explorer browser. I encountered problems when attempting to
access webpages via
HTTPS with
that browser under Wine, though access via
HTTP worked
fine. When I tried accessing pages via HTTPS, I would see only
a blank page. I discovered that problem while trying to resolve
problems with the installation of Windows desktop programs from
Collectorz to manage our book, comics,
game, and movie collections — I was seeing "Error while connecting
to server: 276: Server certificate verification failed. Connection
aborted" messages when trying to register the programs with our Collectorz
account's userid and password. I was able to eliminate the problem with
the Collectorz desktop database programs by resolving the problem with
Wine's version of the Internet Explorer browser.
[ More Info ]
[/os/unix/linux/wine/collectorz]
permanent link
Sat, May 23, 2026 7:11 pm
Addressing a problem with Disney Dreamlight Valley crashing under Steam
A couple of days ago, when my wife tried to play
Disney
Dreamlight Valley under
Steam on her
Ubuntu Linux system, when
she clicked on "Play" it would appear that the game was going to start,
but it never did. When I checked on whether the executable program for
the game, ddv.exe, was running using the
ps command and
piping its output through
grep with ps -aux | grep -i 'ddv.exe' | grep -v grep
in a Terminal window,
I could see it ran briefly, but when I reissued the command a few moments
later, it was no longer running. To troubleshoot the problem, I closed
Steam and then killed all running instances of it with
pkill command, i.e.,
pkill Steam, in a Terminal window. The system has a
NVIDIA Quadro P2000 and the problem seems to have
been an issue related to
Vulkan
graphics software on the system. When I upgraded the
operating system and rebooted, the problem disappeared.
[
More Info ]
[/os/unix/linux/wine]
permanent link

Privacy Policy
Contact

