Recovering a file on a Windows system from a shadow copy
After editing a
spreadsheet in
Microsoft Excel on a
Microsoft Windows Server 2012 system, I intended to save the modified
version under a new file name, but inadvertently chose "Save" rather than
"Save As." Fortunately, Windows systems running the Volume Snapshot Service,
aka
Shadow
Copy, provide an easy mechanism to recover lost data by reverting to a prior
"shadow copy" version of a file. To revert to the prior version, you can
take the following steps:
-
In the
Windows File Explorer, click on the file to select it, then choose
"Properties" from the ribbon of options at the top of the File Explorer
window or right-click on the file and choose "Properties." Or, you can click
on the file to select it and then hit the Alt and Enter
keys simultaneously to bring up the Properties window for that file.
-
Then click on the Previous Versions tab.
-
Click on the prior version of the file to select it and then click on the
Restore button at the bottom of the window.
-
You will see a window asking "Are you sure you want to restore the previous
version of" followed by the file name and the
timestamp
on the prior version of the file. The window also warns you that "This will
replace the current version of this file on your computer and cannot be
undone." Click on the Restore button on that window.
-
You should then see a window stating "The file has been successfully restored
to the previous version." Click on the OK button to close that window.
If you click on the General tab at this point, the Modified date
will still reflect the timestamp before you restored the file, but if you
close the Properties window and reopen it, you should then see
the Modified date and time reflect the timestamp of the prior version that
was restored to the system.
[ More Info ]
[/os/windows/filesystem]
permanent link
Running chkdsk from Windows File Explorer
You can run the Microsoft Windows
chkdsk program from within the Windows
File
Explorer by right-clicking on the drive you wish to check and selecting
Properties or with the drive selected, click on
Properties from
the tool bar at the top of the File Explorer window. Then click on
Tools
tab and then the
Check button.
[ More Info ]
[/os/windows/filesystem]
permanent link
File System not Supported on This Device Optimized for Removal
I was unable to backup a disk drive to an external drive attached
to a system via a USB
connection using the NTBackup program. The backup failed once the
backup file reached 4 GB in size, which is the maximum size for the
FAT32 file system,
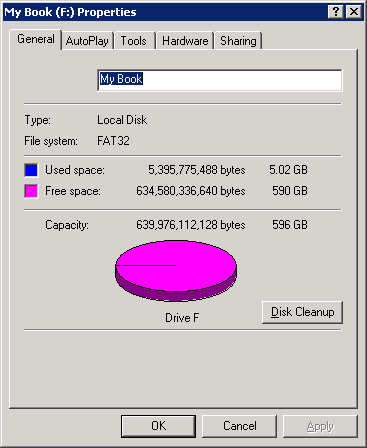
which was the file system on the Western Digital My Book USB external
drive when I purchased it. So I decided to change the file system to
NTFS by reformatting
the drive. But I received an error message when I tried to convert the file
system.
C:\>format f: /fs:ntfs
NTFS file system is not supported on this device optimized for removal.
To change the way this device is optimized, select the Policies tab in
the device's property sheet.
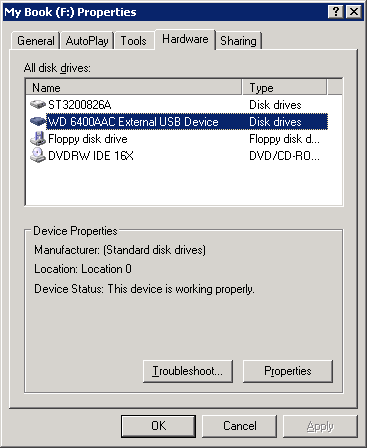
To change the file system, I right-clicked on the drive under
My Computer, then chose Properties.

I then clicked on the Hardware tab and selected the drive.

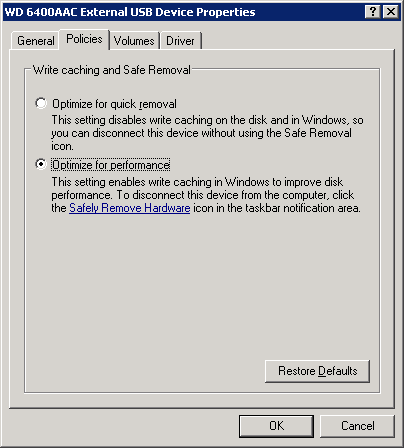
I then clicked on the Properties button and then the
Policies tab. I changed the setting from "Optimize for quick
removal" to "Optimize for performance". The "optimize for quick removal"
setting disables write caching on the disk and in Windows, so you
can disconnect the device without using the Safe Removal icon. The
"optimize for performance" setting enables write caching in Windows to
improve disk performance. When you choose this option, to disconnect
the device from the computer, you should click the "Safely Remove Hardware"
icon in the taskbar notification area."

I then clicked on the OK button. I clicked on a
second OK button to close the window.
I was then able to reformat the drive from the FAT32 file system to the
NTFS file system.
C:\>format f: /fs:ntfs
The type of the file system is FAT32.
The new file system is NTFS.
Enter current volume label for drive F: My Book

WARNING, ALL DATA ON NON-REMOVABLE DISK
DRIVE F: WILL BE LOST!
Proceed with Format (Y/N)? y
Verifying 610477M
Volume label (32 characters, ENTER for none)? ACI-3
Creating file system structures.
Format complete.
 625129280 KB total disk space.
 625044456 KB are available.
[/os/windows/filesystem]
permanent link


