Microsoft Windows Live Messenger Winks .dt2 Files
Microsoft Windows Live Messenger, at least with version 2009, stores
a Flash file within a
.dt2 file associated with a
"
wink". The .swf file
provides the animation associated with a wink. The .swf
file can be extracted from the .dt2 file using Microsoft's
expand utility.
[ More Info ]
[/network/chat/live_messenger]
permanent link
Transferring Live Messenger Winks
I set up a new laptop for a user who uses Microsoft's Live Messenger for
chatting with friends and relatives. In addition to transferring her
documents and pictures, she also wanted me to transfer
winks, which are
Flash-based animated files used by Live Messenger to display short animated
clips of actions, such as blowing a kiss, throwing a snowball, etc., which
a user can pick from when sending a mesage to someone.
[
More Info ]
[/network/chat/live_messenger]
permanent link
Error 80040154: Signing in to Windows Live Messenger failed
When trying to use Windows Live Messenger,
A family member was getting the message "Error 80040154: Signing in to Windows
Live Messenger failed because the service is temporarily unavailable. Please
try again later." after I applied pending updates to Microsoft Windows.
The recommended solution provided at Microsoft's
Error 80040154: Signing in to Windows Live Messenger failed because the service
is temporarily unavailable. Please try again later., which was the page
that came up when I chose the help option, was to uninstall
Windows Live Essentials.
The system was running Windows 7, so I clicked on
Start,
Control Panel,
Programs and Features, and looked for
Windows
Live Essentials, but it wasn't there.
At
How to uninstall Windows Live Essentials, there was a suggestion to
try removing the program by running wlarp.exe from
%programfiles%\Windows Live\Installer, but, though that directory
existed, that file was not in it.
So I downloaded Windows Live Essentials 2011 from
Windows
Live Essentials 2011 - Download free Microsoft programs.
The file that was downloaded was wlsetup-web.exe. When I
reinstalled the software using that file, the problem no longer existed.
[/network/chat/live_messenger]
permanent link
Files for Windows Live Messenger Custom Emoticons
In trying to determine how to copy Windows Live Messenger version 2009
emoticon files from one system to another, I found a
C:\Users\acctname\AppData\Local\Microsoft\Messenger\user@example.com\ObjectStore\CustomEmoticons
directory on a Windows 7 system. For the directory path
acctname is the
particular Windows account. The email
address used for logging into Windows Live Messenger would appear in place
of
user@example.com. The equivalent directory on the Windows XP
system from which I was going to copy the custom icons was
\Documents and Settings\acctname\Local Settings\Application Data\Microsoft\Messenger\user@example.com\ObjectStore\CustomEmoticons.
The directory contained .dt2 and .id2 files.
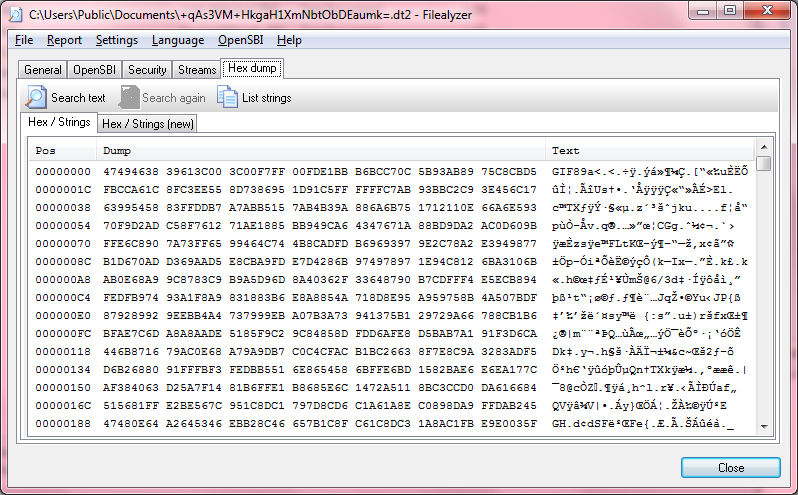
When I checked .dt2 files with
FileAlyzer, I found that they were actually
GIF files. Most were
GIF89a files, but some were GIF87a files as is revealed by the first 6
bytes in the files. GIF89a files have 47 49 46 38 39 61 as
the first six bytes in the files while GIF87a files have
47 49 46 38 37 61 as the first six bytes. If you change the
extension on a file from .dt2 to .gif, you can view the file with an
image viewing program.

There is a .dt2 and .id2 file for each emoticon with names similar
to the example shown below.
ZysU6LltaOP0MVYOBvV4YcbnHr4=.dt2

ZysU6LltaOP0MVYOBvV4YcbnHr4=.id2
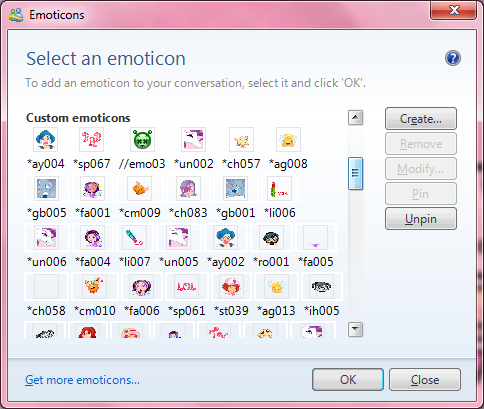
These are associated with the emoticons you see in the Custom emoticons
section when you select an emoticon within Windows Live Messenger.

I was able to transfer all of the custom icons for Windows Live Messenger
from the Windows XP system to the Windows 7 system, by copying all the
files in the CustomIcons folder on the Windows XP system to
that folder on the Windows 7 system. Where the files already exist, you can
choose to skip or copy over those files.
Note: if you have Windows Live Messenger open on the destination system
at the time you copy the files to it, you will need to close all Windows
Live Messenger windows and close the program and then reopen it to see
the custom icons you copied.
References:
-
GIF
Wikipedia, the free encyclopedia
-
Decrypting Messenger Id2 files
Date: July 2, 2007
Fanatic Live
[/network/chat/live_messenger]
permanent link
Live Messenger Scene
Windows Live Messenger (version 2009 and likely other versions) stores
"scenes" in a
scenes.mct file, usually in
C:\Program
Files\Windows Live\Messenger
. If you want to create your own
"scene" for use with Windows Live Messenger, you may want to create
the image in a size that matches what is used for the scenes in
scenes.mct, which is just a
CAB file
containing graphics files
[ More Info ]
[/network/chat/live_messenger]
permanent link
Removing Windows Messenger 4.7
I used the
Windows Update function in Internet Explorer on a
Windows XP system to check for patches for a laptop. Including optional
hardware and software patches, there were 63 available. I chose to
download and install them all. Windows Messenger 4.7 was among those
available; I hadn't paid attention to the fact it was among those to
be installed. It was the first one installed. I saw a Windows Firewall
notice pop up asking me whether I wanted to continue to block Windows
Messenger. I did, but the system gave me a Blue Screen of Death (BSOD)
when I attempted to block it.
When the system rebooted, Windows Messenger 4.7 opened. I didn't want
the software on this laptop anyway. So I opened the Control Panel
(Click on Start, select Settings, then Control
Panel). Under Add or Remove Programs in the Control Panel,
I chose Add/Remove Windows Components. Windows Messenger was
unchecked and had a size of 0.0 MB listed, so I couldn.t uninstall it
that way. I was able to remove it using the steps below, however:
- Close Messenger if it is running. If you see an icon for it
at the lower-right hand corner of your screen, right-click on it
and choose Exit.
- Click on the Start button.
- Select Run.
- In the Open field of the window that appears, copy and
paste
RunDll32 advpack.dll,LaunchINFSection
%windir%\INF\msmsgs.inf,BLC.Remove
- When you see the confirmation prompt below, choose "Yes"
after closing any of the referenced programs, if they are open.
To remove Messenger, you must first exit from it: Click the Messenger
icon in the taskbar, then Exit. Please also close all other programs
that display your contact list (for example, Internet Explorer, Outlook,
Outlook Express, MSN Explorer). Make sure to close programs for all users
signed in to this computer. Do you want to continue?
You will see a notice appear stating Windows Messenger has been removed
when the uninstall process completes.
If you don't want to remove Windows Messenger 4.7, but just want to
stop it from running automatically when you login to a system, instead
of following the procedure above, open Windows Messenger and take the
following steps:
- Click on Tools.
- Select Options.
- Click on the Preferences tab.
- Uncheck "Run this program when Windows starts".
- Click on OK.
References:
-
How to remove Windows Messenger 4.7 permanently
By
Darrell Norton
Posted: March 10, 2004
Darrell Norton's Blog
-
How do I get rid of Messenger 4.7?
By Leo Notenbom
Posted: May 28, 2004
Ask Leo! Tech Questions? Get Answers!
[/network/chat]
permanent link

