Trimming an MP4 Video on a Microsoft Windows 10 system
On a Microsoft Windows 10 system, if you wish
to save just a portion of a video that is in
MP4 format,
you can do so if you are viewing the video in the
Movies &
TV application, which is the default program for playing videos,
by clicking on the pencil icon near the bottom, right side of the
window. If you double-click on the file for the video, it will likely
open in the
Movies & TV app, but if that is not the
default program for playing videos, you should be able to open it
in the program by right-clicking on the file and choosing
Open
with then selecting
Movies & TV. Once you click on
the pencil item in the application, you can then choose
Trim
which appears beneath
Edit in Photos. You should then see white
circles at the beginning and end of a white line at the bottom of the
video that represents the length of the video. You can drag those white
circles to the points in the video that you wish to be the starting and
stopping points for the video. E.g., if I had a video that was several
hours long, but I only wanted the first hour of the video, I could
drag the white circle at the bottom, ride side of the window to the
left until I saw 1:00, which represents 1 hour and 0 minutes. Once you
have just the portion of the video timeline you want isolated with the
white circles, click on
Save as, which appears near the top,
right side of the window next to an icon that depicts a pencil over a
3
1/2" floppy disk. You can then chose a file name you want for the
new copy as the program doesn't change your original file, but makes a
copy with just the portion of the original file you opted to save. By
default, the program will append "_trim" to the original file name.
If it is a large video, you may need to wait a few minutes for the new
file to be created from the larger original file.
[/os/windows/software/audio-video]
permanent link
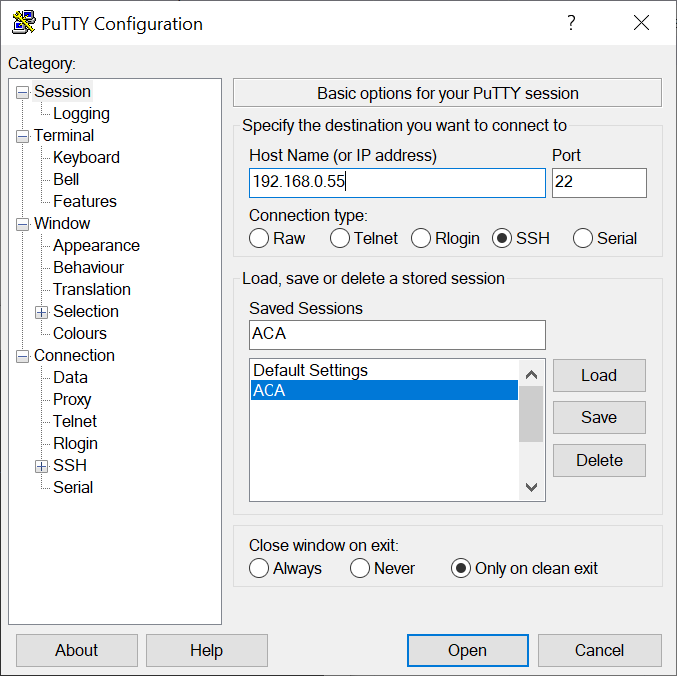
Changing the background color in PuTTY
To change the background color for a terminal session using the
PuTTY ssh and telnet
program, take the following steps:
-
If you wish to change the color for a saved session, load the session then
click on "Colours," which is beneath "Window," in the left hand pane of the
PuTTY Configuration window.
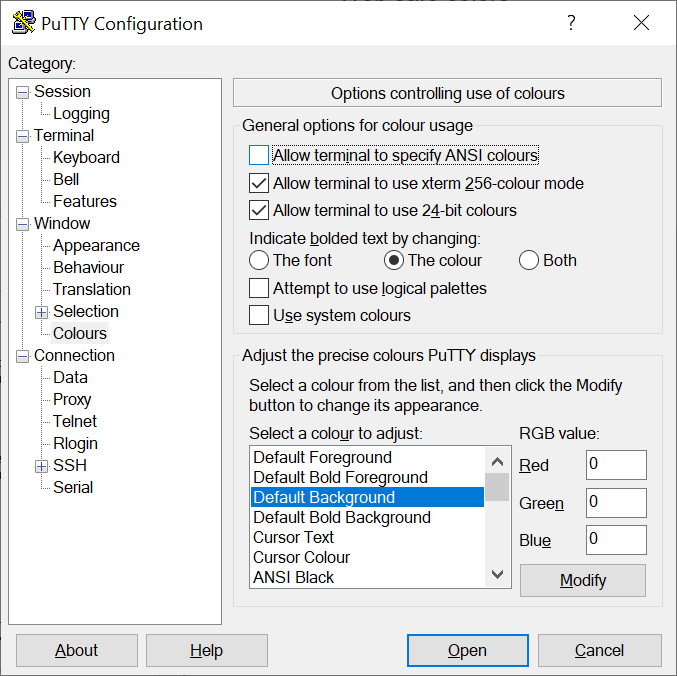
-
Click on "Default Background"; you should then see the default
Red Green Blue
(RGB) values with values of 0,0,0 representing black and 255, 255, 255
representing white. You can use an
RGB Color Codes
Chart, such as the one at RapidTables.com to select a color and then
obtain its numerical RGB value. For instance, if I wanted the background to
be a dark gray, I could use a value of 64 for red, green, and blue.
-
You can then click on the Open button to open a session using the
new background color or click on "Session" and save the session with the
new setting, if you wish to make the setting permanent before opening the
session.
[/network/ssh/putty]
permanent link
Counting SSH break-in attempts by country
Yesterday, I installed
Fail2Ban on a
CentOS 7 server after
noticing SSH break-in
attempts by password guessing. Today, I checked the fail2ban log to see how
many IP addresses were banned and whether after being banned for an hour there
were any subsequent password guessing attempts from the same IP address. I saw
that 40 IP addresses had been banned since I installed Fail2Ban last night and
that some of those addresses had been banned multiple times. You can count
the number of times an IP address has been banned by using the
awk command
awk '($(NF-1) = /Ban/){print $NF}' /var/log/fail2ban.log | sort | uniq -c
| sort -n
. You can pipe the output of that command to the
wc command
wc -l to count the total number of lines which tells you the number
of IP addresses that have been banned as explained at
Fail2ban logging.
[root@moonpoint ~]# awk '($(NF-1) = /Ban/){print $NF}' /var/log/fail2ban.log | s
ort | uniq -c | sort -n
      1 103.50.219.194
      1 104.200.134.181
      1 104.244.77.37
      1 107.189.14.174
      1 107.189.14.230
      1 107.189.14.41
      1 107.189.1.96
      1 107.189.31.223
      1 107.189.8.233
      1 183.157.169.70
      1 183.195.121.197
      1 205.185.123.33
      1 205.185.124.131
      1 209.141.42.29
      1 221.131.165.50
      1 221.131.165.56
      1 221.181.185.151
      1 221.181.185.198
      1 222.186.30.112
      1 222.187.254.41
      1 64.225.49.153
      1 71.9.165.219
      2 104.244.76.64
      2 107.189.12.163
      2 209.141.36.75
      2 209.141.40.64
      2 221.131.165.65
      2 222.186.30.76
      2 222.187.232.39
      3 107.189.13.104
      3 45.61.184.115
      3 70.62.137.84
      4 187.149.76.88
      4 189.85.145.113
      4 205.185.122.239
      4 209.141.57.74
      4 210.73.207.44
      4 222.186.42.137
      5 209.141.34.165
      5 89.211.207.62
[root@moonpoint ~]# awk '($(NF-1) = /Ban/){print $NF}' /var/log/fail2ban.log | sort | uniq -c | sort -n | wc -l
40
[root@moonpoint ~]#
[More Info]
[/security/attacks]
permanent link
Break-in attempts via SSH from 221.131.165.50
While checking on a problem on a test CentOS Linux system today, I issued the
command journalctl -xe from the root account to get more
details on the problem. Among the results displayed was an indication of
attempts to break into the system by guesses for the password of the root
account on the system.
# journalctl -xe
Oct 23 16:20:23 moonpoint systemd[1]: Unit mariadb.service entered failed state.
Oct 23 16:20:23 moonpoint systemd[1]: mariadb.service failed.
Oct 23 16:20:23 moonpoint polkitd[1684]: Unregistered Authentication Agent for u
Oct 23 16:21:35 moonpoint sshd[4558]: pam_unix(sshd:auth): authentication failur
Oct 23 16:21:35 moonpoint sshd[4558]: pam_succeed_if(sshd:auth): requirement "ui
Oct 23 16:21:37 moonpoint sshd[4558]: Failed password for root from 221.131.165.
Oct 23 16:21:38 moonpoint sshd[4558]: pam_succeed_if(sshd:auth): requirement "ui
Oct 23 16:21:40 moonpoint sshd[4558]: Failed password for root from 221.131.165.
Oct 23 16:21:40 moonpoint sshd[4558]: pam_succeed_if(sshd:auth): requirement "ui
Oct 23 16:21:42 moonpoint sshd[4558]: Failed password for root from 221.131.165.
Oct 23 16:21:42 moonpoint sshd[4558]: Received disconnect from 221.131.165.50 po
Oct 23 16:21:42 moonpoint sshd[4558]: Disconnected from 221.131.165.50 port 4518
Oct 23 16:21:42 moonpoint sshd[4558]: PAM 2 more authentication failures; lognam
Oct 23 16:21:55 moonpoint sshd[4561]: pam_unix(sshd:auth): authentication failur
Oct 23 16:21:55 moonpoint sshd[4561]: pam_succeed_if(sshd:auth): requirement "ui
Oct 23 16:21:57 moonpoint sshd[4561]: Failed password for root from 221.131.165.
Oct 23 16:21:57 moonpoint sshd[4561]: pam_succeed_if(sshd:auth): requirement "ui
Oct 23 16:21:59 moonpoint sshd[4561]: Failed password for root from 221.131.165.
Oct 23 16:21:59 moonpoint sshd[4561]: pam_succeed_if(sshd:auth): requirement "ui
Oct 23 16:22:01 moonpoint sshd[4561]: Failed password for root from 221.131.165.
Oct 23 16:22:02 moonpoint sshd[4561]: Received disconnect from 221.131.165.50 po
Oct 23 16:22:02 moonpoint sshd[4561]: Disconnected from 221.131.165.50 port 4175
Oct 23 16:22:02 moonpoint sshd[4561]: PAM 2 more authentication failures; lognam
[root@moonpoint ~]#
When I checked the number of password guesses the attacker had tried by
searching for the IP address in /var/log/secure, I found 183
attempts to log in.
[root@moonpoint ~]# grep "221.131.165.50" /var/log/secure | grep -c "Failed password"
183
[root@moonpoint ~]#
When I checked the location for the IP address 221.131.165.50 with the
geoiplookup program, a program that is provided by the GeoIP package, I found
the address allocated to an entity in China:
[root@moonpoint ~]# geoiplookup 221.131.165.50
GeoIP Country Edition: CN, China
[root@moonpoint ~]#
A check of the IP address on DShield at showed that IP address has been
associated with many attempts at unauthorized access to systems by password
guessing - see
SSH Source Summary. The DShield
IP Info: 221.131.165.50 report for the system currently lists 82,133
reports with 283 targets with activity first reported on 2021-09-26.
When I ran the journalctl command again later, I saw evidence of attempts
from other IP addresses to gain unauthorized access to the system via SSH,
so I installed
fail2ban to automatically block IP addresses when a specific number of
failed SSH login attempts have been detected from IP addresses.
Related
-
Blocking SSH break-in attempts with fail2ban
Date: October 23, 2021
-
Finding which package provided a file on a CentOS Linux system
Date: October 23, 2021
-
Fail2ban Logging
Date: April 9, 2016
[/security/attacks]
permanent link

