Drawing is a simple raster image editor for Linux systems that is similar to Microsoft Paint. The program is free and open-source software (FOSS) released under the GNU General Public License, version 3. It is available as a Snap package for the GNOME desktop on Ubuntu and other Linux systems and on Ubuntu systems can be installed by opening the App Center and searcing for Drawing.
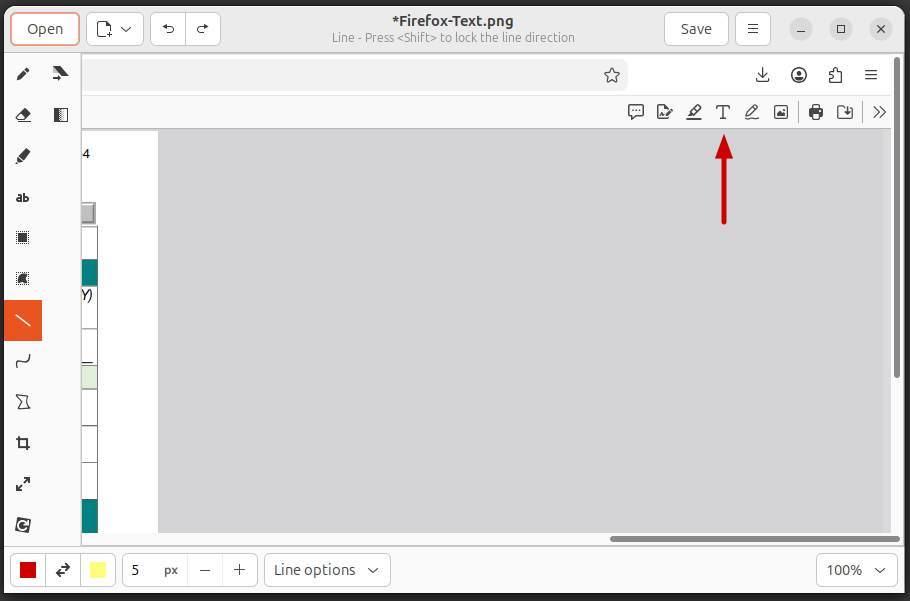
To create an arrow in the Drawing application, take the following steps:
- With the file containing the image you wish to
edit open, click on the line tool on the menu bar on the left side of
the Drawing window.
-
Click on Line options, which you will find at the bottom of the
window, and select simple arrow.

-
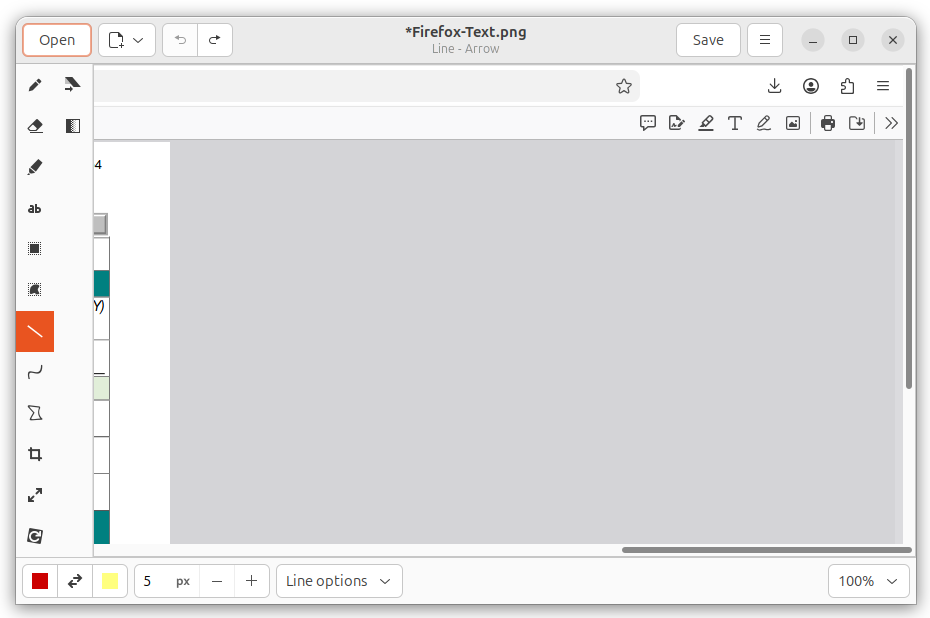
You can adjust the width of the line and arrowhead by changing the
value of the number you see to the left of Line options by
clicking on the plus or minus buttons (the value is in
pixels) or
you can type the number you want in the field. With the color you wish
for the arrow selected (you will see the color in a square near the
lower, left-corner of the window, click at a point where you wish the
back end of the arrow to be located and, while holding down the left
mouse button, move the mouse pointer upwards to where you wish the arrow
to end. Then release the mouse button. You should then have a line with
an arrowhead at the end.