Wed, Sep 23, 2026 7:53 pm
Removing a Wine Bottle
Bottles allows one to run applications
developed for the Microsoft Windows operating system (OS) on
Linux systems.
I had created bottle for the desktop version of
Comic Collector from
CLZ. But as I had installed the
Movie Collector
and Book Collector desktop programs for managing our movie and book collections
in a .wine-collectorz
Wine
prefix on an Ubuntu Linux
system, I decided to remove the Comic Collector bottle and reinstall
the software in the .wine-collectorz prefix instead. To remove a Wine
bottle, you can take the following steps.
-
Open the Bottles application and select the bottle you wish to remove by
clicking on it.
-
With the relevant bottle displayed, click on the column of 3 dots near the
top, right side of the window.
-
Select Delete Bottle from the pull down menu
-
When asked for confirmation for the deletion, click on Delete.
The bottle will then be removed from the list of bottles.
You can confirm that the directory associated with the bottle is gone
by checking the ~/.var/app/com.usebottles.bottles/data/bottles/bottles/
directory.
[ More Info ]
[/os/unix/linux/bottles]
permanent link
Fri, Sep 18, 2026 6:20 pm
Viewing shared folders on a Windows system
There are several ways you can view the list of shared folders on a
system running a Microsoft Windows operating system (OS).
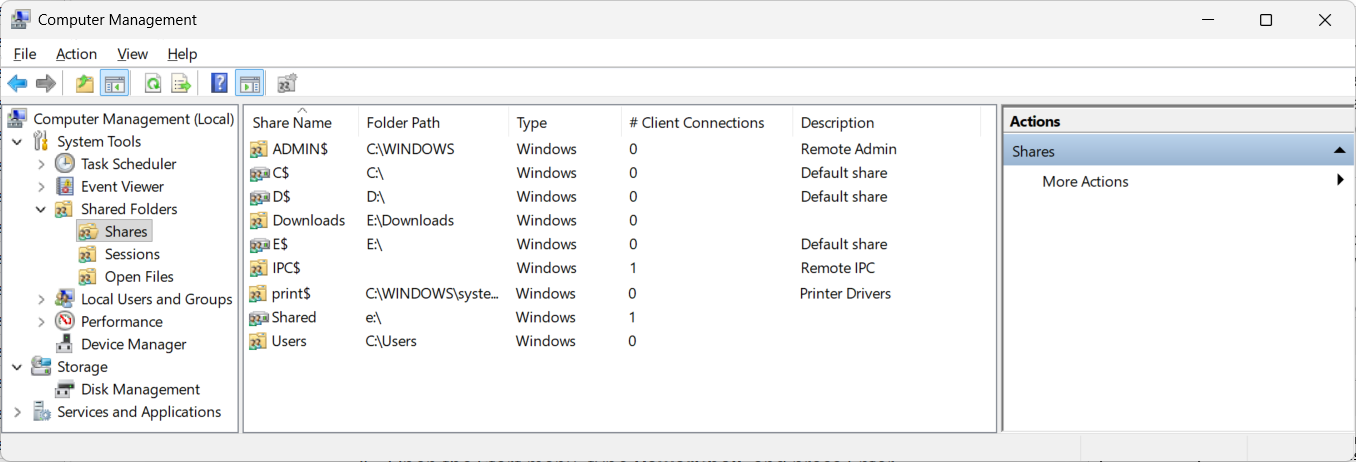
Method 1: Using Computer Management — Graphical User Interface (GUI)
-
Press the Windows key
plus the X key (or you can press the Windows key plus
the R key, type
compmgmt.msc and press Enter.
-
In the left pane of the window, expand System Tools, then
Shared Folders, and then select Shares. A list of all
the active shared folders, their paths, and share names will appear in the
right pane.
Method 2: Using Powershell
-
Open the Start menu, or use the Windows key and R, type
PowerShell, and press Enter. Then type the command
Get-SmbShare and press Enter. The command displays a
table of all
server message
block (SMB) shares currently active on your machine.If you only want
to see the directory path for a particular sharename, you can use a
command such as Get-Smbshare -Name sharename where
sharename is the relevant sharename. E.g., if the directory
E:\Downloads was shared using the sharename Downloads.
PS C:\> Get-SMBShare -Name Downloads

Name      ScopeName Path         Description
----      --------- ----         -----------
Downloads *         E:\Downloads


PS C:\>
Method 3: Using Command Prompt
-
Open the File
Explorer, which you can do by pressing the Windows key and
E.
-
Click in the address bar field at the top of the File Explorer window.
-
Type
\\localhost or \\127.0.0.1
and press Enter to see your computer's
own shared directories over the network. The localhost name is
a hostname that
refers to the local system which is equivalent to the local loopback
address of 127.0.0.1.
[/os/windows/network]
permanent link
Thu, Sep 17, 2026 2:52 pm
Checking on which Debian packages need updating and updating all of them
To check on which
Debian packages
may need updating and update all for which upgrades are available on an
Ubuntu Linux system,
you can take the following steps:
-
Update the package lists
Open a terminal
window and fetch the latest information about available updates from the remote
repositories:
sudo apt update
-
List packages with available updates
List every installed package that has a newer version ready to install:
apt list --upgradable
-
Simulate the update (optional)
Perform a dry run to see exactly which packages will be upgraded or
installed without making any actual system changes:
sudo apt upgrade -s
-
Apply the updates
Upgrade all available packages to their latest versions:
sudo apt upgrade
To automatically perform distribution upgrades that may add or
remove dependencies to complete the update, use sudo apt
dist-upgrade or sudo apt full-upgrade instead.
[/os/unix/linux/ubuntu]
permanent link
Mon, Sep 14, 2026 3:45 pm
Using winecfg to map a drive letter to a shared network folder
To map a drive letter in
Wine to a
network share,
you can't type a
\\server\share
Universal Naming Convention directly into
winecfg. Wine requires network shares to be mounted locally on your
host operating system (OS), such as Linux or macOS, first. To mount a
network share using the
Server Message
Block (SMB) communication protocol, take the following steps:
-
Mount the SMB Share on Your Host OS
Open a terminal
window Mount the Windows network share to a local directory on your machine
using cifs-utils.
sudo mkdir -p /mnt/WINSHARE
sudo mount -t cifs //IP_OR_HOSTNAME/SHARE_NAME /mnt/winshare -o username=USERNAME
Subsitute the name you wish to use for the
mount point for
WINSHARE, the IP
address or hostname
for IP_OR_HOSTNAME, the name of the share on the remote computer for
SHARE_NAME, and the relevant username for USERNAME. E.g.:
alice@Wonderland:~$ sudo mkdir -p /mnt/borras_public
[sudo: authenticate] Password:
ailce@Wonderland:~$ sudo mount -t cifs //borras/public /mnt/borras_public -o username=alice
Password for alice@//borras/public:
alice@Wonderland:~$
Verify access by checking if the files appear:
-
Open Wine Configuration
Launch the Wine configuration utility from the terminal window.
(If using a specific prefix, issue the command
WINEPREFIX=/path/to/prefix winecfg, instead).
-
Add a New Drive Letter
Select the Drives tab at the top of the winecfg
window.
- Click the Add... button at the bottom.
- Select an available drive letter (e.g. Z:)
from the drop-down menu and click OK.
-
Link the Drive to the Mount Point
With your new drive letter selected in the list:
- Locate the Target: input field near the
bottom.
- Enter the path where you mounted the share (e.g.,
/mnt/winshare) or click Browse... to select it.
- (Optional) Click Show Advanced and set
the drive Type to Network drive.
-
Apply and Test
To verify the mapping was successful, open Wine's file manager:
Your mapped drive letter should now be visible and accessible under
My Computer.
[/os/unix/linux/wine]
permanent link
Sun, Sep 13, 2026 1:43 pm
Sharing a folder on an Ubuntu Linux system using SMB
You can share a folder on an
Ubuntu Linux system with
Windows systems using
Server Message
Block (SMB) by installing
Samba, a
free and
open-source software package. If Samba isn't installed, you can install it
as a Debian
package with the following commands:
sudo apt update
sudo apt install samba
You can verify that the Samba service is running with the command
sudo systemctl status smbd; you should see "active (running)".
alice@Wonderland:~$ sudo systemctl status smbd
● smbd.service - Samba SMB Daemon
     Loaded: loaded (/usr/lib/systemd/system/smbd.service; enabled; preset: ena>
     Active: active (running) since Sat 2026-09-12 17:09:53 EDT; 4min 16s ago
 Invocation: 4c72abe09deb445d91cb063be76afc0b
       Docs: man:smbd(8)
             man:samba(7)
             man:smb.conf(5)
   Main PID: 540371 (smbd)
     Status: "smbd: ready to serve connections..."
      Tasks: 3 (limit: 151234)
     Memory: 10M (peak: 11.1M)
        CPU: 161ms
     CGroup: /system.slice/smbd.service
             ├─540371 /usr/sbin/smbd --foreground --no-process-group
             ├─540388 "smbd: notifyd" .
             └─540389 "smbd: cleanupd "

Sep 12 17:09:52 Wonderland systemd[1]: Starting smbd.service - Samba SMB Daemon...
Sep 12 17:09:53 Wonderland update-apparmor-samba-profile[540361]: grep: /etc/appa>
Sep 12 17:09:53 Wonderland update-apparmor-samba-profile[540367]: diff: /etc/appa>
Sep 12 17:09:53 Wonderland systemd[1]: Started smbd.service - Samba SMB Daemon.
alice@Wonderland:~$
Once Samba is installed, you will need to edit the Samba configuration file,
smb.conf, to define the shared folder.
[ More Info ]
[/os/unix/linux/network/samba]
permanent link
Fri, Sep 11, 2026 3:31 pm
Installing Disney Dreamlight Valley on a Nintendo switch
To install
Disney Dreamlight Valley on a
Nintendo switch
using a download code, take the following steps:
-
On the Nintendo switch, select Nintendo eShop from the menu.
-
When you are presented with a
QR code, sccan it and use it to sign into your account at
account.nintendo.com.
-
Select Enter Code and enter the download code.
-
After the code is confirmed, select Redeem.
If you have been playing the game on another system and want access to your
Cloud Save data, select
Cloud Save, then, on the Nintendo switch,
log into your Disney Dreamlight Valley account and select
OK. Then,
when the software is downloaded to the switch, on the switch, log into your
Disney Dreamlight Valley account then select
OK. Then, when you see
a window displaying your email address, and options to reset your password or
unlink the account on the switch, do neither, but instead go back to the
Disney Dreamlight Valley game, which is on the left side of the screen, and
select
Continue.
-
Disney Dreamlight Valley: How to Enable Cloud Saves for Cross-Progression
By: Greysun Morales
Date: September 6, 2022
[/gaming/nintendo]
permanent link
Thu, Sep 10, 2026 1:32 pm
Determining the Linux device name that maps to a drive under Wine
You can view the drive letter mappings used by a
Wine prefix from a
command-line
interface (CLI) on a Linux system by opening a
terminal window
and entering the command ls -l ~/wineprefix/dosdevices/
where wineprefix is the relevant Wine prefix. E.g.,
ls -l ~/.wine-collectorz/dosdevices/, if the Wine prefix is
.wine-collectorz. I can limit the output to just drive
mappings with ls -l ~/.wine-collectorz/dosdevices | grep "[a-z]:" | grep
-E '/dev/|/run/media', which
pipes the output of
the ls
through two grep commands. The
first looks for lines that have a drive letter, i.e., one of the lowercase
letters a through z followed by a colon, e.g., c:, while the second then looks
for those lines that have either "/dev/" or "/run/media" in them.
alice@Wonderland:~$ ls -l ~/.wine-collectorz/dosdevices | grep "[a-z]:" | grep -E '/dev/|/run/media'
lrwxrwxrwx 1 alice alice  8 May  4 16:29 d:: -> /dev/sdc
lrwxrwxrwx+1 alice alice  8 May  4 16:29 e:: -> /dev/sr0
lrwxrwxrwx 1 alice alice  8 May  4 16:29 f:: -> /dev/sdd
lrwxrwxrwx 1 alice alice  8 May  4 16:29 g:: -> /dev/sde
lrwxrwxrwx 1 alice alice  8 May  4 16:29 h:: -> /dev/sdf
lrwxrwxrwx 1 alice alice  9 May  4 16:29 i:: -> /dev/sdi1
lrwxrwxrwx 1 alice alice  8 May  4 16:29 j:: -> /dev/sdg
lrwxrwxrwx 1 alice alice  8 May  4 16:29 k:: -> /dev/sdh
lrwxrwxrwx 1 alice alice  9 May  4 16:29 l:: -> /dev/sdg1
lrwxrwxrwx 1 alice alice  8 May  4 16:29 m:: -> /dev/sdi
lrwxrwxrwx 1 alice alice 43 Aug 26 17:47 n: -> /run/media/alice/MS 3
lrwxrwxrwx 1 alice alice  9 May  4 16:29 n:: -> /dev/sdg2
lrwxrwxrwx 1 alice alice  8 May  4 16:29 o:: -> /dev/sdj
lrwxrwxrwx 1 alice alice 47 Sep  3 19:49 p: -> /run/media/alice/Nifler
lrwxrwxrwx 1 alice alice  9 May  4 16:29 p:: -> /dev/sde1
lrwxrwxrwx 1 alice alice  9 May  4 16:29 q:: -> /dev/sde2
lrwxrwxrwx 1 alice alice  9 May  4 16:29 r:: -> /dev/sdc1
lrwxrwxrwx 1 alice alice 43 Jun 27 11:29 s: -> /run/media/alice/MS 2
lrwxrwxrwx 1 alice alice  9 May  4 16:29 s:: -> /dev/sdc2
lrwxrwxrwx 1 alice alice  9 May  4 16:29 t:: -> /dev/sdj1
lrwxrwxrwx 1 alice alice  9 May  4 16:29 u:: -> /dev/sdh1
lrwxrwxrwx 1 alice alice  9 May  4 16:29 v:: -> /dev/sdh2
lrwxrwxrwx 1 alice alice 48 Aug 26 17:47 w: -> /run/media/alice/Willow
lrwxrwxrwx 1 alice alice  9 May  4 16:29 w:: -> /dev/sdf1
lrwxrwxrwx 1 alice alice  9 May  4 16:29 x:: -> /dev/sdd1
lrwxrwxrwx 1 alice alice 43 Jun 27 11:29 y: -> /run/media/alice/MS 1
lrwxrwxrwx 1 alice alice  9 May  4 16:29 y:: -> /dev/sdd2
alice@Wonderland:~$
I can use the lsblk -o name,mountpoint,label,size to see
the connection between the device designations and the labels on drives.
alice@Wonderland:~$ lsblk -o name,mountpoint,label,size
NAME                        MOUNTPOINT                         LABEL        SIZE
loop0                       /snap/canonical-livepatch/406                  13.5M
loop1                                                                     201.3M
loop2                       /snap/celluloid/322                            21.9M
loop3                       /snap/cups/1238                                47.9M
loop4                       /snap/bare/5                                      4K
loop5                       /snap/chromium-ffmpeg/112                       8.3M
<text snipped>
sda                                                                          20T
├─sda1                                                                       16M
└─sda2                      /run/media/alice MS 4          20T
sdb                                                                        29.3G
└─sdb1                      /run/media/alice             29.3G
sdc                                                                        14.6T
├─sdc1                                                                      499M
├─sdc2                                                                      128M
├─sdc3                      /run/media/alice Windows     14.5T
└─sdc4                                                         Recovery    74.5G
sdd                                                                          20T
├─sdd1                                                                       16M
└─sdd2                      /run/media/alice MS Working    20T
sde                                                                        14.6T
└─sde1                      /run/media/alice Nifler      14.6T
sdf                                                                         4.5T
└─sdf1                      /run/media/alice Oak          4.5T
sdg                                                                        18.2T
├─sdg1                                                         EFI          200M
└─sdg2                      /run/media/alice MS 3        18.2T
sdh                                                                        25.5T
├─sdh1                                                         EFI          200M
└─sdh2                                                         MS 2        25.5T
sdi                                                                        25.5T
├─sdi1                                                         EFI          200M
└─sdi2                      /run/media/alice MS 1        25.5T
sdk                                                                        18.2T
├─sdk1                                                         EFI          200M
└─sdk2                      /run/media/alice YouTube     18.2T
sr0                                                                         4.1G
nvme0n1                                                                     1.8T
├─nvme0n1p1                 /boot/efi                                         1G
├─nvme0n1p2                 /boot                                             2G
└─nvme0n1p3                                                                 1.8T
  └─dm_crypt-0                                                              1.8T
    └─ubuntu--vg-ubuntu--lv /                                               1.8T
alice@Wonderland:~$
You can use the Wine Configuration Tool for a graphical user interface
(GUI) view of drive mappings by using a command like
WINEPREFIX=$HOME/.wine-collectorz winecfg.
alice@Wonderland:~$ WINEPREFIX=$HOME/.wine-collectorz winecfg
alice@Wonderland:~$
References:
-
How do I list Wine drive letter mappings?
By: Rovanion
Date: February 27, 2023
Stack Exchange - Unix & Linux
Related
-
Creating and using a Wine prefix on an Ubuntu Linux system
Date: July 31, 2026
[/os/unix/linux/wine]
permanent link
Wed, Sep 09, 2026 8:03 pm
Registry values for Collectorz Movie Collector running under Wine
I needed to check the version and some other values for the
Collectorz Windows desktop version
of its
Movie Collector database program which was running under
Wine on a
Linux system.
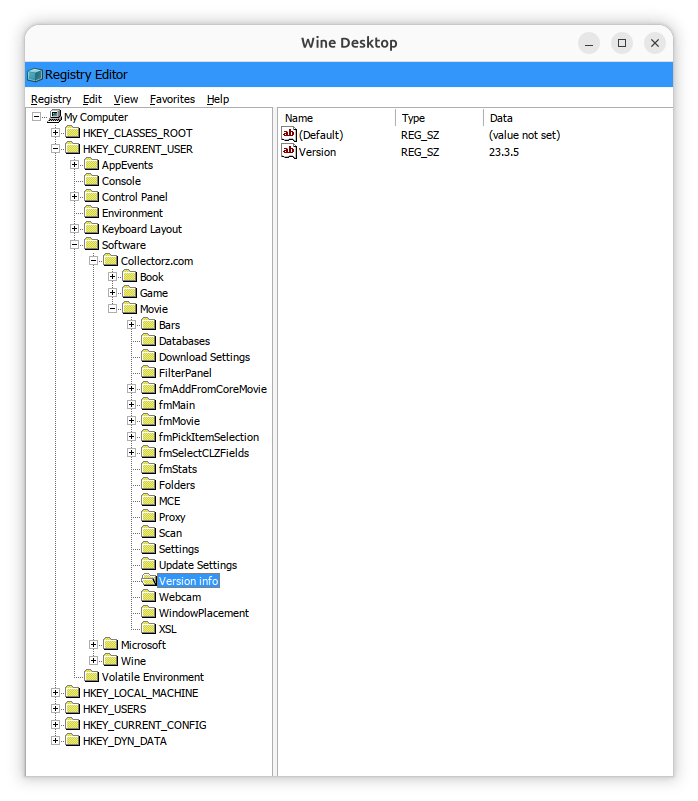
You can view values that are stored in the
Windows Registry
under a
Wine prefix by
entering a command similar to
WINEPREFIX=$HOME/wineprefix wine
regedit
where
wineprefix is the name of the Wine prefix. E.g.,
WINEPREFIX=$HOME/.wine-collectorz wine regedit. You
can find the registry keys for Movie Collector under
HKEY_CURRENT_USER\Software\Collectorz.com\Movie
You can check specific keys with
reg query commands like the
ones below, where the Wine prefix is .wine-collectorz,
which show the version of Movie Collector, the location of the currently
specified database, and the location where backups will be stored.
alice@Wonderland:~$ WINEPREFIX=$HOME/.wine-collectorz wine reg query "HKCU\Software\Collectorz.com\Movie\Version info" /v Version

HKEY_CURRENT_USER\Software\Collectorz.com\Movie\Version info
    Version    REG_SZ    23.3.5

alice@Wonderland:~$ WINEPREFIX=$HOME/.wine-collectorz wine reg query "HKCU\Software\Collectorz.com\Movie\Databases" /v CurrentDatabase

HKEY_CURRENT_USER\Software\Collectorz.com\Movie\Databases
    CurrentDatabase    REG_SZ    T:\Movie Collector\Movies.mvc

alice@Wonderland:~$ WINEPREFIX=$HOME/.wine-collectorz wine reg query "HKCU\Software\Collectorz.com\Movie\Folders" /v Backup

HKEY_CURRENT_USER\Software\Collectorz.com\Movie\Folders
    Backup    REG_SZ    I:\Movie Collector\Backup\

alice@Wonderland:~$
References:
-
Collectorz.com® Movie Collector for Windows - Getting Started
Collectorz.com
Related:
-
Creating and using a Wine prefix on an Ubuntu Linux system
Date: July 31, 2026
-
Windows Reg Query Command
Date: October 1, 2016
[/os/unix/linux/wine]
permanent link
Mon, Aug 24, 2026 10:00 pm
Importing Vcard contacts extracted from a PST file into Proton Mail using an Intermediate CSV file
Proton Mail provides
end-to-end encrypted email. If you are transitioning to Proton Mail from
another email application and need the contacts you had stored in the other
application, Proton Mail provides the capability to import contacts
stored in a
Virtual Contact File (VCF) or
a comma-separated
values (CSV) file. VCF, aka vCard, files usually have a .vcf
filename
extension while .csv is the filename extension for CSV files.
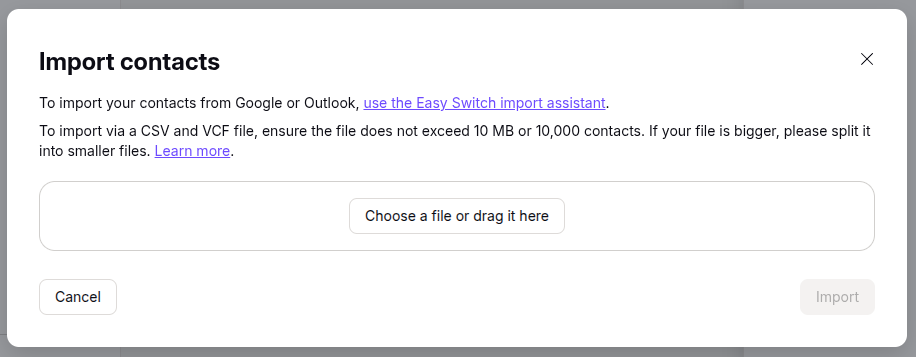
To import such files, in the Proton Mail application, click on the
Contacts icon on the upper, right side
of the Proton Mail window, then click on Import Contacts, then
select "Import from .csv or Vcard", then click on the "Choose a file or
drag it here" button.
If you want to extract contacts from a
Microsoft Outlook
Personal
Storage Table .pst file, you can use the
readpst utility to extract the contacts from the .pst file. A command
such as readpst -cv -tc -o contacts_out your-outlook.pst
can be used where contacts out is the output directory where you wish
the utility to place the contacts (the output directory must exist prior to
running the command) and your-outlook.pst is the location and name
for the existing .pst file. E.g.:
alice@Wonderload:~/Documents$ readpst -cv -tc -o ~/Documents/contacts ~/Downloads/alice\@example.com.pst
Opening PST file and indexes...
Processing Folder "Deleted Items"
Processing Folder "Inbox"
Processing Folder "Outbox"
Processing Folder "Sent Items"
Processing Folder "Suggested Contacts"
Processing Folder "Junk E-mail"
Processing Folder "Conversation Action Settings"
Processing Folder "Quick Step Settings"
Processing Folder "Drafts"
Processing Folder "Calendar"
Processing Folder "Contacts"
Processing Folder "Journal"
Processing Folder "Notes"
Processing Folder "Tasks"
	"Suggested Contacts" - 22 items done, 0 items skipped.
Processing Folder "RSS Feeds"
Processing Folder "~ Holly"
Processing Folder "HVIA Members"
	"alice@example.com" - 16 items done, 0 items skipped.
Processing Folder "Tutorials"
Processing Folder "HVIA Renters"
	"Tasks" - 0 items done, 5 items skipped.
	"HVIA Renters" - 1 items done, 0 items skipped.
	"HVIA Members" - 102 items done, 1 items skipped.
	"Tutorials" - 31 items done, 0 items skipped.
	"Contacts" - 127 items done, 4 items skipped.
	"Calendar" - 0 items done, 229 items skipped.
	"Inbox" - 0 items done, 297 items skipped.
	"Sent Items" - 0 items done, 341 items skipped.
	"~ Holly" - 0 items done, 399 items skipped.
alice@Wonderload:~/Documents$
[ More Info ]
[/network/email/protonmail]
permanent link
Tue, Aug 18, 2026 7:09 pm
Importing an Outlook PST file into Evolution
My wife wanted to transition from Microsoft Windows to Linux for privacy
and performance reasons, so I installed
Ubuntu Linux on her desktop
system. She had been using
Microsoft Outlook
as an email client. I installed
Evolution, which
is available as a
Debian package, as an alternative to Outlook.
Evolution has the capability to import an Outlook
Personal
Storage Table (PST), though that did not work when I tried the process
with the PST file Outlook was using under Microsoft Windows. But to try
that process, when the Welcome window opens when you start
Evolution, click on Cancel to close it. Then take the following
steps:
- Press the Alt+F keys to view the file menu, then select
Import.
- You can click on Next at the Evolution Import Assistant
window to proceed with the import of the Outlook
Personal Storage
Table (PST) file.
- For the Importer Type, choose "Import a single file"
then click on Next.
- At the Select a File window, navigate to the location of the PST
file and select it. The file type in the file type field should automatically
change to "Outlook personal folders (.pst)" instead of the default file type of
"Berkeley Mailbox (mbox)"
If the option to select Outlook personal folders (.pst) is
not in the drop down list of file types, you may need to install the
plugin that allows Evolution to import .pst files.
To check on the status of the PST plugin on an Ubuntu system, or
another Debian distribution of Linux, use the command sudo apt
install evolution-plugins evolution-plugin-pstimport.
[ More Info ]
[/network/email/evolution]
permanent link
Thu, Aug 13, 2026 7:20 pm
Symlinks on Linux
To create a
symbolic link
(symlink), aka soft link, on a
Linux system, you can
use the ln command with
the -s option, i.e., ln -s, followed by the target
file path and the name you wish to use for the symbolic link. The
-s option specifies that the link should
be "soft" or symbolic (omitting this creates a hard
link). You can view existing symlinks with the ls command with the
-l option and then piping the output through the grep command with the
-l or --long option to obtain more detailed
information. Since the permission string for files or directories will
begin with the letter "l", you can limit the output with ls -l |
grep "^l". E.g.:
alice@Wonderland@Serenity:~/Documents$ ln -s ~/Pictures/Phone/PXL_20260715_202210365.jpg erin.jpg
alice@Wonderland@Serenity:~/Documents$ ls -l | grep "^l"
lrwxrwxrwx  1 alice@Wonderland domain users@ad.moonwillowwoods.com        75 Aug 14 15:03 erin.jpg -> /home/alice@Wonderland/Pictures/Phone/PXL_20260715_202210365.jpg
alice@Wonderland:~/Documents$
You can link an entire directory with a symlink. E.g., you could point a
local logs folder to a folder elsewhere on the system, even one
on another drive. E.g., ln -s /var/log/app_logs ./logs.
If you wish to find all of the symlinks in the current directory and
all its subdirectories, you can use the command find . -type l.
The -type l flag instructs the
find command to look
just for links. To see the full, absolute path of where a specific link points
you can use the
readlink command, e.g.,
readlink -f filename
where filename is the name of the symlink. E.g.:
alice@Wonderland:~/Documents$ readlink -f erin.jpg
/home/alice@Wonderland/Pictures/Phone/PXL_20260715_202210365.jpg
alice@Wonderland:~/Documents$
You can remove a symlink with the unlink command
followed by the symlink name.
alice@Wonderland@Serenity:~/Documents$ unlink erin.jpg
alice@Wonderland:~/Documents$
You could also use the rm
command. E.g., if you created a symlink named shortcut.txt, you could
remove that shortcut with rm shortcut.txt. Never add a trailing
slash (/) when removing a directory symlink, or you risk
deleting the contents inside the actual target directory.
[/os/unix/linux]
permanent link
Tue, Aug 11, 2026 9:14 pm
Changing the horizontal folder display on a Jellyfin server
When you view the media folders on a Jellyfin server, you
will see the folders displayed horizontally, so you have to click on a
rightward-pointing arrowhead to view additional folders. If you wish to
change that behavior so that you see a grid display, instead, you can
change it through CSS.
To do so, take the following steps:
-
Click on the
hamburger button (3 short horizontal lines one below the other)
at the upper-righthand corner of the homepage display for the server when
viewing it from a browser.
-
Select Dashboard.
-
Select Branding.
-
Paste the following code into the "Custom CSS code" field, then click on
Save.
@media all and (min-width: 50em) {
  .homePage .emby-scroller {
    margin-right: 0;
  }
  .homePage .emby-scrollbuttons {
    display: none;
  }
  .homePage .itemsContainer {
    flex-wrap: wrap;
  }
}
When you go back to the home page for the Jellyfin server and refresh
the webpage in your web browser, you should now see a grid display for
all of the folders you created, i.e., rows of folders one beneath the
other. If you don't see the change take effect, try pressing the Ctrl
and the F5 keys, or Cmd, Shift, and R,
depending on your operating system, together to force a refresh that
will apply CSS changes. For an example of how the display of folders
changes, see these "before" and
"after" displays for a server on which 6
folders had been created. Note: the custom CSS injected via the server
dashboard applies to web browser clients and the desktop client, but
dedicated apps, such as
Android TV or
Fire TV
stick, may ignore the web CSS. It does work with the Jellyfin app
under the LG webOS on an
LG TV.
[ More Info ]
[/network/web/server/jellyfin]
permanent link
Thu, Aug 06, 2026 3:29 pm
Registry location for Advanced Diary registration information
The Advanced Diary journaling/diary
program from CSoftLab stores its
license information in the
Windows registry at
HKEY_CURRENT_USER\Software\CSoftLab\Advanced Diary. When you
install the software, you will have a 30-day trial period and the
LicenseCode and LicenseName keys will not have
any values set. You can see the values using the Microsoft Windows registry
editor regedit.exe.
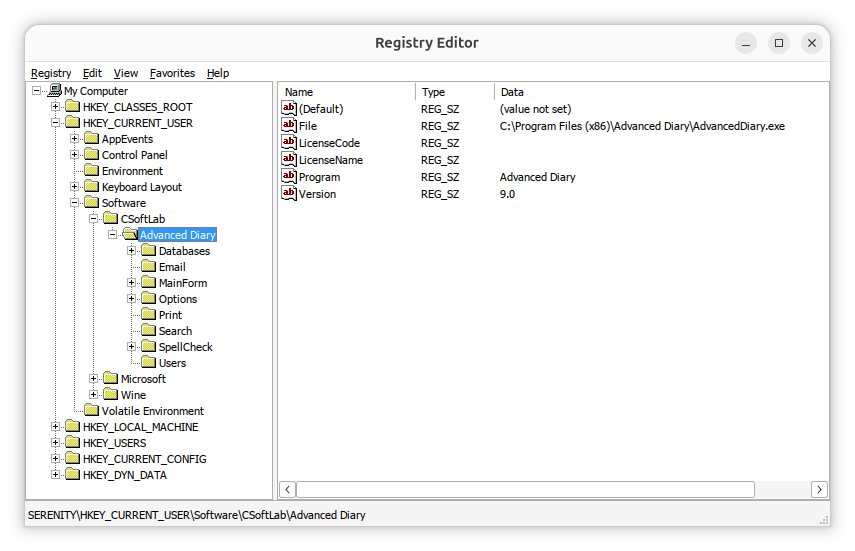
If you need to view the license information, you can navigate to the
HKEY_CURRENT_USER\Software\CSoftLab\Advanced Diary key in
the registry using the registry editor or you can
open a command prompt window and
issue the following reg query commands.
C:\>reg query "HKCU\SOFTWARE\CSoftLab\Advanced Diary" /v LicenseName

HKEY_CURRENT_USER\SOFTWARE\CSoftLab\Advanced Diary
    LicenseName    REG_SZ    John Doe


C:\Users\Lisa>reg query "HKCU\SOFTWARE\CSoftLab\Advanced Diary" /v LicenseCode

HKEY_CURRENT_USER\SOFTWARE\CSoftLab\Advanced Diary
    LicenseCode    REG_SZ    VN37-H79K-28ZZ-XMMUMM9XX9


C:\>
You can extract the information from the registry by right-clicking on the
Advanced Diary entry in the registry and choosing Export
and then saving the information to a .reg registry file. That will save all
of the registry information for Advanced Diary. You can then delete all
but the lines that are like the ones below, if you only need the license
entries in the registry.
Windows Registry Editor Version 5.00
[HKEY_CURRENT_USER\SOFTWARE\CSoftLab\Advanced Diary]
"LicenseName"="John Doe"
"LicenseCode"="VN37-H79K-28ZZ-XMMUMM9XX9"
You can then import the registry entries after installing Advanced Diary
on another system. You can import them by opening the registry editor and
choosing Registry and then Import Registry File.
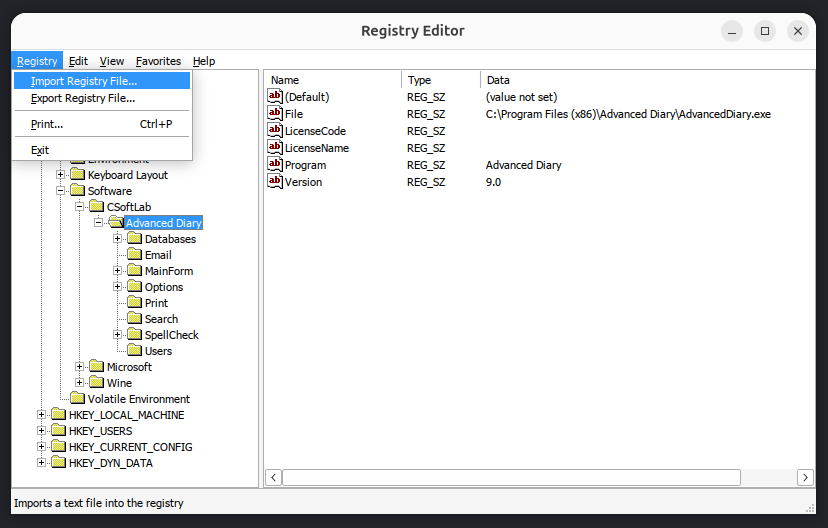
Note: if you are transferring the registry keys to an installation of
Advanced Diary running under Wine on a Linux system, you can run the
registry editor provided by Wine by opening a
terminal window
and then setting the WINEPREFIX environment variable equal to
whatever Wine prefix you have set, if you are using one other than the
.wine one, and then running wine regedit. E.g.:
$ export WINEPREFIX="$HOME/.wine-advdiary"
$ wine regedit
If you have saved the registry values to a .reg file, e.g.
file.reg, and want to import the values from that file from
a command-line
interface (CLI), open a
command prompt window as an administrator and run
reg import "C:\path\to\file.reg". Alternatively, use
regedit /s "C:\path\to\file.reg" to import the file silently
without a confirmation prompt. To import the registry values from a
Windows system into the registry for an instance of Advanced Diary 9.0
running in a Wine prefix named .wine-advdiary on
an Ubuntu Linux system,
I used the commands below in a terminal window to import a .reg file
named AdvancedDiary_LicenseInfo.reg.
$ export WINEPREFIX="$HOME/.wine-advdiary"$ wine regedit /s "$HOME/Documents/AdvancedDiary_LicenseInfo.reg"
$
After doing so, when I clicked on Help and chose About Advanced
Diary, I saw it was registered.
Related articles:
-
Obtaining a command prompt in Windows 11
Date: August 14, 2023
-
Windows Reg Query Command
Date: October 1, 2026
-
Checking Microsoft Windows proxy server
settings
Date: January 7, 2015
-
Installing Advanced Diary on a Linux system with Wine
Date: February 24, 2026
-
Access violation when installing Advanced Diary 9.0 with Wine on a Linux system
Date: August 4, 2026
-
Advanced Diary Active Database and Backup Registry Values
Date: July 18, 2026
[/os/unix/linux/wine/AdvDiary]
permanent link
Wed, Aug 05, 2026 9:21 pm
SSH ServerAliveInterval
If you want to prevent a
Secure Shell (SSH)
connection being dropped when it has been inactive for several minutes, you can
specify a keepalive value.
To specify a keepalive value directly from the command line, use
the -o flag followed by the
ServerAliveIntervaloption
Command Line Syntax
Run the following command to send a keepalive packet every 60 seconds:
ssh -o ServerAliveInterval=60 user@hostname
Advanced Keepalive Control
For more robust protection against drops, combine the interval with ServerAliveCountMax. This defines how many consecutive keepalive messages can go unanswered before the client disconnects.
ssh -o ServerAliveInterval=60 -o ServerAliveCountMax=3 user@hostname
ServerAliveInterval=60: Sends a packet every 60 seconds of inactivity.ServerAliveCountMax=3: Drops the dead connection if the server fails to respond 3 times in a row.
Making It Permanent (Optional)
If you get tired of typing this out every time, you can save it to your local configuration:
[/network/ssh]
permanent link
Tue, Aug 04, 2026 9:27 pm
Access violation when installing Advanced Diary 9.0 with Wine on a Linux system
I needed to install the
Advanced Diary diary/journaling program
from CSoftLab on an Ubuntu
Unix system. The application is developed only for Microsoft Windows,
so to get it to work on an Ubuntu Linux system I used
Wine, which is
free and
open-source software that allows one to run applications developed
for the Microsoft Windows
operating system
(OS) on Linux systems.
I started the installation from a
terminal window after
creating and initializing a Wine
prefix for it. But when I clicked on Install, I saw the
message "Invalid operation in GDI+ (Code: 2)". When I canceled the
installation and closed the window associated with it, I saw an error
window stating "The setup files are corrupted. Please obtain a new copy
of the program." I had encountered the same "Invalid operation in GDI+
(Code: 2)" problem many months ago (the setup file wasn't actually
corrupted, so I could ignore that message) when I installed a previous
version of Advanced Diary, version 8.0, on another system using Wine
— see Installing Advanced
Diary on a Linux system with Wine — and remembered that I
had used a shell
script then to install additional software for Wine that
would alleviate that problem. I needed Winetricks installed, so
I verified I had already installed it on this system with the which command
(you can install it with sudo apt install winetricks,
if it is not installed). I used winetricks to install gdiplus and core
fonts for Windows applications. That resolved the problem with the
"Invalid operation in GDI+ (Code: 2)", but then I saw a
"Access violation at address 75D947DC in module 'qcap.dll'. Read of address
5F505353" message every time I started Advanced Diary.
[ More Info ]
[/os/unix/linux/wine/AdvDiary]
permanent link
Sat, Aug 01, 2026 8:27 pm
Making an optical drive accessible to a guest OS running in VirtualBox
I needed to make an
optical disc drive accessible to a Windows virtual
machine (VM) running in VirtualBox
on an Ubuntu
Linux system. The drive was attached to the host operating system
(OS) via a USB
connection. One way to make a USB optical drive connected to a Linux
host available to a Windows VM is to pass through the host optical
drive. With the VM running, I could select Devices and then
the optical drive connected to the host operating system, "Host Drive
PIONEER BD-RW BDR-XS07U (sr0)". Since I had seen a recommendation to
use a USB passthrough method instead, though, as while passing through
the host optical drive works well for ordinary CD/DVD access, unusual
discs or software that communicates directly with the hardware are less
likely to be problematic if one uses the USB passthrough method, instead,
I chose the USB passthrough option. To do so, I verified that the logged
in user account was in the vboxusers
group by issuing the command grep vboxusers /etc/group in
a terminal
window. If it isn't, you can add the account to that group using
sudo usermod -aG vboxusers $USER. I also verified that
the USB 3.0 Controller option was enabled by selecting the Windows 10
VM in VirtualBox and clicking on Settings and then selecting
USB. I then made the Pioneer Blu-ray drive accessible inside
the Windows VM by clicking on Devices at the top of the running
Windows VM window and then selecting Pioneer Corporation Pioneer
Blu-ray Drive [0100]. I then was able to see the blu-ray drive in
the Windows File
Explorer.
[ More Info ]
[/os/virtualbox]
permanent link
Fri, Jul 31, 2026 9:18 pm
Creating and using a Wine prefix on an Ubuntu Linux system
A Wine prefix is a directory that acts like a separate Windows installation.
Each prefix has its own registry, installed programs, libraries, and
configuration, providing a way to isolate applications and configure Wine
in a way that is optimal for a particular Windows application or set of
applications without affecting other Windows applications that you need
to run on the system. To create a new Wine prefix, take the following
steps:
Create a new Wine prefix
Open a
terminal
window.
-
Choose a location for the new prefix. For example:
export WINEPREFIX="$HOME/.wine-myapp"
-
Initialize the prefix:
WINEPREFIX="$HOME/.wine-myapp" wineboot
Wine will create the directory and initialize a fresh Windows environment.
[ More Info ]
[/os/unix/linux/wine]
permanent link
Wed, Jul 22, 2026 11:41 pm
Viewing and setting the display turn off time using powercfg
You can view the current setting for a Microsoft Windows system to turn off
the attached screen by typing "power settings" in the Windows "Type here to
search" field and selecting "Power & sleep settings".
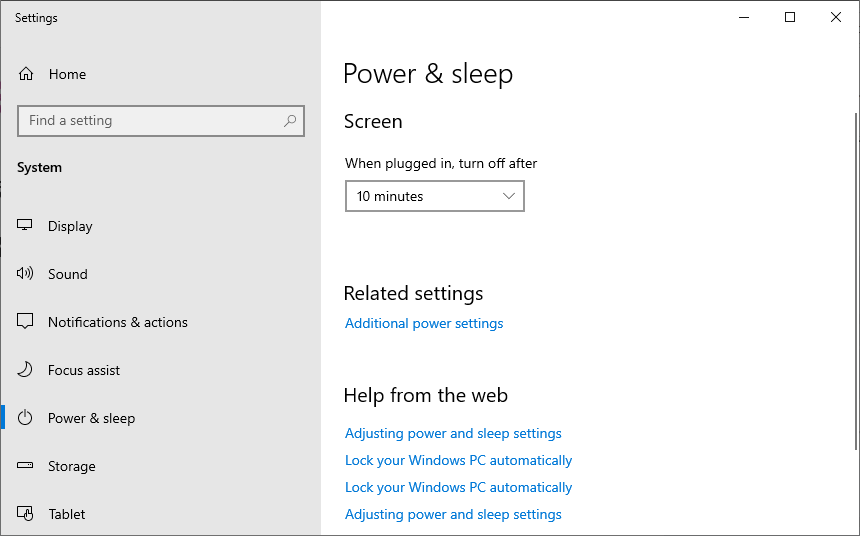
Settings on a desktop system running
Windows 10
Alternatively, you can see the current screen timeout power off settings
from a
command-line interface (CLI) using the command
powercfg /query SCHEME_CURRENT SUB_VIDEO VIDEOIDLE
from a PowerShell or
command prompt window.
C:\>powercfg /query SCHEME_CURRENT SUB_VIDEO VIDEOIDLE
Power Scheme GUID: 381b4222-f694-41f0-9685-ff5bb260df2e  (Balanced)
  GUID Alias: SCHEME_BALANCED
  Subgroup GUID: 7516b95f-f776-4464-8c53-06167f40cc99  (Display)
    GUID Alias: SUB_VIDEO
    Power Setting GUID: 3c0bc021-c8a8-4e07-a973-6b14cbcb2b7e  (Turn off display after)
      GUID Alias: VIDEOIDLE
      Minimum Possible Setting: 0x00000000
      Maximum Possible Setting: 0xffffffff
      Possible Settings increment: 0x00000001
      Possible Settings units: Seconds
    Current AC Power Setting Index: 0x00000258
    Current DC Power Setting Index: 0x0000012c


C:\>
[ More Info ]
[/os/windows/win10]
permanent link
Tue, Jul 21, 2026 1:06 pm
Installing GVIM with winget
My preferred text editor
is
gVim, which is available for
Linux,
macOS,
MS-DOS and
Microsoft Windows
systems as well as other
operating systems.
It is
free and open-source software. I've been using personal computers since
the early days of MS-DOS and have used the
vi text editor on
which it is based for decades, so I've learned many of the
keyboard shortcuts
which make it a powerful text editor and which make it easier for me to
modify text files more quickly than I could navigating through menu entries
in a graphical
user interface (GUI). So I usually install it on Microsoft Windows systems
that I will be using regularly. You can download an installation file from
the website of the developer,
Bram Moolenaar or
on Windows 10 or later versions of Windows, you can use Microsoft's
package manager
utility,
winget. To install the application using winget, you can open a
command prompt window or
PowerShell window and issue the command winget install vim.vim.
Note: on a Windows 10 system (version 22H2),
I found that the command was not available from a command prompt or PowerShell
window with administrator privileges, only from windows opened with standard
account privileges.
C:\>winget install vim
Multiple packages found matching input criteria. Please refine the input.
Name            Id              Source
---------------------------------------
Vim             vim.vim.nightly winget
Vim             vim.vim         winget
Vim Cheat Sheet 9WZDNCRDMCWR    msstore

C:\>winget install vim.vim
Found Vim [vim.vim] Version 9.2.0758
This application is licensed to you by its owner.
Microsoft is not responsible for, nor does it grant any licenses to, third-party packages.
Downloading https://github.com/vim/vim-win32-installer/releases/download/v9.2.0758/gvim_9.2.0758_x64_signed.exe
  ██████████████████████████████  12.7 MB / 11.7 MB
Successfully verified installer hash
Starting package install...
Successfully installed

C:\>
[/software/editors/vi]
permanent link
Mon, Jul 20, 2026 9:05 am
Installing Jellyfin as a Snap package on an Ubuntu Linux system
Jellyfin is a
free and
open-source
media server
application. It can be installed on an
Ubuntu Linux system as a
Snap package through
the App Center.
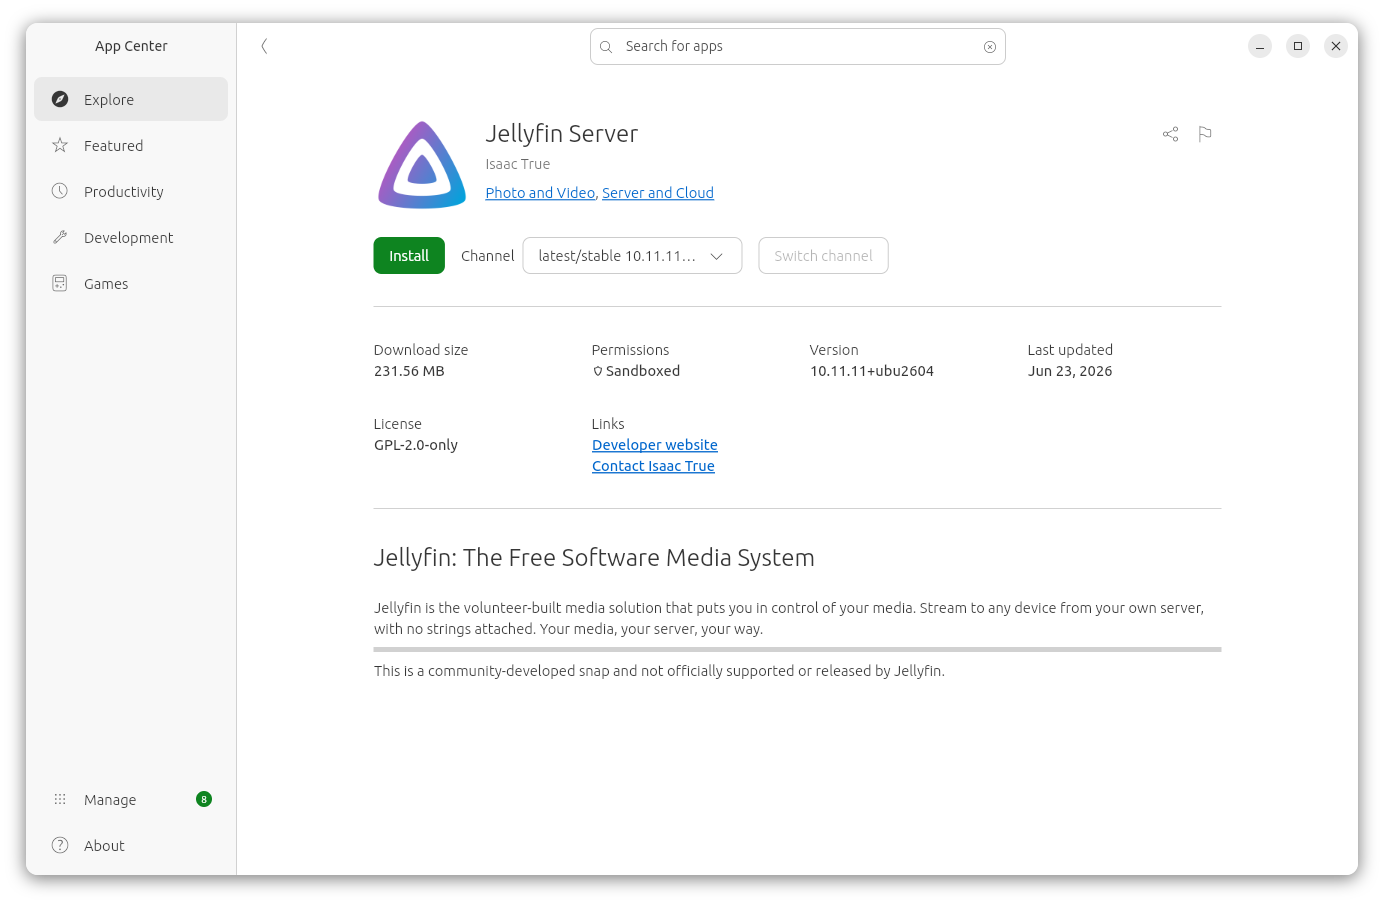
Alternatively, you can install the software from a
terminal window
with the command sudo snap install itrue-jellyfin.
$ sudo snap install itrue-jellyfin
[sudo: authenticate] Password:
itrue-jellyfin 10.11.11+ubu2604 from Isaac True (itrue) installed
$
[ More Info ]
[/network/web/server/jellyfin]
permanent link
Sun, Jul 19, 2026 8:53 pm
Importing Winamp playlists into Audacious
The Winamp media player
was developed to run on Microsoft Windows
operating
systems. The last stable release of the software was released about
three years ago on April 26, 2023. If you need a native
Linux alternative
to Winamp,
Audacious is a
free and open-source audio player that has a
GTK-based interfrace (GTKUI),but which can also be configured with a Winamp-like interface and which
supports Winamp 2 skins, i.e., Winamp .wsz files (a type of
ZIP archive
file). You can also migrate Winamp playlists into Audacious; it supports
the standard .m3u and
.m3u8 playlist formats,
though you will need to modify the Windows-style
file paths to be
Linux-style file paths. To use Winamp playlists on a Linux system,
such as an Ubuntu system,
you can take the following steps.
-
Locate your Winamp playlists, which are .m3u or .m3u8 files typically
located in
C:\Users\username\AppData\Roaming\Winamp\Plugins\ml\playlists
where username is the relevant username. You can view the contents
of that directory from a command
prompt window using the command dir
%appdata%\Winamp\plugins\ml\playlists since %appdata% is an
environment
variable pointing to the account's AppData\Roaming
directory.
A list of the playlists is contained in the playlists
XML file. In that
file, which can be viewed in a
text editor such as
the Windows Notepad,
you will see data like the following:
<?xml version="1.0" encoding="UTF-16"?>
<playlists playlists="35">
<playlist filename="plf8064.m3u8" title="Moonzic (Top Favorite Mix)"
id="{8B45286F-9CF9-4A14-9045-F27EDC1ED72B}" songs="217" seconds="0"/>
The first line above shows the version of XML in use is 1.0 and the
character encoding
is UTF-16. The
next lines shows that, in this case, there are 35 playlists. The next line
shows the filename of 1 of the 35 playlists and the title for the playlist
in Winamp.
-
If the music files, e.g., the
.mp3 files referenced in the
playlists are not accessible from the Linux system, copy them to a location
that is accessible from the Linux system. If you preserve a similar
folder structure, if you need to copy or move the files, editing the
playlists files will be easier. E.g., if the Winamp playlists contain
paths like:
C:\Users\Alice\Music\Artist\Album\song.mp3
You could have a similar folder structure on Linux like the following:
/home/alice/Music/Artist/Album/song.mp3
-
Edit the playlists files. You could use a global find and replace function
in a text editor
or you could update all of the files at once with
sed (short for stream
editor), which you can run from a
Terminal window.
Sed will likely already be present on a Linux system. You can verify
that by using the
which command, i.e.,
which sed, which will show you the
location of the program, if it is present. Sed is also available for Microsoft
Windows systems at
sed for
Windows. A sed command like the one below, if executed from the
directory where the playlist files are located, could be made to make the
needed changes if the the Windows and Linux file paths were like the ones
above.
sed -i 's|C:\\Users\\Alice|/home/alice|g; s|\\|/|g' *.m3u8
- The
-i tells sed to edit files in place, i.e., to
make the changes to the specified file rather than create a new
file.
- The commands sed will use are enclosed in single quotes.
- The
s at the beginning of the command instructs sed
to perform a substitution. The
vertical bar is
being used to separate the old
string
from the new replacement string. Another character could be used, such
as a colon,
etc.
- The string to be replaced,
C:\\Users\\Alice is
placed within the first pair of vertical bars. Each
backslash must be
preceded by another backslash because the backslash character has a
special meaning — it is an
escape
character. If you have a period in the replacement string, you should also
precede it with a backslash, since the period (.) has a special meaning
in a regular
expression, also. The replacement string is enclosed within the
second set of vertical bars.
- The
g that follows the 4th vertical bar indicates it
is a "global" replacement operation, i.e., it should occur everywhere
the original string occurs in the file.
- The semicolon
separates the first command from a second one, which indicates any
backslashes in the file should be replaced with forward slashes. I.e.,
the backslashes that occur later in each line should also be replaced.
- The
*.m3u8 indicates that the sed commands should be
applied to all .m3u files in the directory.
-
After updating the .m3u8 files, within Audacious, click on Playlist
and select Import.
-
Navigate to the location of the playlist then select one by clicking
on it and then click on the Import button.
-
The playlist name, e.g.,
plf68B in the example below, will
match the filename for the .m3u/.m3u8 file. You can rename it to match
the name for the playlist in Winamp by opening the Winamp
playlists.xml file, which will be in the same directory
as the playlist .m3u8 files, in a text editor or web browser and looking for
the corresponding entry, e.g.:
<playlist filename="plf68B.m3u8" title="Disney Classic Tunes"
id="{AAD2A93E-93E9-442B-B24C-88D0BFBB4607}" songs="44" seconds="8231"/>
Right-click on the playlist name in Audacious and choose Rename.
[ More Info ]
[/software/audio_video/Audacious]
permanent link
Sat, Jul 18, 2026 5:40 pm
Advanced Diary Active Database and Backup Registry Values
Advanced Diary is a journaling/diary
application for Microsoft Windows systems developed by
CSoftLab. It stores the location of
the currently active datbase in the
Windows registry at
HKEY_CURRENT_USER\SOFTWARE\CSoftLab\Advanced Diary\Databases in
the key Database0. You can query the value from a
command prompt
using the reg query command
reg query "HKEY_CURRENT_USER\SOFTWARE\CSoftLab\Advanced Diary\Databases"
/v Database0
. You can change the value from a
command-line
interface (CLI) using the reg
add command.
C:\>reg query "HKEY_CURRENT_USER\SOFTWARE\CSoftLab\Advanced Diary\Databases" /v Database0

HKEY_CURRENT_USER\SOFTWARE\CSoftLab\Advanced Diary\Databases
    Database0    REG_SZ    Protocol=Local*Database=C:\Users\Alice\Documents\Advanced Diary\diary.dndb


C:\>
It stores the settings for automatic backups at
HKEY_CURRENT_USER\SOFTWARE\CSoftLab\Advanced Diary\Options.
The default option settings when no automatic backup has been set are
shown below.
C:\>reg query "HKEY_CURRENT_USER\SOFTWARE\CSoftLab\Advanced Diary\Options" | find "AutoBackup"
    AutoBackup    REG_DWORD    0x0
    AutoBackupPath    REG_SZ
    AutoBackupMode    REG_DWORD    0x0
    AutoBackupTime    REG_BINARY    4F5555555555D53F

C:\>
You can change the backup settings in the program by selecting Tools,
then Options, then Backup from the Advanced Diary menu bar.
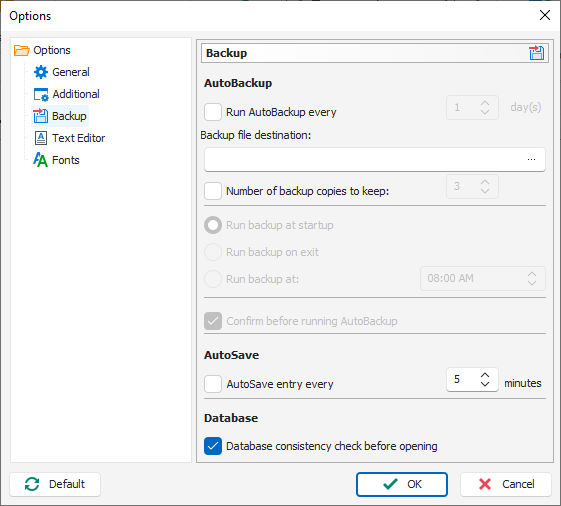
The registry settings when automatic backups have been turned on with a
backup location specified and the default backup options left in place, e.g.,
every day, are shown below.
C:\>reg query "HKEY_CURRENT_USER\SOFTWARE\CSoftLab\Advanced Diary\Options" | find "AutoBackup"
    AutoBackup    REG_DWORD    0x1
    AutoBackupPath    REG_SZ    P:\alice\Advanced Diary Backups\
    AutoBackupMode    REG_DWORD    0x0
    AutoBackupTime    REG_BINARY    4F5555555555D53F

C:\>
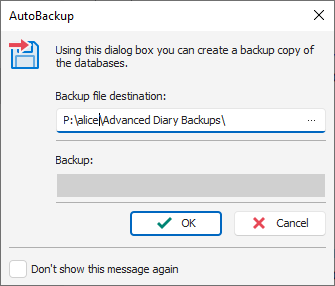
When you turn on the backup option, the next time you start the program
you will see a AutoBackup window prompting you to OK a backup.
if you leave the "Confirm before running AutoBackup" option checked.
The "AutoSave" option is stored in the registry at AutoSave
under HKEY_CURRENT_USER\SOFTWARE\CSoftLab\Advanced Diary\Options.
The default value is zero. With "AutoSave entry ever 5 minutes" turned on
the value will be "1" as shown below.
C:\>reg query "HKEY_CURRENT_USER\SOFTWARE\CSoftLab\Advanced Diary\Options" /v AutoSave

HKEY_CURRENT_USER\SOFTWARE\CSoftLab\Advanced Diary\Options
    AutoSave    REG_DWORD    0x1


C:\>
The value in minutes for the interval at which automatic saves are performed
is stored in the AutoSaveInterval key. The key that controls
whether the user is prompted to confirm backups is stored in the
BackupConfirmation key. A value of "0" indicates that confirmation
is not required.
C:\>reg query "HKEY_CURRENT_USER\SOFTWARE\CSoftLab\Advanced Diary\Options" /v AutoSaveInterval

HKEY_CURRENT_USER\SOFTWARE\CSoftLab\Advanced Diary\Options
    AutoSaveInterval    REG_DWORD    0x5


C:\>reg query "HKEY_CURRENT_USER\SOFTWARE\CSoftLab\Advanced Diary\Options" /v BackupConfirmation

HKEY_CURRENT_USER\SOFTWARE\CSoftLab\Advanced Diary\Options
    BackupConfirmation    REG_DWORD    0x0


C:\>
Related articles:
-
Obtaining a command prompt in Windows 11
Date: August 14, 2023
-
Remotely Enabling Remote Desktop Protocol From the Command Line
Date: April 11, 2009
-
Checking Microsoft Windows proxy server
settings
Date: January 7, 2015
[/os/windows/software/journaling/AdvDiary]
permanent link
Fri, Jul 17, 2026 9:30 pm
Renaming a Windows system and joining a Windows domain with PowerShell
You can view the current name of a system running a Microsoft Windows
operating system
(OS) using the hostname command in a
PowerShell or
command prompt window.
You can change the name of the
host by opening
a PowerShell window with administrator privileges by choosing "Run as
administrator" when opening the window and then using the PowerShell command
Rename-Computer -NewName "name" where name is the
new name you wish to assign to the system. Note: names must be 15 or fewer
characters due to NetBIOS
limitations and should only use standard alphanumeric characters, i.e, A-Z,
0-9, and hyphens (-). Spaces and most special characters are invalid and will
cause an error.
PS C:\Windows\system32> hostname
DESKTOP-PNS32H3
PS C:\Windows\system32> Rename-Computer -NewName "Jamestown"
WARNING: The changes will take effect after you restart the computer DESKTOP-PNS32H3.
PS C:\Windows\system32>
You will need to reboot to have the new name go into effect; you can
add the -Restart option to the command to restart automatically.
E.g., Rename-Computer -NewName "TheNewName" -Restart.
To join a Windows
domain from a
command-line interface (CLI), you can issue the command
Add-Computer -DomainName "YourDomainName" -Credential
(Get-Credential) -Restart
— replace YourDomainName with
the name of the Windows domain. If you don't want to automatically reboot, omit
the -Restart option.
Add-Computer -DomainName "ad.example.com" -Credential (Get-Credential) -Restart

cmdlet Get-Credential at command pipeline postion 1
Supply values for the following parameters:
Credential
You will see a "Windows PowerShell credential request" window open where
you can provide a user name and password for an account in the domain
administrators group. The system will automatically reboot if you have
added the -Restart parameter.
[/os/windows/PowerShell]
permanent link
Thu, Jul 16, 2026 6:53 pm
Querying and setting network settings with PowerShell
To determine the IP
address of a Microsoft Windows system from a
command-line
interface (CLI) you can
open a command prompt window and
use the ipconfig command
ipconfig /all. If you only need the IPv4 address you can
pipe
the output into find
or findstr. Alternatively,
you can use a netsh command.
C:\>ipconfig /all | find "IPv4 Address"
   IPv4 Address. . . . . . . . . . . : 192.168.0.8(Preferred)

C:\>ipconfig | findstr /C:"IPv4"
   IPv4 Address. . . . . . . . . . . : 192.168.0.8

C:\>netsh interface ip show addresses

Configuration for interface "Ethernet"
    DHCP enabled:                         Yes
    IP Address:                           192.168.0.8
    Subnet Prefix:                        192.168.0.0/24 (mask 255.255.255.0)
    Default Gateway:                      192.168.0.1
    Gateway Metric:                       0
    InterfaceMetric:                      25

Configuration for interface "Loopback Pseudo-Interface 1"
    DHCP enabled:                         No
    IP Address:                           127.0.0.1
    Subnet Prefix:                        127.0.0.0/8 (mask 255.0.0.0)
    InterfaceMetric:                      75


C:\>
You can also use a
PowerShell cmdlet to view the IP address.
PS C:\> Get-NetIPAddress -AddressFamily IPv4


IPAddress         : 192.168.0.8
InterfaceIndex    : 5
InterfaceAlias    : Ethernet
AddressFamily     : IPv4
Type              : Unicast
PrefixLength      : 24
PrefixOrigin      : Dhcp
SuffixOrigin      : Dhcp
AddressState      : Preferred
ValidLifetime     : 15:58:12
PreferredLifetime : 15:58:12
SkipAsSource      : False
PolicyStore       : ActiveStore

IPAddress         : 127.0.0.1
InterfaceIndex    : 1
InterfaceAlias    : Loopback Pseudo-Interface 1
AddressFamily     : IPv4
Type              : Unicast
PrefixLength      : 8
PrefixOrigin      : WellKnown
SuffixOrigin      : WellKnown
AddressState      : Preferred
ValidLifetime     : Infinite ([TimeSpan]::MaxValue)
PreferredLifetime : Infinite ([TimeSpan]::MaxValue)
SkipAsSource      : False
PolicyStore       : ActiveStore


PS C:\>
You can get a more concise version showing the interface and address
with Get-NetIPAddress -AddressFamily IPv4 |Select-Object InterfaceAlias,
IPAddress.
PS C:\> Get-NetIPAddress -AddressFamily IPv4 | Select-Object InterfaceAlias, IPAddress

InterfaceAlias              IPAddress
--------------              ---------
Ethernet                    192.168.0.8
Loopback Pseudo-Interface 1 127.0.0.1


PS C:\>
[ More
Info ]
[/os/windows/PowerShell]
permanent link
Tue, Jul 14, 2026 9:27 pm
Copying and pasting from a VirtualBox VM to the host operating system
If you wish to be able to be able to copy text from within a
virtual machine (VM)
running on
VirtualBox
to the host
operating
system (OS) clipboard, e.g., from a Microsoft Windows guest VM to a Linux
host, take the following steps:
- Shut down the VM
-
With the VM selected, click on Settings, then General,
then select Features. Change the Shared Clipboard setting from
Disabled to Bidirectional then click on OK.
-
Start the VM.
-
In the running VM, click on Devices then select Shared Clipboard
. Make sure it is set to Bidirectional.
-
Select Devices then Insert GUest Additions CD image....
-
When you see the "VirtualBox - Question" window with the message "Do you
wish to download this disk image file fromt he Internet?", click on
Download.
-
If you see a window asking you to confirm the VirtualBox Guest Additions
disk image file followed by the URL for the download, e.g.,
https://download.virtualbox.org/virtualbox/7.2.6/VBoxGuestAdditions_7.2.6.iso,
click on Download.
-
You should then see a window informing you that the VirtualBox Guest
Additions disk image file has been successfully downloaded and saved
locally. The download location is
~/.config/VirtualBox/VBoxGuestAdditions_x.y.z where
x.y.z is the version of the ISO file, e.g.
VBoxGuestAdditions_7.2.6.iso. You will be asked "Do you
wish to continue with Guest Additions installation?" Click on Continue.
-
Open the Windows File Explorer, then navigate to "CD Drive (D:) VirtualBox
Guest Additions" in the left pane and with it selected, in the right pane,
right-click on VBoxWindowsAdditions and select "Run as administrator". When
asked if you wish to allow the program to make changes", click on "Yes".
-
You will then see a "Welcome to the Oracle VirtualBox Guest Additions Setup"
window which will inform you "It is recommended that you close all other
applications before starting Setup. This will make it possible to update
relevant system files without haviging to reboot your computer." Close
any applications you are running in the Windows VM and then click on
Next.
-
At the next window you can "Choose Install Location". Unless you need
to change the location, just click on Next.
-
The next window is one where you can "Choose Components". You can click on
Install to proceed with the default options. The space required is
675.0 KB.
-
At the next window you will be informed "Your computer must be restarted in
order to complete the installation of Oracle VirtualBox Guest Additions..."
and asked "Do you want to reboot now?" You can click on Finish to
immediately reboot. Once you have rebooted, you should be able to copy and
paste between the host and guest operating systems.
You should also see the "VirtualBox Guest Additions Service" and
"VirtualBox Guest Additions Tray Application" processes running if you
bring up the Windows Task Manager.
[
More Info ]
[/os/virtualbox]
permanent link
Mon, Jul 13, 2026 4:52 pm
Installing Discord on an Ubuntu Linux system
To install Discord on
an Ubuntu Linux system,
you can install it as a
Snap package through Ubuntu's App Center.
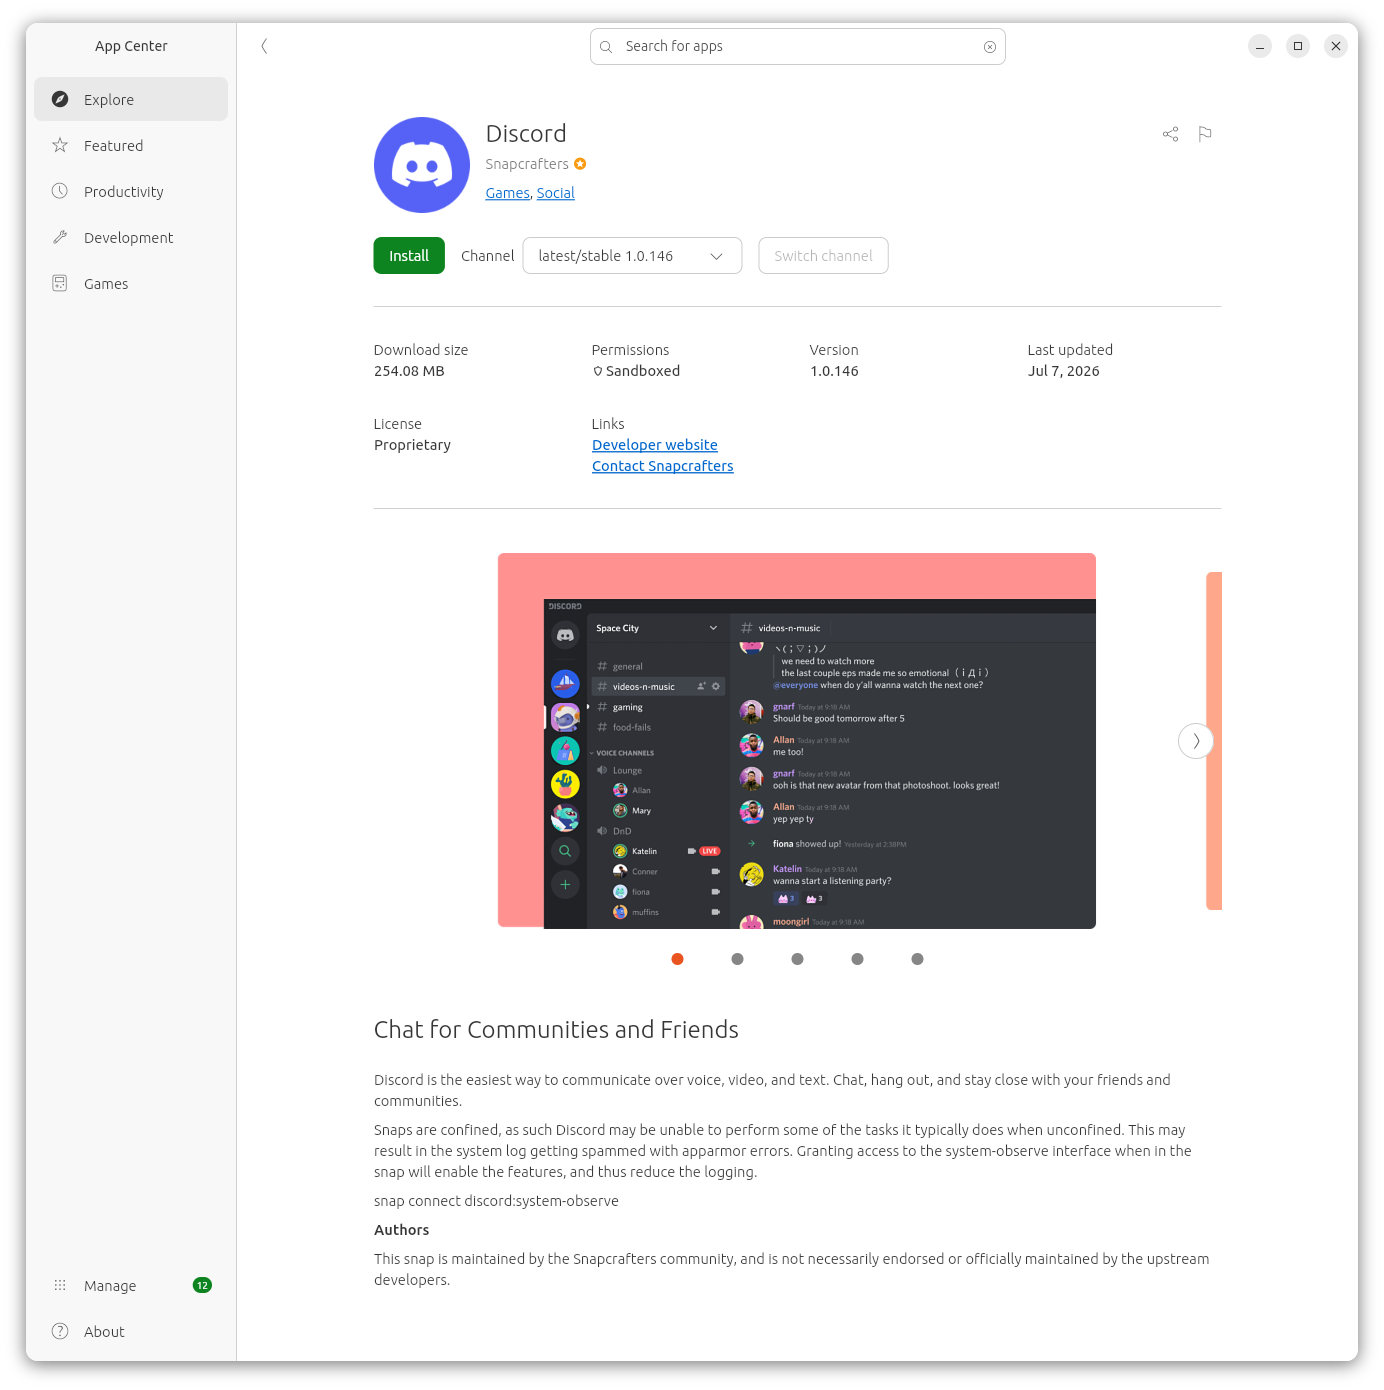
At the install screen, I saw the message below:
Snaps are confined, as such Discord may be unable to perform some
of the tasks it typically does when unconfined. This may result in the
system log getting spammed with apparmor errors. Granting access to the
system-observe interface when in the snap will enable the features, and
thus reduce the logging.
snap connect discord:system-observe
AppArmor is a
Linux kernel
security module that provides system administrators the capability to
restrict the access programs have to the system on which they run.
[ More Info ]
[/os/unix/linux/ubuntu]
permanent link
Thu, Jul 09, 2026 2:50 pm
Installing Python on a Microsoft Windows system using winget
If you would like to use the
Python
programming language on a Microsoft Windows system, one way to install
Python software is to use the
Windows
Package Manager, aka winget. Open
a command prompt and enter the command winget install python.
After the software is installed, you can view information on the Python
package with the command winget show python.
C:\>winget install python
The `msstore` source requires that you view the following agreements before using.
Terms of Transaction: https://aka.ms/microsoft-store-terms-of-transaction
The source requires the current machine's 2-letter geographic region to be sent to the backend service to function properly (ex. "US").
Do you agree to all the source agreements terms?
[Y] Yes [N] No: Y
Found Python 3.12 [9NCVDN91XZQP] Version Unknown
This package is provided through Microsoft Store. WinGet may need to acquire the package from Microsoft Store on behalf of the current user.
Agreements for Python 3.12 [9NCVDN91XZQP] Version Unknown
Version: Unknown
Publisher: Python Software Foundation
Publisher Url: https://www.python.org/
Publisher Support Url: https://www.python.org/doc/
License: https://docs.python.org/3.12/license.html
Privacy Url: https://www.python.org/privacy
Copyright: (c) Python Software Foundation
Agreements:
Category: Developer tools
Pricing: Free
Free Trial: No
Terms of Transaction: https://aka.ms/microsoft-store-terms-of-transaction
Seizure Warning: https://aka.ms/microsoft-store-seizure-warning
Store License Terms: https://aka.ms/microsoft-store-license
The publisher requires that you view the above information and accept the agreements before installing.
Do you agree to the terms?
[Y] Yes [N] No: Y
Starting package install...
██████████████████████████████ 100%
Successfully installed
C:\>winget show python
Found Python 3.12 [9NCVDN91XZQP]
Version: Unknown
Publisher: Python Software Foundation
Publisher Url: https://www.python.org/
Publisher Support Url: https://www.python.org/doc/
Description:
Python is an easy to learn, powerful programming language. It has efficient high-level data structures and a simple but effective approach to object-oriented programming. Python’s elegant syntax and dynamic typing, together with its interpreted nature, make it an ideal language for scripting and rapid application development in many areas on most platforms.
The Python interpreter and the extensive standard library are freely available in source or binary form for all major platforms from the Python web site, https://www.python.org/, and may be freely distributed. The same site also contains distributions of and pointers to many free third party Python modules, programs and tools, and additional documentation.
The Python interpreter is easily extended with new functions and data types implemented in C or C++ (or other languages callable from C). Python is also suitable as an extension language for customizable applications.
License: https://docs.python.org/3.12/license.html
Privacy Url: https://www.python.org/privacy
Copyright: (c) Python Software Foundation
Agreements:
Category: Developer tools
Pricing: Free
Free Trial: No
Terms of Transaction: https://aka.ms/microsoft-store-terms-of-transaction
Seizure Warning: https://aka.ms/microsoft-store-seizure-warning
Store License Terms: https://aka.ms/microsoft-store-license
Installer:
Installer Type: msstore
Store Product Id: 9NCVDN91XZQP
Offline Distribution Supported: true
C:\>
You can then type python in a command prompt window to
open the Python interpreter where you can enter commands. E.g., in the
example below it is being used as a calculator. You can exit the program
by typing exit(). You can run Python
scripts from
the command prompt window using commands in the form python
example.py.
C:\>python
Python 3.12.10 (tags/v3.12.10:0cc8128, Apr 8 2025, 12:21:36) [MSC v.1943 64 bit (AMD64)] on win32
Type "help", "copyright", "credits" or "license" for more information.
>>> 99 / 4
24.75
>>> 12 * 13
156
>>> exit()
C:\>
Related articles:
-
Obtaining a command prompt in
Windows 11
Date: August 14, 2023
-
Obtaining a command prompt in Windows
10
Date: February 18, 2017
-
WinPython - Python for Microsoft
Windows
Date: May 13, 2018
-
Installing new packages for WinPython
Date: May 18, 2018
[/languages/python]
permanent link
Thu, Jul 02, 2026 9:42 pm
DVDFab 13 - Unload debugger
My wife had been using
DVDFab 13 under Microsoft
Windows 11 and wanted to continue to use it for
ripping DVDs after we
converted her desktop PC to
Ubuntu Linux. DVDFab 13
seemed to be working fine after I installed it using
Wine until after I
updated Wine to version 11.0 (you can see which version of Wine is present
by issuing the command wine --version in a
Terminal window).
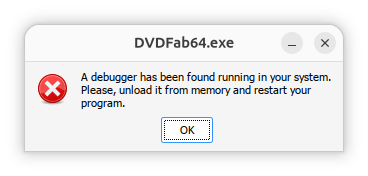
When I tried to run DVDFab afterwards, though, I saw the message
“A debugger has been found running in your system. Please, unload
it from memory and restart your program.”
When I queried
ChatGPT about the
issue, it replied “This error is usually not caused by an actual
debugger running on Ubuntu. DVDFab contains anti-debugging / anti-tamper
checks, and under Wine or Proton those checks can sometimes incorrectly
conclude that a debugger is attached.” It also stated that, for
DVDFab 13 specifically, there is an issue when trying to run the program on
later versions of Wine with the problem appearing with version 10.3 or
later. The problem occurs on newer versions, even when no
debugger is running.
I decided to install the application under Bottles, which I had previously
installed on the system with Flatpak, to see if the problem might not occur
if I tried to run the application under
Bottles, but the problem still occurred. I.e., I saw the "A debugger
has been found running in your system. Please, unload it from memory and
restart your program.” message. It took me a considerable amount of time
to resolve the problem, but I was finally able to fix the issue by disabling
DXVK and VKD3D in the settings for the DVDFab bottle.
[ More Info ]
[/os/unix/linux/ubuntu/DVDFab]
permanent link
Wed, Jul 01, 2026 9:13 pm
Remove a Flatpak
To see the Flatpaks
installed on a Linux system, you can issue the command flatpak list
in a terminal window. To remove a Flatpak from a system, find the Application
ID of the software by issuing the command flatpak list --app.
Once you have the Application ID, you can uninstall the Flatpak with the
command flatpak uninstall AppID where AppID is
the relevant Application ID. To remove all of the application's local settings
and configuration files, add the --delete-data option. E.g.,
to remove the
Bottles Flatpak, I could use the command
flatpak uninstall --delete-data com.usebottles.bottles.
alice@Wonderland:~$ flatpak list
Name             Application ID              Version Branch       Installation
Bottles          com.usebottles.bottles      63.2    stable       system
i386             …sktop.Platform.Compat.i386         25.08        system
Mesa             …esktop.Platform.GL.default 26.0.6  25.08        system
Mesa (Extra)     …esktop.Platform.GL.default 26.0.6  25.08-extra  system
nvidia-580-159-… …tform.GL.nvidia-580-159-03         1.4          system
Mesa             …ktop.Platform.GL32.default 26.0.6  25.08        system
Mesa (Extra)     …ktop.Platform.GL32.default 26.0.6  25.08-extra  system
nvidia-580-159-… …orm.GL32.nvidia-580-159-03         1.4          system
Nvidia VAAPI dr… …ktop.Platform.VAAPI.nvidia         25.08        system
Codecs Extra Ex… …ktop.Platform.codecs-extra         25.08-extra  system
i386             …Platform.codecs_extra.i386         25.08-extra  system
GNOME Applicati… org.gnome.Platform                  49           system
Yaru Gtk Theme   org.gtk.Gtk3theme.Yaru              3.22         system
gecko            org.winehq.Wine.gecko               stable-25.08 system
mono             org.winehq.Wine.mono                stable-25.08 system
alice@Wonderland:~$ flatpak list --app
Name        Application ID             Version     Branch     Installation
Bottles     com.usebottles.bottles     63.2        stable     system
alice@Wonderland:~$ flatpak uninstall --delete-data com.usebottles.bottles


        ID                                    Branch         Op
 1. [-] com.usebottles.bottles                stable         r
 2. [-] com.usebottles.bottles.Locale         stable         r

Uninstall complete.
Delete data for com.usebottles.bottles? [y/n]: y
alice@Wonderland:~$
A Flatpack may required shared "runtimes" components. When you delete
the application, those runtimes can become "orphaned", but still occupy
space on the system. You can, optionally, use the command
flatpak uninstall --unused afterwards, if that is a concern.
[/os/unix/linux]
permanent link
Sun, Jun 28, 2026 3:16 pm
Determining the default file manager application under Ubuntu
The file command
can be used on a Linux
system to determine what type of data a file holds, e.g.,
file Untitled.png. You can determine the
media type, aka
MIME type, by using
the --mime-type option for the file command. E.g.,
file --mime-type Untitled.png. You can determine which application
is the default application for opening files of that
file type using the
xdg-mime
command — the
xdg-mime program is a command line tool that can be used to determine
what application handles a particular file type. E.g., xdg-mime
query default image/png — you need to specify the filetype
in the "minor/major" format that xdg-mime expects, which is what you see
in the output of the file --mime-type command.
$ file Documents/Untitled.png
Documents/Untitled.png: PNG image data, 597 x 113, 8-bit/color RGBA, non-interlaced
$ file Documents/tea.html
Documents/tea.html: ASCII text, with very long lines (6229)
$ file --mime-type Documents/Untitled.png
Documents/Untitled.png: image/png
$ xdg-mime query default image/png
org.gnome.Loupe.desktop
$ file --mime-type Documents/Cocoa-Lead.odt
Documents/Cocoa-Lead.odt: application/vnd.oasis.opendocument.text
$ xdg-mime query default application/vnd.oasis.opendocument.text
libreoffice-writer.desktop
$
The default file
manager for Ubuntu
Linux is GNOME Files.
You can make another application the default file manager, if you like.
Some alternatives are
Thunar,
Nemo,
Krusader, or
Dolphin.
You can determine which application is the default file manager with the
command xdg-mime query default inode/directory. You can set
the default file manager with the command xdg-mime default
fmgr.desktop where fmgr is the filemanager you wish to
use.
[ More Info ]
[/os/unix/linux/ubuntu]
permanent link
Fri, Jun 26, 2026 1:55 pm
Turning off Autocorrect on an Android phone
I have a Google Pixel 9
phone which uses the
Android
operating system. Though I have been happy with the phone, I find its
autocorrection feature to be awful. When I'm typing in the
Google Keep Notes
application and in text messages, the autocorrection feature will replace
correctly spelled English words with other words that are unrelated to
what I'm trying to write. Often the replacement word leads to a sentence
making no sense or giving it a meaning I don't intend. I consider the
Google autocorrection feature to be far more of an annoyance than a help.
The feature can be turned off by the following steps:
-
Drag your finger down from the top of the screen until you see a menu
of options.
-
Tap on the gear icon at the bottom, right-hand corner of the screen to
get to the settings menu.
-
Tap System.
-
Tap Keyboard under Interaction.
-
Tap On-screen keyboard.
-
Tap Gboard.
-
Tap Corrections & suggestions.
-
Tap Turn off autocorrect.
-
When you've changed the setting you can exit from the options
selection.
[ More Info ]
[/os/android]
permanent link
Wed, Jun 17, 2026 9:08 pm
Unable to access minimized Collectorz windows
My wife and I have been using the Microsoft Windows desktop versions
of CLZ's database programs for managing
book, comic, and movie collections for many years. We've found the Collectorz
database programs to be
well-designed and very useful, but we've encountered some issues getting the
programs to work correctly on her
Ubuntu Linux system, though
I would note that the software was developed for Microsoft Windows
operating systems
and the company doesn't indicate they are supported under Linux.
One problem we encountered is that after installing the programs under
Wine, when she
opened one of the programs, e.g., Movie Collector, and then minimized it
or switched to another application with Alt-Tab, she was unable to
switch back to the Collectorz program. Alt-Tab would not work nor
would the
Super key plus Tab key combination. There would be a small window
at the upper, left-hand corner of the screen indicating the program was
running, but clicking on it would not allow her to enlarge the window to
work in the application again and there didn't appear to be any way to
enlarge or maximize the window.

I was able to resolve the problem with minimizing the application or
switching from it without re-creating a problem opening files by checking the
Emulate a virtual desktop option under the Graphics
tab for winecfg instead.
[ More Info ]
[/os/unix/linux/wine/collectorz]
permanent link
Sun, Jun 14, 2026 10:43 pm
Application failed to initialize NO_ANSWER_FROM_MAKEMKVCON
I had installed
MakeMKV from source files on an Ubuntu Linux system . It had been
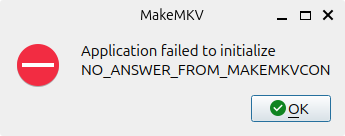
working then, but when I tried to run the program today, I saw the
message "Application failed to initialize NO_ANSWER_FROM_MAKEMKVCON".
I had updated the operating system and other applications on the system
in the intervening months, so I knew it was possible that the upgrade changed or
removed libraries that makemkvcon depends on. I had upgraded the operating
system from Ubuntu
25.10 (Questing Quokka) to 26.04
LTS (Resolute Racoon). The error means the MakeMKV graphical
user interface (GUI) can't communicate with its backend console
process, makemkvcon. I.e., the GUI is waiting for a response from
makemkvcon and that process isn't starting or is crashing, possibly because
of a missing required dependency such as a missing or changed library file.
To try to determine if that was the case and, if so, which library might be
associated with the problem, I ran makemkvcon from a terminal window.
alice@Wonderland:~$ which makemkvcon
/usr/bin/makemkvcon
alice@Wonderland:~$ makemkvcon
makemkvcon: error while loading shared libraries: libavcodec.so.61: cannot open shared object file: No such file or directory
alice@Wonderland:~$
I was able to resolve the problem by reinstalling
MakeMKV from the source files. When I did
that and re-registered the application, it started normally.
[ More Info ]
[/os/unix/linux/ubuntu/MakeMKV]
permanent link
Fri, Jun 12, 2026 1:55 pm
Thunar on Ubuntu
My wife was dissatisfied with the default
file manager,
GNOME Files, aka
Nautilus, on her Ubuntu
Linux desktop system. You can determine the default file manager from a
terminal window
by issuing the command xdg-mime query default inode/directory,
which will show you what application opers directories.
$ xdg-mime query default inode/directory
org.gnome.Nautilus.desktop
$
You can also check on whether one of several common file managers, such
as Nautilus, Thunar,
Dolphin, or
Nemo, which is a
fork of
Nautilus, is currently running with ps aux | grep -E
'nautilus|thunar|dolphin|nemo'. I saw that I had previously
installed the Krusader file manager when I checked for file manager
desktop entries with grep -l "inode/directory"
/usr/share/applications/*.desktop.
$ grep -l "inode/directory" /usr/share/applications/*.desktop
/usr/share/applications/org.gnome.baobab.desktop
/usr/share/applications/org.gnome.Nautilus.desktop
/usr/share/applications/org.kde.krusader.desktop
$
But I didn't think the
Krusader interface would appeal to her as she wanted a file manager
that provided an interface more similar to the one for the Windows Fle Explorer
that she had on her Windows 11 system, so I issued the command
sudo apt update and then sudo apt install thunar,
which installed thunar 4.20.7 — after installation, you can check the
version of Thunar with thunar --version.
I then made Thunar the default file manager with
xdg-mime default thunar.desktop inode/directory. If you run
the command xdg-mime query default inode/directory, you should
see thunar listed when it has been made the default handler for directories.
$ xdg-mime default thunar.desktop inode/directory
$ xdg-mime query default inode/directory
thunar.desktop
$
I then unpinned the GNOME Files (Nautilus) app by right-clicking on the
icon for it and selecting Unpin. I then pressed the
Super
key along with the "A" key, and typed thunar in the "Type to
search" filed and then right-clicked on thunar when I saw it returned
and selected "Pin to Dock" so she could open it the way she was opening
GNOME Files.
To make the left pane of the Thunar window act like Explorer on Microsoft
Windows operating systems, I configured it to expand a directory to show
subdirectories if she clicked on it. To do so, I changed Thunar's
sidebar style from the default "Shortcuts" to "Tree, which can be done
by selecting View, then Side Pane and then selecting
Tree, which changes the left pane to provide an expandable
directory tree. As with the Windows File Explorer, you can toggle
the display of hidden files. I turned that option on by pressing the
Ctrl and H keys simultaneously — the option can
be toggled off again by using the same key combination.
[ More Info ]
[/os/unix/linux/ubuntu]
permanent link
Sun, Jun 07, 2026 8:35 pm
Wine Iexplore unable to access webpages via HTTPS and Collectorz database programs
Wine allows
you to run programs developed for Microsoft Windows systems under
Linux. It comes with its
own version of the
Internet Explorer browser. I encountered problems when attempting to
access webpages via
HTTPS with
that browser under Wine, though access via
HTTP worked
fine. When I tried accessing pages via HTTPS, I would see only
a blank page. I discovered that problem while trying to resolve
problems with the installation of Windows desktop programs from
Collectorz to manage our book, comics,
game, and movie collections — I was seeing "Error while connecting
to server: 276: Server certificate verification failed. Connection
aborted" messages when trying to register the programs with our Collectorz
account's userid and password. I was able to eliminate the problem with
the Collectorz desktop database programs by resolving the problem with
Wine's version of the Internet Explorer browser.
[ More Info ]
[/os/unix/linux/wine/collectorz]
permanent link
Sat, May 23, 2026 7:11 pm
Addressing a problem with Disney Dreamlight Valley crashing under Steam
A couple of days ago, when my wife tried to play
Disney
Dreamlight Valley under
Steam on her
Ubuntu Linux system, when
she clicked on "Play" it would appear that the game was going to start,
but it never did. When I checked on whether the executable program for
the game, ddv.exe, was running using the
ps command and
piping its output through
grep with ps -aux | grep -i 'ddv.exe' | grep -v grep
in a Terminal window,
I could see it ran briefly, but when I reissued the command a few moments
later, it was no longer running. To troubleshoot the problem, I closed
Steam and then killed all running instances of it with
pkill command, i.e.,
pkill Steam, in a Terminal window. The system has a
NVIDIA Quadro P2000 and the problem seems to have
been an issue related to
Vulkan
graphics software on the system. When I upgraded the
operating system and rebooted, the problem disappeared.
[
More Info ]
[/os/unix/linux/wine]
permanent link
Sat, May 09, 2026 2:14 pm
Creating an arrow in the Drawing program
Drawing is a simple
raster
image editor for
Linux systems that is
similar to Microsoft
Paint. The program is
free
and open-source software (FOSS) released under the GNU
General Public License, version 3. It is available as a
Snap package
for the GNOME desktop on
Ubuntu and other Linux
systems and on Ubuntu systems can be installed by opening the
App Center and searcing for Drawing.
To create an arrow in the Drawing application, take the following steps:
- With the file containing the image you wish to
edit open, click on the line tool on the menu bar on the left side of
the Drawing window.
-
Click on Line options, which you will find at the bottom of the
window, and select simple arrow.
-
You can adjust the width of the line and arrowhead by changing the
value of the number you see to the left of Line options by
clicking on the plus or minus buttons (the value is in
pixels) or
you can type the number you want in the field. With the color you wish
for the arrow selected (you will see the color in a square near the
lower, left-corner of the window, click at a point where you wish the
back end of the arrow to be located and, while holding down the left
mouse button, move the mouse pointer upwards to where you wish the arrow
to end. Then release the mouse button. You should then have a line with
an arrowhead at the end.
[/software/graphics/drawing]
permanent link
Tue, May 05, 2026 10:19 pm
Repairing Microsoft Edge
A user reported that she could not access her email from her
Windows 11 system, which she normally would do by clicking
on a shortcut on her desktop which would open the Microsoft
Edge
browser to the webpage where she could log into
her email account on outlook.com. When I clicked on the
shortcut, I saw a blank, white area appear above the taskbar. I found
statements online about opening Microsoft Edge in a restricted "Safe
Mode" that disables extensions and custom settings, by starting it in
InPrivate mode by openng the Windows Run dialog, which you can do by
pressing the Windows
key and the "R" key. Then type msedge --inprivate
in the Run dialog window and then pressng Enter (I wasn't
certain whether there should be one dash or two before "inprivate"
since I found both listed when I searched online for a method to open
the browser in safe mode). However, with either option, Edge still
crashed shortly after opening with a blank, white window.
I was able to correct the problem by repairing the application, which
can be done through the following steps:
-
Type
settings in the Windows "Type here to search" field and
press Enter.
-
When you see Settings returned, click on it.
-
Select Apps.
-
Select Apps & features.
-
Scroll down through the list of applications until you see
Microsoft Edge and then select it and click on Modify.
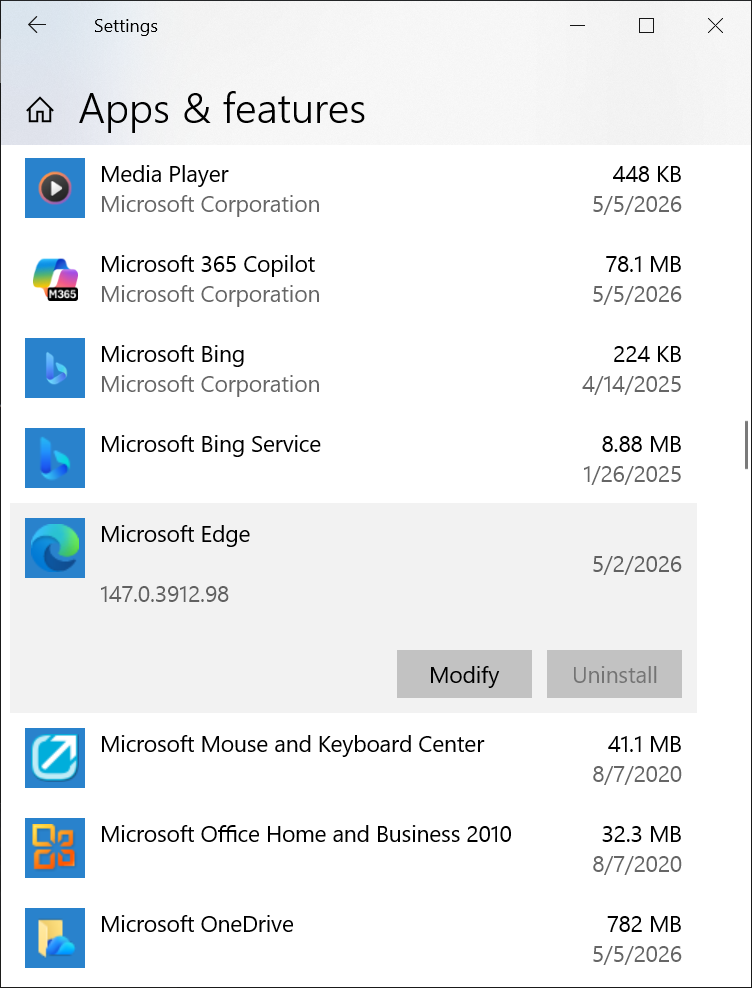
-
Provide the credentials for an administrator account when prompted
for a userid and password.
-
Click on Repair.
[/network/web/browser/edge]
permanent link
Sun, May 03, 2026 9:42 pm
Disney Dreamlight Valley Cloud Save Problem Under Ubuntu
My wife had been playing
Disney
Dreamlight Valley under
Windows 11. When
I installed
Ubuntu
25.10, I installed
Wine, then
Steam
as a Snap
package, and then installed Disney Dreamlight Valley under Steam. She
was able to use the Cloud Save option to log into the game with all of the
progress she had made under Windows. She needed to switch back to Windows for
a while and didn't switch back to Ubuntu for several weeks. When I started
Steam and Disney Dreamlight Valley again under
Ubuntu and then tried
the Cloud Save option, it did not work with the message below displayed
when I was prompted to provide login credentials:
Login Error
Cannot connect to online services. Continue playing in offline
mode
If I entered the wrong password, I got a response indicating that
the system was able to check the credentials, which I presumed were being
checked on a remote server. And I was able to successfully use the
change password option, which sent a password reset code to my wife's
email address. I was able to resolve the problem by uninstalling
Disney Dreamlight Valley under Steam and then reinstalling it.
[ More Info ]
[/os/unix/linux/wine]
permanent link
Sat, Apr 04, 2026 4:05 pm
Moving a Filename Magic Pro license from one system to another
My wife has been using
Filename Magic Pro for Windows for many years; she has version 1.00,
which still appears to be the latest version. The
software "offers robust functionality for batch renaming files within
folders. It streamlines the process for organizing large collections of
documents, music, or images." I transitioned her desktop PC from
Microsoft Windows 11
to
Ubuntu Linux 25.10 and installed
Wine so that she
could run Windows applications that she might want to still use on the
Ubuntu system. I was able to install Filename Magic Pro and use it without
any problems on the Ubuntu system. If you choose to have the program
create a desktop shortcut during the installation, you will see two
shortcuts on the desktop, Filename Magic Pro.desktop and
Filename Magic Pro.lnk. If you right-click on Filename Magic
Pro.desktop and choose Allow Launching, you can then
double-click on the shortcut to start the application. You can delete
the Filename Magic Pro.lnk by right-clicking on it and
choosing Move to Trash.
When you start the program, if it is unregistered, you will see
a countdown timer that counts down from 15.
You can wait to the countdown gets to zero or just close the countdown
window to proceed, which will then lead to the display of the window
below.
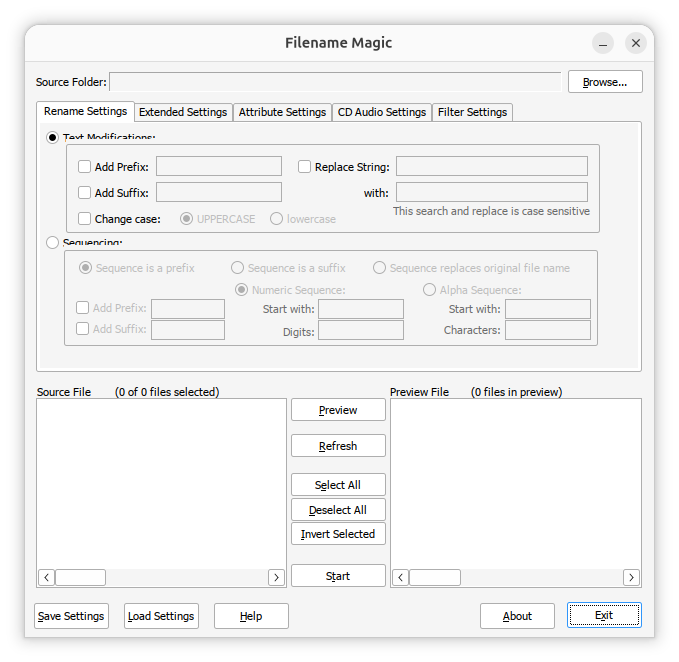
There is a "click here to purchase" link, but that no longer works; if
you click on it, you will see a
HTTP 404 error
indicating the page no longer exists. But if you previously purchased a
license as we had, you can transfer it from an old system to a new system
or, in our case, from Windows to Linux by exporting the
HKEY_LOCAL_MACHINE\SOFTWARE\WOW6432Node\L5 Software Group
registry keys, which you can do with the Windows
registry
editor, RegEdit, or you can download or copy this
L5SoftwareGroup.reg file and edit it with a
text editor, such as
Windows Notepad
and replace the AppRegKey Xs with your license key (be sure to save it
with just the .reg extension and not a .txt file extension tacked on).
You can add the registry keys to the registry used by Wine by opening
a Terminal window
and running the command wine regedit filename.reg
where filename is the name of the .reg file.
jim@Wonderland:~$ wine regedit ~/Downloads/L5SoftwareGroup.reg
jim@Wonderland:~$
When you then open the program, you won't see the countdown
timer and can just click on OK. You can press Alt-Tab
afterwards to get to the main Filename Magic Pro window.
[/os/unix/linux/wine]
permanent link
Mon, Mar 30, 2026 9:51 pm
Setting the default application to open PDF and EPUB files in Wine
I installed Wine
on an Ubuntu Linux
system to be able to run Microsoft Windows applications on it. I
installed Sumatra
PDF to view PDF and
EPUB files. When
I double-clicked on EPUB files in the Wine
File Explorer
window, which you can run by issuing the command wine explorer
in a Terminal
window, or wine explorer &, if you wish to open it and
immediately return to the
shell prompt,
I saw an Error window which stated "There is no Windows program
configured to open this type of file." If I double-clicked on a PDF file,
it would open in the
GNOME Document Viewer
application. I was able to set the default application for opening those
files under Wine with the following steps:
-
From the Bash prompt in a Terminal window, run the Wine
registry
editor program to modify the
Windows
Registry with
wine regedit.
-
Navigate to
HKEY_CLASSES_ROOT\.epub and set
(Default) = epubfile. If you don't see a .epub
entry, right-click on HKEY_CLASSES_ROOT and choose New.
You can press the F5 key or choose View and Refresh to
refresh the display to show the new entry in alphabetical order.
-
If you then click on the
.epub entry, you will see
(Default) under Name, REG_SZ
under Type, and (value not set) under Data.
-
Double-click on the entry and then type
epubfile in the
Value data field and then click on OK.
-
Then navigate to
HKEY_CLASSES_ROOT\epubfile\shell\open\command,
if it exists. If there is no epubfile entry you can create one by
right-clicking on HKEY_CLASSES_ROOT and selecting
New and Key giving the new key a name of
epubfile. Then double-click on the (Default) entry
under the new key and type EPUB Document in the Value
data field. Then right-click on the epubfile key
and choose New and Key and type shell for
the name. Right-click on shell and create a new, open
beneath it. Then right-click on open and create a new key,
command beneath open.
-
Then right click on the command key and choose New then
String Value.
-
Double-click on the new (Default) entry under command
and then type the location and file name for the application that you
wish to use to open .epub files within double quotes followed by a space
and then
"%1", e.g.
"C:\Program Files\SumatraPDF\SumatraPDF.exe" "%1", if
you wish to open the files with Sumatra PDF and you installed it so
that it is accessible to all users of the system. Or use
"C:\users\username\AppData\Local\SumatraPDF\SumatraPDF.exe
" "%1"
, where username is the relevant username, if you chose
to install it just for the current user when you installed it.
[ More Info ]
[/os/unix/linux/wine]
permanent link
Sun, Mar 29, 2026 8:58 pm
Installing MakeMKV on a Ubuntu Linux system
After trying unsuccessfully to get the
Snap package of
MakeMKV working on
an
Ubuntu Linux system
(see
Installing the MakeMKV
Snap Package on a Ubuntu Linux system), I uninstalled the Snap version
and installed the software from the
source code.
Though installing the application from source code involved more steps,
I was able to successfully install and then rip a couple of discs in far
less time than I spent trying to get the Snap version to work.
[ More Info ]
[/os/unix/linux/ubuntu]
permanent link
Sat, Mar 28, 2026 1:28 pm
Updating file locations in Book Collector
Collectorz now appears to be focusing
on their mobile and web-based products
for managing book collections, but they also provide a desktop
Book Collector desktop application for systems running Microsoft
Windows, though I don't even see a link for it on the homepage of
their website nor do I see one in their
sitemap webpage. However, if you are using the desktop product and
need to update your Book Collector database if the location of cover images,
thumbnails, list item images, templates, and/or local files for
entries already in the datbase, you can take the steps below.
You can specify the directories for new entries by clicking on
Tools, Options, Folders to set the
directories Book Collector should use by default.
Inside the Book Collector program, click on Tools then
select Update File Links. In the Update File Links
window you can "choose the kind of files you would like to repair". I left
the default value of All Types, but you can also select Front
Cover, Back Cover, Pick List Image, Pick List
Template Image, Local File, or Backdrop.
When you click on Next Step, you can choose to have the program
automatically update the old folder to the new folder or you can choose
to do it manually. With the automatic option, you can "Select a base
folder and let the program find the missing files automatically" while
with the manual option you can "Use a find and replace action to
manually fix your file paths". For the "Choose folder where to
find files", browse to the appropriate directory where the files are
now located. Check the box next to "Include subfolders", if that is
appropriate, and then click on Next step. The program will then
show a "Finding best matches for missing files" window with a progress
bar as it updated links.
At the next step, Step 4, you can see the resulting file paths
and click on the Update File Links button to finalize the
changes. You will then see the number of file links that will be updated
and asked if you are sure to proceed. I saw a window with a message that
Book Collector was not responding, but I chose "Wait" several times and
it finally completed. When all the links are updated, you should see
a window informing you of the number of file links updated.
If you updated the location for the images for books already in the
database, you should now see the images appear for book entries.
If you just need to update the links for a particular kind of files,
e.g., the local files, or the location of those files differs from
the location of other files, e.g., if they are on a different drive than
the images, etc., at Step 1 where you "choose the kind of files you
would like to repair", you can choose that file type instead of "All
Types".
I was able to use the above steps when transitioning my wife's desktop
computer from Windows to
Ubuntu Linux, after I installed Book Collector under
Wine, to
specify the new location of image and local files.
[ More Info ]
[/software/database/collectorz]
permanent link
Wed, Mar 25, 2026 4:39 pm
Ejecting a Disc with PowerShell
I needed to eject a
optical disc
drive tray from a
command-line
interface (CLI) on a system running Microsoft Windows 11 so that
I could insert a DVD in the drive. That can be done using the
Powershell
command powershell (New-Object -ComObject
WMPlayer.OCX.7).cdromCollection.item(0).Eject(), which will
eject the tray of the first optical drive found by Windows Media Player's
COM object.
PS C:\> powershell (New-Object -ComObject WMPlayer.OCX.7).cdromCollection.item(0).Eject()
Windows PowerShell
Copyright (C) Microsoft Corporation. All rights reserved.

Install the latest PowerShell for new features and improvements! https://aka.ms/PSWindows

PS C:\>
[/os/windows/PowerShell]
permanent link
Tue, Mar 24, 2026 9:15 pm
Could not initialise OpenGL support
I downloaded a YouTube
video on a Ubuntu Linux
with yt-dlp.
When I tried to view the downloaded
WebM file with the default
video application, Videos, also known as Totem, which is an application for
playing videos that is provided with Ubuntu, I saw the message below:
Ⓧ
An error occurred
Could not initialise OpenGL support
OK
When I opened the video with
VLC, which I had
previously installed, I heard audio, but no video was displayed. I checked
to see if the Nvidia
driver was up-to-date since the system had an Nvidia graphics card, but they
were up-to-date. You can check that by clicking on the Show Apps
button at the lower-right-hand corner of the screen Ubuntu desktop. Then type
Software Updates in the "Type to search" field. Click on
Software & Updates and then click on the Additional
Drivers.
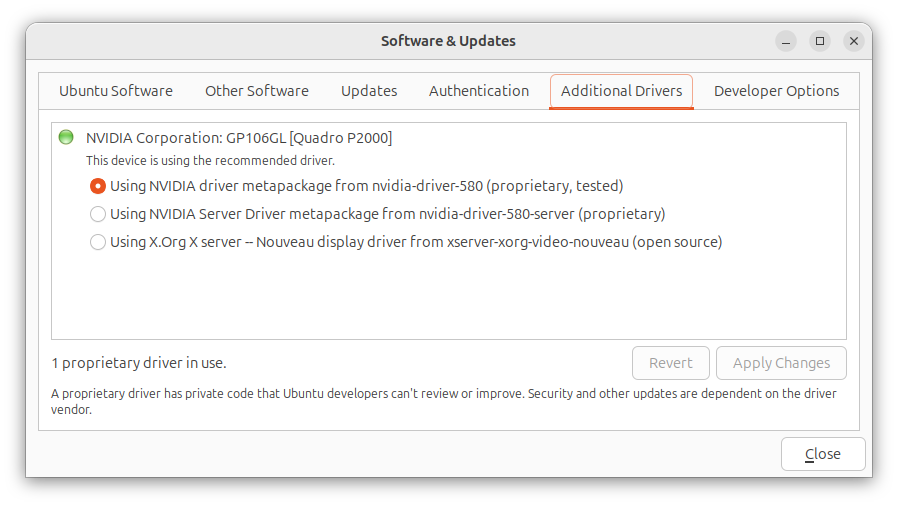
To resolve the problem, I added the following line to the
/etc/environment file with a
text editor:
GDK_GL=gles
When I rebooted the system, I was then able to view the video with
the default Videos application, though when I tried playing it in
VLC I could hear audio, but did not see video.
[/os/unix/linux/ubuntu]
permanent link
Tue, Mar 24, 2026 9:10 pm
No video shown when playing a WebM file in VLC
When I tried to play a
YouTube video I
downloaded as a WebM file
using
yt-dlp on an Ubuntu
Linux system in the
VLC media player application, I could hear the audio, but no video
was shown. I tried opening a few other .webm videos and found I was able
to view the video in some, but not others, though I was able to view
the video and hear the audio in all the .mp4 and .mkv files. I tried
changing the video output setting from "Automatic" to "OpenGL video
output" and then "XVideo output (XCB)", which you can do by clicking on
Tools, then Preferences, then Video, and then
selecting those options from the dropdown list next to Output, but
neither of those options resolved the problem, so I reset Output
to Automatic. I was able to resolve the problem by taking the
following steps, though:
-
In the VLC program, click on Tools and then select
Preferences.
-
Click on Input/Codecs and change the hardware-accelerated
decoding setting by clicking on the downward arrowhead next to
Automatic, which will be the setting if the default setting is
in effect.
-
Change the setting to Disable and then click on Save.
When I checked the Codec
information for the file where I could not view the video before disabling
the hardware-accelerated decoding setting, which you can do by opening
an audiovisual
(AV) file in VLC and then selecting Tools and Codec
Information, I saw the video codec was AOMedia's AV1 Video
(av01). When I checked the video codec for another WebM file where
the video wasn't visible in VLC, I saw it was also the AOMedia's AV1
Video (av01) codec. Checking the video codec for .webm files where
I could view the video, I saw Google/ON2's VP9 Video (VP90)
for some and H264 - MPEG-4 AVC (part 10) (avc1) for another.
Note: you can also determine the codecs used in a file using the
mediainfo utility, which you can install on an Ubuntu system with
sudo apt-get install mediainfo. You can check on whether
it is already installed using the command which mediainfo,
which would show the location of the mediainfo executable file if the
application was installed, or you can use dpkg -s mediainfo,
which will show details on the mediainfo package if it is installed.
[/software/audio_video/VLC]
permanent link
Thu, Mar 12, 2026 7:48 pm
Concatenating videos with FFmpeg
The
FFmpeg video handling
utility can be used to join videos together into one larger video. If the video
files are
MPEG-1,
MPEG-2, MPEG
Program Stream (PS)
, or
Digital Video
(DV) files, you can use a Direct Stream copy method, by issuing a command in
the form
ffmpeg -i "concat:input1.mpg|input2.mpg" -c copy
output.mpg
. Using ffmpeg for the concatenation operation ensures that
file headers and timestamps are handled correctly, whereas using operating
system commands such as
cat on a Linux system or
copy /b on a Microsoft Windows system may produce payback issues.
This method can not be used for
MPEG-4 files, however.
Another method that can be used for MP4 files, as well as the above
file types is the Concat Demuxer method,
if the files use the same
codecs and parameters, such as
resolution,
framerate, etc.
If the files have the same characteristics, you can use a command of the form:
ffmpeg -f concat -safe 0 -i inputFileList.txt
-c copy output.mp4
[ More Info ]
[/video/ffmpeg]
permanent link
Wed, Mar 11, 2026 5:17 pm
Trimming a video with FFmpeg
FFmpeg provides a
suite of
command-line
interface tools for working with audio and video files. It is
free and
open-source software that is available for a variety of
operating systems,
including
Microsoft Windows,
Linux, and
macOS. If you wish to
use it on a Microsoft Windows system, you can install it with the
Windows
Package Manager known as winget by
opening a command prompt window
and issuing the command winget install "FFmpeg (Essentials Build)".
Microsoft Windows [Version 10.0.26100.7623]
(c) Microsoft Corporation. All rights reserved.

C:\Windows\System32>winget install "FFmpeg (Essentials Build)"
Found FFmpeg (Essentials Build) [Gyan.FFmpeg.Essentials] Version 8.0.1
This application is licensed to you by its owner.
Microsoft is not responsible for, nor does it grant any licenses to, third-party packages.
Downloading https://github.com/GyanD/codexffmpeg/releases/download/8.0.1/ffmpeg-8.0.1-essentials_build.zip
  ██████████████████████████████   101 MB /  101 MB
Successfully verified installer hash
Extracting archive...
Successfully extracted archive
Starting package install...
Command line alias added: "ffmpeg"
Command line alias added: "ffplay"
Command line alias added: "ffprobe"
Path environment variable modified; restart your shell to use the new value.
Successfully installed

C:\Windows\System32>
If you need to trim the beginning of a video file, such as a .mp4 file,
you can do so using a command of the form
ffmpeg -ss hh:mm:ss -i input.mp4 -c copy output.mp4 where
you specify the point you wish the video to start in the form hh:mm:ss
for hours, minutes, and seconds with -ss and
input.mp4 is the file you wish to trim and output.mp4
is the name you wish to give to the trimmed file. E.g., if I have a video
file, REC-0001-A.mp4, where I wish to discard audio and video up to the 3
minutes and 34 seconds mark in the file, I can use ffmpeg -ss 00:03:34 -i REC-0001-A.mp4 -c copy output1.mp4 to create a new file, output1.mp4,
that omits the first 3 minutes and 33 seconds from the input file. Using the
-c copy option copies the video/audio streams directly,
which is fast but can be less accurate on
keyframes.
[ More Info ]
[/video/ffmpeg]
permanent link
Thu, Mar 05, 2026 3:30 pm
Disabling Skye automatic startup
I found Microsoft's
Skype for
Business application was automatically staring on a Microsoft Windows
system where it was not being used. Microsoft
retired the product on May 5, 2025, replacing it with
Microsoft Teams,
and is no longer providing security updates or bug fixes for the software.
Though Microsoft ended official support for Skype for Business Server on
October 14, 2025 and is no longer providing cloud service for the product,
companies that installed their own servers can still run it locally. If there
is a need to retain the software on a system, but no need to have it start
automatically when the system boots, one can stop it from
starting whenever the system is rebooted by taking the following steps:
-
Open the program and then click on the gear icon near the top, right side of
the window.
- Choose Tools and Options.
-
Uncheck the option for "Automatically start the app
when I log on to Windows" under the Personal options to prevent
the program from restarting automatically upon a login to the system,
then click on OK to apply the change after unchecking that
option.
[/os/windows/software]
permanent link
Tue, Mar 03, 2026 3:33 pm
Adding the capability to save webpages as a single file to Firefox
The Firefox web
browser does not have the capability to save the contents of a webpage to a
single file, such as an
MHTML file, which is
a web archive file format that allows one to save the
HTML code, images
etc. on a webpage into a single file.
Though the capability is absent from Firefox, you can add the functionality
of saving a page to a single file by installing
Save
Page WE, an
add-on for Firefox
by DW-dev. The
extension provides the capability to "Save a complete web page (as
currently displayed) as a single HTML file that can be opened in any browser.
Save a single page, multiple selected pages or a list of page URLs. Automate
saving from command line." The saved file is not an MHTML file,
or one of the other common
web
archiving file formats, but it
is a single HTML file that Firefox and other browsers can read.
Save Page WE is implemented using the
WebExtensions API and is available for both Firefox and
Chrome with
identical functions and user interfaces.
When you start the installation process, you will see a list of the
permissions required by the extension:
- Access your data for all websites
- Download files and read and modify the browser's download history
- Display notifications to you
- Access browser tabs
- Access browser activity during navigation
Click on the Add button to add the extension. You should then
see the message "Save Page WE was added. Update permissions and data preferences any time in the extension settings." You also have the option to pin the
extension to the toolbar.
Select the option to pin the extension to the toolbar, which will
result in an icon of a 3.5" floppy disk appearing on the toolbar.
You can click on that icon to save the page displayed in the current
browser tab.
You can also save a page by hitting the Alt+A key
combination (you can cancel the saving of a page with At+C).
The file format is HTML rather than MHTML, so the
file extension
used by SavePageWE is .html, which Firefox can open — if you try to open
a file with the .mhtml extension, Firefox will prompt you to use another
application to open the file.
Anyone who wishes to have the ability to save a webpage as a single file
added to Firefox, can add their voice to the post at
Add native Web Archive File support to Firefox, including MHTML, MAFF, and
Webarchive...
References
-
How to save a webpage as .mhtml with Firefox?
Last updated: September 15, 2024
superuser
-
Add native Web Archive File support to Firefox, including MHTML, MAFF, and
Webarchive...
Date: August 15, 2023
By:
JohnBoyTheGreat
moz://a Connect
[ More Info ]
[/network/web/browser/firefox/addons]
permanent link
Mon, Mar 02, 2026 11:11 pm
Turning off Fast Startup on a system running Microsoft Windows
Microsoft Windows 8 introduced a feature called
Fast Startup. The feature was a variation of hibernate mode, but when
enabled would close all running programs and log the user out before
hibernating. This feature would result in a user being able to log in
more quickly when a system is powered back on after a shutdown. There may
be cases where use of this feature is not desirable, however. E.g., if the
user wants to boot the system into
Linux, but still access data
on the Windows boot drive. To turn fast startup off, you can take the
following steps:
-
Type
Control Panel in the Windows Search field
at the bottom of the screen.
-
Click on System and Security.
-
Click on Change what the power buttons do under Power
Options.
-
Click on Change settings that are currently unavailable.
If prompted for administrator credentials, provide those for
an administrator account.
-
Uncheck the check box next to "Turn on fast startup (recommended)".
-
Click on Save changes. You can then close the window.
[ More Info ]
[/os/windows]
permanent link
Sun, Mar 01, 2026 10:55 pm
Controlling whether a scrollbar appears in a tab in a Terminal window
I needed to scroll back through a tab I had open in a
Terminal window on
an
Ubuntu Linux system,
but there was no
scrollbar on the right side of the tab in which I had run the command,
though a scrollbar was open in other Terminal tabs. I was able to get the
scrollbar to appear by clicking on the icon with 3 horizontal bars at
the top of the Terminal window and then selecting
Preferences.
Then from the Behavior tab, I changed the setting from
Follow System to Always, which resulted in the
scrollbar appearing where it had been missing, but I could not scroll
back any further than the text that had been appearing in the tab
before I changed the settiing and that remained the same whenever
I issued another command and text moved upwards, so that I could no
longer see it or scroll back to see it, so I closed the tab.
When I opened another tab, the scrollbar was there and operated
as expected.
[/os/unix/linux/ubuntu]
permanent link
Sat, Feb 28, 2026 8:29 pm
Creating a desktop shortcut under Ubuntu for a Windows app runnning under Wine
From a CD, I
installed
Microsoft Office 2007 under
Wine, so that
my wife could edit her
Microsoft
Publisher files on an
Ubuntu Linux system. I also installed
Microsoft Excel
and Microsoft Word.
All three seemed to be working OK when I checked them after the
installation completed. I was able to open the programs from the
File Explorer by
issuing the command wine explorer from a
shell prompt in
a Terminal window
and then navigating to the directory,
C:\Program Files (x86)\Microsoft Office\Office12, where the
applications were located. I could also start Publisher by issuing the command
below in a Terminal window:
wine "/home/alice@Wonderland/.wine/drive_c/Program Files (x86)/Microsoft Office/Office12/MSPUB.EXE"
To make it easer for my wife to open Publisher, though, I created a
shortcut on her Ubuntu desktop. To create a shortcut you can take the
following steps:
Open a Terminal
window and create a new .desktop file on your desktop. You can use
the nano
editor or another text
editor to create the file. E.g., nano
~/Desktop/AppName.desktop.
You then need to have lines like the following ones in the file:
[Desktop Entry]
Name=Name of Your Application
Exec=wine "/home/username/.wine/drive_c/Program Files/AppName/app.exe"
Type=Application
Icon=wine
Terminal=false
StartupNotify=true
You need to use the absolute path the the .exe file for the program and,
if the directory
path contains a space, you must enclose the path within quotes. Also,
you need to replace username with your username on the system.
For Publisher, I could use the following lines:
[Desktop Entry]
Name=Publisher
Exec=wine "/home/alice@Wonderland/.wine/drive_c/Program Files (x86)/Microsoft Office/Office12/MSPUB.EXE"
Type=Application
Icon=wine
Terminal=false
StartupNotify=true
If you use the nano text editor, you can hit Ctrl+X, the
Y, then Enter to save the file. You then need to make
the shortcut executable, which you can do by right-clicking on the file
on the desktop, selecting Properties, and then makng sure "Executable
as Program" is on. Or you can use the
chmod command to make
the file excutable by a command like chmod +x ~/Desktop/AppName.desktop
. You then need to permit launching of the application from the shortcut
by right-clicking on it and selecting Allow Launching.
[ More Info ]
[/os/unix/linux/wine]
permanent link
Fri, Feb 27, 2026 3:41 pm
Wine window becoming transparent with an attempt to resize it
My wife was using Advanced Diary for
journaling on a Microsoft Windows system, but wanted to transition to
Linux, so I installed
Ubuntu Linux and then,
since there is no Linux version of Advanced Diary, I installed
Advanced Diary under
Wine. She wanted to adjust the size of the Advanced Diary window, but when
she attempted to adjust the window size by clicking on the
Restore Down icon at the top right side of the
window (between the dash and the "X"), the Advanced Diary window became
transparent and it was not possible to close it or adjust the size of the
transparent box that appeared for the Advanced Diary window.
So I had to open a
Terminal window to determine the
process ID (PID)
of the Advanced Diary process with the
ps and then kill that
process with the
kill command. I could also have used the
killall command
killall AdvancedDiary.exe.
I tried closing and opening the program several times. The behavior
was consistent — the window would become transparent whenever
I tried resizing or minimizing the window.
If you are using the
GNOME desktop, you can use the steps below to try to resolve the problem.
GNOME is the default desktop environment for Ubuntu, but you can verify
it is the desktop in use by the command echo $XDG_CURRENT_DESKTOP.
Steps that may resolve the problem:
-
Run winecfg in a Terminal window.
-
In the Wine configuration window, click on the Graphics
tab.
-
Toggle the settings for "Allow the window manager to decorate the windows"
and "Allow the window manager to control the windows" one by one to see if
one of those settings change the behavior. When I toggled off "Allow the
window manager to decorate the windows", I now no longer saw the icons
to adjust the size of the window or minimize the window at the top of the
Wine window for Advanced Diary, but when I clicked where I expected them
to appear, the window became transparent again. I toggled the setting back
on and then toggled off the "Allow the window manager to control the
windows" setting. That resolved the problem. I then closed the window
and reopened Advanced Diary and toggled that setting on again, also, so
that both settings were checked. I could still adjust the window size
as expected. I closed and reopened the application several times
and was still able to adjust the window size, so just toggling the
"Allow the window manager to control the windows" setting off and
then back on seemed to resolve the problem.
[ More Info ]
[/os/unix/linux/wine]
permanent link
Thu, Feb 26, 2026 10:31 pm
Restarting the Windows audio service
If you are experiencing problems with sound on a Microsoft Windows system,
such as being unable to hear audio even when the sound hasn't been muted
and any external speakers are turned on and set to an audible volume level,
one possible way to resolve the problem is to restart the
Windows Audio service. To do so, you can can take the following steps:
- Type
services in
the Windows Search field. You should see it returned by the search
utility. Click on "Run as administrator" and provide the login credentials
for an account that has adminisrator privileges.
- When the Services window opens, scroll
down until you see Windows Audio.
- Right-click on the entry and choose "Restart".
- When the status for the service returns to "Running",
you can close the Services window.
[ More Info ]
[/os/windows]
permanent link
Wed, Feb 25, 2026 11:57 pm
Configuring Sendmail to listen on the mail submission port
Sendmail is an
email server application that is available for many operating systems.
It will listen on
TCP
port 25 for connections from other mail servers that use the
Simple
Mail Transfer Protocol for email transmissions. As
a message
submission agent (MSA), another common port it listens on is TCP port 587
for email transmissions from users' email clients. On a
Linux system you can use the
netstat or
ss
commands to determine if a system is listening for connections on a
particular port. When I checked a Sendmail server to determine whether it
was listening on port 587, I could see that it was not listening on that
port, though that was needed.
# netstat -an | grep 587
# ss -ln | grep ":587 "
#
When I searched /etc/mail/sendmail.mc for
RELAY_MAILER_ARGS, I saw the following
lines, which are needed to have Sendmail listen for email transmissions
from users on TCP port 587, were already present and were not commented out:
define(`RELAY_MAILER_ARGS', `TCP $h 587')
define(`ESMTP_MAILER_ARGS', `TCP $h 587')
When I searched for DAEMON_OPTIONS, I saw the following:
dnl # The following causes sendmail to additionally listen to port 587 for
dnl # mail from MUAs that authenticate. Roaming users who can't reach their
dnl # preferred sendmail daemon due to port 25 being blocked or redirected find
dnl # this useful.
dnl #
dnl DAEMON_OPTIONS(`Port=submission, Name=MSA, M=Ea')dnl
I removed the dnl from the begining of the line so that
I then had the line below, instead:
DAEMON_OPTIONS(`Port=submission, Name=MSA, M=Ea')dnl
I then rebuilt /etc/sendmail/mc and restarted the Sendmail
service.
# m4 /etc/mail/sendmail.mc > /etc/mail/sendmail.cf
# service sendmail restart
Redirecting to /bin/systemctl restart  sendmail.service
#
I could then see that the system was listening for connections on port
587.
[ More Info ]
[/network/email/sendmail]
permanent link
Tue, Feb 24, 2026 4:06 pm
Installing Advanced Diary on a Linux system with Wine
I needed to install Advanced Diary
on an Ubuntu Linux system.
for someone who had been using the program for journaling on a Microsoft Windows
system. I had previously installed
Wine, a program that
allows one to run Windows applications on
Linux,
macOS, and
FreeBSD
systems. I used AdvDiary.sh, which
contains the following lines, to install Advanced Diary:
#!/usr/bin/env bash

set -e

if [ -z "$1" ]; then
  echo "Usage: $0 AdvancedDiarySetup.exe"
  exit 1
fi

INSTALLER="$(realpath "$1")"
PREFIX="$HOME/.wine-advdiary"

echo "Creating 32-bit Wine prefix..."
export WINEPREFIX="$PREFIX"
export WINEARCH=win32
winecfg -v win7 >/dev/null 2>&1 || true

echo "Installing required components (gdiplus, corefonts)..."
winetricks -q gdiplus corefonts

echo "Forcing native GDI+..."
cat > "$PREFIX/user.reg" <<'EOF'
[Software\\Wine\\DllOverrides]
"gdiplus"="native"
EOF

echo "Running Advanced Diary installer..."
wine "$INSTALLER"

echo
echo "✔ Installation complete"
echo "Run with:"
echo "WINEPREFIX=$PREFIX wine \"$PREFIX/drive_c/Program Files/Advanced Diary/Diary.exe\""
To run it, you need to assign "execute" permission to the file, which can be
done in a Terminal
window with chmod + x filename or chmod a+x
filename to make a file executable by all users or
chmod u+x filename to make it executable by just the owner
of the file, i.e., the user.
alice@Wonderland:~/Downloads$ chmod u+x install-advanced-diary.sh
alice@Wonderland:~/Downloads$
When I ran the shell
script .sh file, I realized I hadn't installed
Winetricks beforehand, so I installed it with
sudo apt install winetricks after running the script.
I then reran the installation script for Advanced Diary. The installation
completed successfully — I selected the option to have the program
opened automatically at the conclusion of the installation — and it
appeared to open normally (I had to press Enter in the terminal
window to return to the shell prompt).
[ More Info ]
[/os/unix/linux/wine]
permanent link
Mon, Feb 23, 2026 10:05 pm
Determining if a drive is encrypted with Bitlocker on a Windows system
If you need to determine if a drive in a Microsoft Windows system or connected
to it via USB is
BitLocker encrypted, you
can use the
manage-bde utility. To use the program, open a
command prompt window with
administrator privileges and then issue the command
manage-bde -status to see the status of all drives. To see just
the status of one drive, e.g., C:, you could use manage-bde -status
C:.
C:\Windows\System32>manage-bde -status c:
BitLocker Drive Encryption: Configuration Tool version 10.0.26100
Copyright (C) 2013 Microsoft Corporation. All rights reserved.

Volume C: [Windows]
[OS Volume]

    Size:                 14826.87 GB
    BitLocker Version:    None
    Conversion Status:    Fully Decrypted
    Percentage Encrypted: 0.0%
    Encryption Method:    None
    Protection Status:    Protection Off
    Lock Status:          Unlocked
    Identification Field: None
    Key Protectors:       None Found


C:\Windows\System32>
[ More Info ]
[/os/windows/commands]
permanent link
Sun, Feb 22, 2026 3:38 pm
Running the Big Fish Games Manager on an Ubuntu system
You can run the Big
Fish Games Game Manager on an
Ubuntu Linux system
under Steam.
You can install Steam as a
Snap package
from the Ubuntu App Center.
Steps:
-
Download the Big Fish Games App (Game Manager) for PC
-
In Steam on the Ubuntu system, click on Add a Game, which is
at the lower, left-hand corner of the Steam window, then
select Add a Non-Steam Game, then browse to where you downloaded
the .exe installer for the game manager, click on it, and then
click on Add Selected Programs.
-
You should then see the Big Fish Game Manager in the "Uncategorized" list
of games at the left side of the Steam window, e.g., you may see
bfginstaller32_s1_l1.exe listed. Right-click on it and then select
Properties, then Compatibility, and then, from the
drop-down list that becomes available, select Proton Experimental
or the latest stable version — I selected Proton Experimental.
-
You can then close the Compatibility window by clicking on the
"X" at the upper, right-hand corner.
-
Then with the Big Fish Game Manager selected in the Uncategorized
list, click on the Play button to launch the Big Fish Game Manager
Setup and agree to the License Agreement when you see it appear.
When I started the install process, the installation appeared to hang at
"Execute: C:\Program Files (x86)\bfglient\epoch.exe". When I clicked on the
title bar for the window, I saw "About Wine", so it appeared to be using
Wine, which I had
previously installed on the Ubuntu system.
But I waited and eventually the installation succeeded, though I think it
took over 15 minutes. I closed the window and then went back to the
Steam window, I saw bfginstaller32_s1_l1.exe was still there. This time
when I clicked on it, the Big Fish window where I could sign in to Big
Fish Games opened fairly quickly.
Note: if the window goes blank or displays just a white background,
minimize it by clicking on the "-" in the upper, right-hand corner of
the Big Fish window and then switch to it again, which you can do with
Alt+Tab — continue to press the Tab key while
continuing to hold down the Alt key to cycle between open open
windows until you get to the Big Fish window.
Initially, you will see "No games to play," but if you have already
purchased games that you've played on another system, you can click
on Purchase History and install them on the Linux system.
When I installed the Big Fish Games Manager under Steam, I had my wife
check one of her games, Aquascapes, and that ran fine. I then closed
the Big Fish window and the Steam window and reopened it. Note: if
you want to change the name that appears for Big Fish Games in the
Uncategorized list, you can right-click on the entry, e.g.,
bfginstaller32_s1_l1.exe, and choose Properties and then change
the "Shortcut" value to something you prefer, such as "Big Fish Games".
When I reopened Steam and started Big Fish Games, I saw the Aquascapes
game under "My Games".
[ More Info ]
[/os/unix/linux/ubuntu]
permanent link
Sat, Feb 21, 2026 10:37 pm
Mounting a network drive under Ubuntu Linux
To access a directory that is shared from a Microsoft Windows system in a
Windows domain, you
can take the following steps on a
Ubuntu Linux system.
Note: you will need to have a package installed that provides
Server Message
Block (SMB) support. If the libsmclient0 package is installed, you should be
able to use these steps. You can check if it is installed by opening
a Terminal window and
issuing the command dpkg -s libsmbclient0.
If it is not installed, you can install it with sudo apt install
libsmbclient0.
alice@Wonderland:~$ dpkg -s libsmbclient0
Package: libsmbclient0
Status: install ok installed
Priority: optional
Section: libs
Installed-Size: 259
Maintainer: Ubuntu Developers <ubuntu-devel-discuss@lists.ubuntu.com>
Architecture: amd64
Multi-Arch: same
Source: samba
Version: 2:4.22.3+dfsg-4ubuntu2.2
Replaces: libsmbclient
Provides: libsmbclient (= 2:4.22.3+dfsg-4ubuntu2.2)
Depends: samba-libs (= 2:4.22.3+dfsg-4ubuntu2.2), libbsd0 (>= 0.0), libc6 (>= 2.38), libndr6 (>= 2:4.17.2), libtalloc2 (>= 2.0.4~git20101213), libtevent0t64 (>= 0.15.0)
Breaks: libsmbclient (<< 2:4.22.3+dfsg-4ubuntu2.2)
Description: shared library for communication with SMB/CIFS servers
 This package provides a shared library that enables client applications
 to talk to Microsoft Windows and Samba servers using the SMB/CIFS
 protocol.
Homepage: https://www.samba.org
Original-Maintainer: Debian Samba Maintainers <pkg-samba-maint@lists.alioth.debian.org>
alice@Wonderland:~$
[ More Info ]
[/os/unix/linux/ubuntu]
permanent link
Fri, Feb 20, 2026 11:01 pm
Clearing the cache for a webpage displayed in Firefox
I had opened an
HTML file
in the
Firefox browser
and needed to refresh the display of the file, which was using a
CSS file located on a
remote web server, after the remote CSS file had changed. Clicking on
the refresh/reload button on the Firefox navigation bar or pressing the
F5 key would show changes I made to the local file, but would not
reflect changes to the remote CSS file, which was
cached
on the local system's disk drive.
You can remove a cached
CSS
for a specific webpage by performing a forced reload of that webpage.
A forced reload tells Firefox to ignore the cached files and download fresh
copies from the server. The keyboard shortcut, which works on Linux, is to
hold down Ctrl + Shift + R or Ctrl + F5. Alternatively, you can hold
the Shift key and click the Reload button on the navigation toolbar.
This is usually the quickest solution for a single page.
[/network/web/browser/firefox]
permanent link
Thu, Feb 19, 2026 9:43 pm
Listing all accounts on an Ubuntu Linux system
If you need to list all of the accounts on an
Ubuntu Linux system, there
are many commands that you can use.
cat /etc/passwdgrep -oE '^[^:]+' /etc/passwd - for just the account namescut -d: -f1 /etc/passwd - for just the account namesawk -F: '{print $1}' /etc/passwd - for just the account names
lsloginscompgen -u - for just the accunt namesgetent passwd
[ More Info ]
[/os/unix/linux/ubuntu]
permanent link
Wed, Feb 18, 2026 4:01 pm
Determining the amount of memory in a system running Ubuntu Linux
If you need to determine the amount of memory in a system that is running
the Ubuntu Linux
operating
system (OS), you can open a
Terminal
window from the App Center and then use the free command.
If you use the command without any options, you will see the amount
of memory displayed in
bytes. To display the value in a more human-friendly format, you
can add the argument -h or --human, e.g.,
to see the value in
gigabytes.
alice@firefly:~$ free -h
               total        used        free      shared  buff/cache   available
Mem:            14Gi       2.4Gi        10Gi       426Mi       2.3Gi        12Gi
Swap:          4.0Gi          0B       4.0Gi
alice@firefly:~$
Other options for the command are shown below:
jim@Serenity:~$ free --help

Usage:
 free [options]

Options:
 -b, --bytes         show output in bytes
     --kilo          show output in kilobytes
     --mega          show output in megabytes
     --giga          show output in gigabytes
     --tera          show output in terabytes
     --peta          show output in petabytes
 -k, --kibi          show output in kibibytes
 -m, --mebi          show output in mebibytes
 -g, --gibi          show output in gibibytes
     --tebi          show output in tebibytes
     --pebi          show output in pebibytes
 -h, --human         show human-readable output
     --si            use powers of 1000 not 1024
 -l, --lohi          show detailed low and high memory statistics
 -L, --line          show output on a single line
 -t, --total         show total for RAM + swap
 -v, --committed     show committed memory and commit limit
 -s N, --seconds N   repeat printing every N seconds
 -c N, --count N     repeat printing N times, then exit
 -w, --wide          wide output

     --help     display this help and exit
 -V, --version  output version information and exit

For more details see free(1).
jim@Serenity:~$
Note:The
free command in Linux shows the total amount of installed physical memory in the total column, but this value is less than the actual hardware
random-access
memory (RAM) installed because the Linux
kernel
reserves a portion of memory for itself and for hardware devices (like video
card buffers) at boot time. The total shown is the usable RAM available to the
OS, not the absolute hardware total.
[
More Info ]
[/os/unix/linux/ubuntu]
permanent link
Tue, Feb 17, 2026 1:53 pm
Adding and removing users from the sudoers list on an Ubuntu Linux system
On a Ubuntu Linux system,
you can determine which users are allowed to use the
sudo command by looking
at the contents of the /etc/group file. If you
grep for sudo
you will see which accounts on the system can use the command.
jack@firefly:~$ grep sudo /etc/group
sudo:x:27:jack,jill@ad.example.com
jack@firefly:~$
The above output shows that the local jack account and a
Windows domain
account, jill@ad.example.com, can use the command.
You can see what groups a particular user belongs to with the command
groups username, where username is the user's
account name.
jack@firefly:~$ groups jill@ad.example.com
jill@ad.example.com : domain users@ad.example.com ra_allowmediaaccess@ad.example
.com ra_allowcomputeraccess@ad.example.com ra_allowaddinaccess@ad.example.com ra
_allowshareaccess@ad.example.com ra_allowremoteaccess@ad.example.com wssusers@ad
.example.com ra_allowvpnaccess@ad.example.com ra_allowhomepagelinks@ad.example.c
om
jack@firefly:~$ groups jack
jack : jack adm cdrom sudo dip plugdev users lpadmin
jack@firefly:~$
You can also determine if a user has sudo privilege using
groups username | grep -c sudo. If the result is 0, then
the user does not have that privilege. If the result is 1, inciding that
the grep command found username one in the output of the groups command,
then the user has that privilege.
jack@firefly:~$ groups jill@ad.example.com | grep -c sudo
1
jack@firefly:~$
You can grant a user that privilege by issuing the command
sudo usermod -aG sudo username from an account that already
has the capability to run the sudo command.
jack@firefly:~$ sudo usermod -aG sudo mary
[sudo: authenticate] Password:
jack@firefly:~$
You can remove a user's account from the list of those allowed to run
the command using the
gpasswd
command, which is part of the sysutils package by issuing the command
sudo gpasswd -d username sudo.
jack@firefly:~$ sudo gpasswd -d mary sudo
Removing user mary from group sudo
jack@firefly:~$ groups mary | grep -c sudo
0
jack@firefly:~$
[ More Info ]
[/os/unix/linux/ubuntu]
permanent link
Sun, Feb 15, 2026 8:49 pm
Putting the current date into a text variable in YYMMDD format in Python
To obtain the current date in Python and put it into a text variable in
YYMMDD format, you can use the
datetime module and
the
strftime() method.
Python Code:
from datetime import date

# Get today's date as a date object
today = date.today()

# Format the date into a string variable in YYMMDD format
# %y gives the two-digit year, %m gives the zero-padded month, and %d gives the # zero-padded day formatted_date_string = today.strftime("%y%m%d")

# Print the result (optional, for verification)
print(f"Today's date in YYMMDD format: {formatted_date_string}")
Steps:
from datetime import date:
This line imports the date class from the built-in
datetime module, which is necessary to work with dates
in Python.today = date.today(): This uses the
today() method to get the current local date as a date
object.today.strftime("%y%m%d"):
The strftime() method is then applied to the
today object to format it into a string. The format
string uses specific directives:
%y: Represents the year without the century
(e.g., 26 for 2026).%m: Represents the month as a zero-padded
decimal number (e.g., 02 for February).%d: Represents the day of the month as a
zero-padded decimal number (e.g., 15 for the
15th).
The resulting string, stored in formatted_date_string,
will look like 260215 (for February 15, 2026)
[/languages/python]
permanent link
Sat, Feb 14, 2026 7:02 pm
Changing the time zone on a Microsoft Windows system from the command line
The timezone on a Microsoft Windows system can be changed from the
command line
by
opening a command prompt window
with administrator privileges and then typing
timedate.cpl and
hitting
Enter, which opens a window where you can alter the
timezone or you can use the
tzutil utility to
change the time zone using a command of the form
tzutil /s
"TimeZone"
where
TimeZone is the appropriate time zone
identifier, e.g.,
tzutil /s "Eastern Standard Time".
[ More Info ]
[/os/windows/commands]
permanent link
Fri, Feb 13, 2026 9:45 pm
Installing OpenSSH Server software on a Windows 10 system with PowerShell
OpenSSH Server for
Windows 10 requires at
least Windows 10 (build 1809).
You can determine the build number for Windows 10 by typing winver
in the Windows "Type here to search" field at the bottom of the screen or
at a
PowerShell prompt. Or
you can use the
systeminfo utility and pipe it's output into the
findstr command, filtering
on the line that has "OS" at the beginning of the line and also "Version" in
the line.
PS C:\> systeminfo | findstr -B "OS" | findstr "Version"
OS Version:                10.0.19045 N/A Build 19045
PS C:\>
The SSH Client software may already be installed. You can determine if
it is already installed by opening a PowerShell prompt and typing
ssh. If it is installed, as it was on the Windows 10 Professional
Version 22H2 (OS Build 19045.6466) system on which I wanted to set up
the OpenSSH Server software, you will see a response like the following one:
PS C:\> ssh
usage: ssh [-46AaCfGgKkMNnqsTtVvXxYy] [-B bind_interface] [-b bind_address]
           [-c cipher_spec] [-D [bind_address:]port] [-E log_file]
           [-e escape_char] [-F configfile] [-I pkcs11] [-i identity_file]
           [-J destination] [-L address] [-l login_name] [-m mac_spec]
           [-O ctl_cmd] [-o option] [-P tag] [-p port] [-Q query_option]
           [-R address] [-S ctl_path] [-W host:port] [-w local_tun[:remote_tun]]
           destination [command [argument ...]]
PS C:\>
[ More Info ]
[/os/windows/network/ssh/OpenSSH]
permanent link
Sun, Feb 08, 2026 4:29 pm
Checking an NVMe drive's status in Ubuntu Linux with nvme-cli
You can check the health of a
NVM Express (NVMe)
drive on an Ubuntu Linux
system using the nvme-cli
command-line
interface (CLI) application. The description for the package is as follows:
NVMe management command line interface
nvme-cli is a NVMe management command line interface. NVM Express™
(NVMe™) is a specification defining how host software communicates with
non-volatile memory across a PCI Express® (PCIe®) bus. It is the industry
standard for PCIe solid state drives (SSDs) in all form factors (U.2,
M.2, AIC, EDSFF).
You can install nvme-cli throught the App Center on a Ubuntu Linux
system.
[ More Info ]
[/os/unix/linux/ubuntu]
permanent link
Fri, Feb 06, 2026 3:36 pm
Downloading YouTube videos on a Windows system with yt-dlp
YouTube recently
changed its website (around January 4, 2026) so that programs that worked in
the past for downloading YouTube videos, such as
StreamFab,
no longer work. My wife and I like to archive YouTube videos we find that
have useful information we might wish to refer to again in the future,
since we've sometimes found that when we try to view them again on
YouTube that a channel where they were posted has disappeared along with
all its videos. We have a YouTube premium subscription, which allows
one to download videos, but they are stored in a blob file where they
are not accessible to programs we use to view videos and there is no
guarantee they will remain accessible even in YouTube's limited offline
viewing method when a channel disappears. So we were very perturbed that
YouTube has now made it very difficult to archive videos. StreamFab has been
working very well for my wife and is easy to use, but I needed to look
for an alternative for her. A couple of sites that still work that
allow one to download YouTube videos are listed below, but downloading
through those websites is slower and she found that for fairly large
videos the downloads would fail.
https://ytdown.to/en2/
https://v6.www-y2mate.com/
Since I had WinPython, a
free and
open-source version of the
Python programming language installed on a Windows laptop and she is
using a Windows 11 system at the moment, though she wants to switch to
Linux, I decided to try
the yt-dlp
Python program that allows one to download YouTube videos from a
command-line
interface (CLI).
[ More Info ]
[/video/youtube]
permanent link
Mon, Feb 02, 2026 10:07 pm
Adding the capability to save webpages as a single file to Firefox
The
Firefox
web browser does not have the capability to save the
contents of a webpage to a single file, such as an
MHTML file,
which is a web archive file format that allows one to save
the
HTML
code, images etc. on a webpage into a single file.
Though the capability is absent from Firefox, you can add the
functionality of saving a page to a single file by installing
Save
Page WE, an
add-on for Firefox by
DW-dev.
The
extension provides the capability to "Save a complete web page
(as currently displayed) as a single HTML file that can be opened
in any browser. Save a single page, multiple selected pages or
a list of page URLs. Automate saving from command line." The
saved file is not an MHTML file, or one of the other common
web
archiving file formats, but it is a single HTML file that Firefox
and other browsers can read. Save Page WE is implemented using the
WebExtensions API and is available for both Firefox and
Chrome with
identical functions and user interfaces.
[ More Info ]
[/network/web/browser/firefox]
permanent link
Sun, Feb 01, 2026 3:27 pm
Viewing Payment Details for a Loan in the Desktop Version of Quicken
If you automatically update a loan's balance by downloading transactions
from a bank's website, when you click on "Payment Details" in the Windows
Classic Business & Personal desktop version of Quicken, you won't
be able to actually view details on payments, such as the amount of
principal and interest paid for each transaction. You can change the loan
account's settings in Quicken to stop automatically updating the account
by right-clicking on the account and then selecting "Edit/Delete account"
then clicking on the "Online Services" tab and then clicking on the
"Deactivate" button in the online setup portion of the window. When asked
"Would you like to deactivate this service?", click on "Yes". You can
then close the "Account Details" window. Then, when you choose "Payment
Details", you should see the individual transactions for the account and
you will be able to modify the opening balance, principal and interest
for payments, if needed. If you then want to transfer money from another
account, such as a checking account, as a payment on the loan, you may
not see the account listed as one of the transfer options in the dropdown
list for transfers, but if you type the account name in the Category field
exactly as it appears in the account list and then hit the
Tab
key, the amount you specify will be transferred to the loan account.
[/financial]
permanent link
Wed, Jan 28, 2026 2:57 pm
Masquerading a "from" address with sendmail
Many years ago, I distributed email to the mailing list for an
organization through my email server. The person who sent out a monthly
newsletter to the members of the organization had a Verizon email address
and would send the newsletter via my server running
Sendmail, which would
then send the mail onwards to the organization's members. Since my server
wasn't a designated email server for verizon.net addresses, I configured
Sendmail to change the "from" domain to my server's domain name, moonpoint.com,
so the sending address wouldn't be johnslartibartfast444@verizon.net but would
be johnslartibartfast444@moonpoint.com; otherwise many recipients' email
servers would reject the email since it didn't come from an email server
designated to send email for verizon.net users. I put the following lines in
/etc/mail/sendmail.mc (the last two lines are the ones I added to the
Masquerade section of the file):
dnl # The following example makes mail from this host and any additional
dnl # specified domains appear to be sent from mydomain.com
dnl #
dnl MASQUERADE_AS(`mydomain.com')dnl
dnl #
dnl # masquerade not just the headers, but the envelope as well
dnl #
dnl FEATURE(masquerade_envelope)dnl
dnl #
dnl # masquerade not just @mydomainalias.com, but @*.mydomainalias.com as well
dnl #
dnl FEATURE(masquerade_entire_domain)dnl
dnl #
dnl MASQUERADE_DOMAIN(localhost)dnl
dnl MASQUERADE_DOMAIN(localhost.localdomain)dnl
dnl MASQUERADE_DOMAIN(mydomainalias.com)dnl
dnl MASQUERADE_DOMAIN(mydomain.lan)dnl
MAILER(smtp)dnl
MAILER(procmail)dnl
dnl MAILER(cyrusv2)dnl
MASQUERADE_DOMAIN(`verizon.net')dnl
MASQUERADE_AS(`moonpoint.com')dnl
After I edited the sendmail.mc file, I rebuilt the sendmail.cf
file by restarting sendmail with the command service sendmail
restart , which put the following line in sendmail.cf:
C{M}verizon.net
The person who was sending the newsletter died several years ago
and I took over maintaining the membership list for the organization as
well as distributing the email version of the newsletters to members.
Though the account from which the newsletter is sent is intended to be
used only for sending the newsletter and members are advised to send an
email related to the organization to the organization's Gmail email addresses,
occasionally members will reply directly to the "from" address used for
the newsletter. When checking the account for that address, I found that someone
with a verizon.net address had sent a reply to the account, but if I replied
my reply would go not to his verizon.net address, but to his email name
followed by my domain name, which would result in the email bouncing since
that address would not be a valid address on my server. I corrected the
problem by removing the two MASQUERADE lines in sendmail.mc that resulted
in the change to the domain name part of email addresses if any email
came from a verizon.net address and then restarted sendmail, which resulted
in the C{M}verizon.net line being removed from sendmail.cf.
The sendmail.mc file is a human-readable macro configuration file, while the sendmail.cf file is the more complex configuration file actually used by the
Sendmail message
transfer agent (MTA). The .mc file serves as the source, which is processed
by the m4
macro to generate the final, often uncommented sendmail.cf file used by
sendmail. The command m4 /etc/mail/sendmail.mc > /etc/mail/sendmail.cf
can be used to rebuild the .cf configuration file after one makes
changes to the sendmail.mc file, but the changes won't take effect until
sendmail is restarted. Or, on many newer versions of the Linux operating
system, one can simply restart sendmail and a new .cf file will be
automatically generated and applied to sendmail, if any changes have been made
to the .mc file
References:
-
18.4. The sendmail.cf and sendmail.mc Files
Linux Network Administrators Guide
Related articles:
-
Modifying the "from" domain of a message with sendmail
Date: June 1, 2018
[/network/email/sendmail]
permanent link
Sun, Jan 18, 2026 4:51 pm
Installing Calibre on Ubuntu Linux
I installed Calibre
8.8.0 on a Ubuntu Linux
system through the Ubuntu App Center (I had to filter by Debian packages
rather than by Snap
packages in the App Center to see Calibre packages as there isn't a Snap
package for the
software). But when I checked to see if that was the latest version on the
Calibre website, I found the latest version is 8.16.2. Also, the
Calibre Download for
Linux page states "Please do not use your distribution provided
calibre package, as those are often buggy/outdated. Instead use the
Binary install described below." So I uninstalled the version I installed and
then reinstalled the software using the command provided on that
Calibre webpage, sudo -v && wget -nv -O-
https://download.calibre-ebook.com/linux-installer.sh | sudo sh
/dev/stdin - a command that can be run on any version of Linux.
[ More Info ]
[/ebook/calibre]
permanent link

Privacy Policy
Contact