Could not initialise OpenGL support
I downloaded a YouTube
video on a Ubuntu Linux
with yt-dlp.
When I tried to view the downloaded
WebM file with the default
video application, Videos, also known as Totem, which is an application for
playing videos that is provided with Ubuntu, I saw the message below:
Ⓧ
An error occurred
Could not initialise OpenGL support
OK
When I opened the video with
VLC, which I had
previously installed, I heard audio, but no video was displayed. I checked
to see if the Nvidia
driver was up-to-date since the system had an Nvidia graphics card, but they
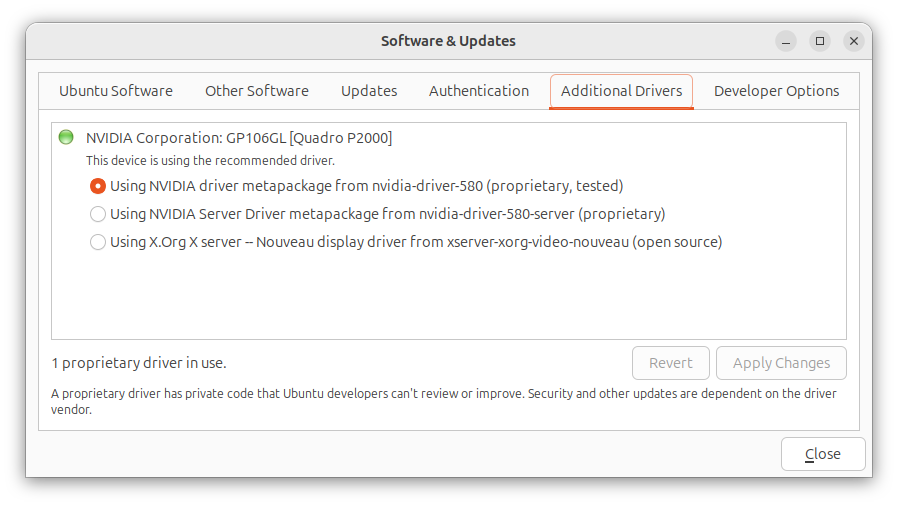
were up-to-date. You can check that by clicking on the Show Apps
button at the lower-right-hand corner of the screen Ubuntu desktop. Then type
Software Updates in the "Type to search" field. Click on
Software & Updates and then click on the Additional
Drivers.
To resolve the problem, I added the following line to the
/etc/environment file with a
text editor:
GDK_GL=gles
When I rebooted the system, I was then able to view the video with
the default Videos application, though when I tried playing it in
VLC I could hear audio, but did not see video.
[/os/unix/linux/ubuntu]
permanent link
No video shown when playing a WebM file in VLC
When I tried to play a
YouTube video I
downloaded as a WebM file
using
yt-dlp on an Ubuntu
Linux system in the
VLC media player application, I could hear the audio, but no video
was shown. I tried opening a few other .webm videos and found I was able
to view the video in some, but not others, though I was able to view
the video and hear the audio in all the .mp4 and .mkv files. I tried
changing the video output setting from "Automatic" to "OpenGL video
output" and then "XVideo output (XCB)", which you can do by clicking on
Tools, then Preferences, then Video, and then
selecting those options from the dropdown list next to Output, but
neither of those options resolved the problem, so I reset Output
to Automatic. I was able to resolve the problem by taking the
following steps, though:
-
In the VLC program, click on Tools and then select
Preferences.
-
Click on Input/Codecs and change the hardware-accelerated
decoding setting by clicking on the downward arrowhead next to
Automatic, which will be the setting if the default setting is
in effect.
-
Change the setting to Disable and then click on Save.
When I checked the Codec
information for the file where I could not view the video before disabling
the hardware-accelerated decoding setting, which you can do by opening
an audiovisual
(AV) file in VLC and then selecting Tools and Codec
Information, I saw the video codec was AOMedia's AV1 Video
(av01). When I checked the video codec for another WebM file where
the video wasn't visible in VLC, I saw it was also the AOMedia's AV1
Video (av01) codec. Checking the video codec for .webm files where
I could view the video, I saw Google/ON2's VP9 Video (VP90)
for some and H264 - MPEG-4 AVC (part 10) (avc1) for another.
Note: you can also determine the codecs used in a file using the
mediainfo utility, which you can install on an Ubuntu system with
sudo apt-get install mediainfo. You can check on whether
it is already installed using the command which mediainfo,
which would show the location of the mediainfo executable file if the
application was installed, or you can use dpkg -s mediainfo,
which will show details on the mediainfo package if it is installed.
[/software/audio_video/VLC]
permanent link

