←March→
| Sun |
Mon |
Tue |
Wed |
Thu |
Fri |
Sat |
| |
|
|
|
|
1 |
2 |
| 3 |
4 |
5 |
6 |
7 |
8 |
9 |
| 10 |
11 |
12 |
13 |
14 |
15 |
16 |
| 17 |
18 |
19 |
20 |
21 |
22 |
23 |
| 24 |
25 |
26 |
27 |
28 |
29 |
30 |
| 31 |
|
|
|
|
|
|
|
|
Sun, Mar 31, 2013 6:08 pm
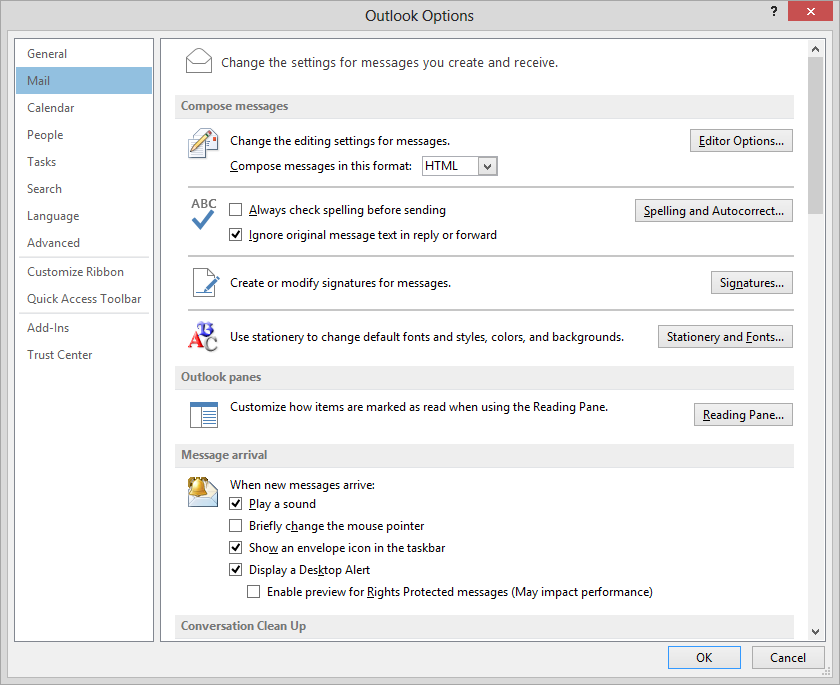
Turning Off Outlook's New Mail Alerts
To turn off Outlook's popup alerts telling you that new mail has arrived,
take the following steps in Outlook:
- Click on File.
- Click on Options.
- Click on Mail.
- Under Message arrival, clear the
checkbox for Display a Desktop Alert.
Applies to Outlook 2010 to 2013
References:
-
Turn on or off new message alert pop-up window
Office.com
[/os/windows/office/outlook]
permanent link
Fri, Mar 22, 2013 10:15 pm
Missing IMAP Folders in Thunderbird
Thunderbird was
not showing some folders listed for an email account on
an an
IMAP server.
In order to get them to display on the PC on which I was running
Thunderbird 17.0.4, within Thunderbird I clicked on
File, then
selected
Subscribe. I then saw a folder list with "Select the
folders to subscribe to" displayed above the folders on the IMAMP server
for the account. I checked the boxes to the right of the ones that weren't
displaying. For some folders that had subfolders, I had to click on the
rightward pointing arrowhead to the left of the folder to display the
subfolders and their checkboxes.
[/network/email/clients/thunderbird]
permanent link
Wed, Mar 06, 2013 6:42 pm
Adding Live365 to Online Services in Winamp 5.63
I installed
WinAmp 5.63 on a family
member's Windows 8 system She wanted to add
Live365 as a service to it. I had written
instructions for doing that for Winamp 5.552 previously at
Adding Live365 to WinAmp's
Online Services List. I found that I had to modify the procedure
slightly for Winamp 5.63. I found
ml_online.ini was now
in
C:\Users\Username\AppData\Roaming\Winamp\Plugins\ml where
Username was the user's account name.
The
ml_online.ini file contained the following lines:
[Setup]

[ml_online_config]

maxbandwidth=350

minbandwidth=1

[Navigation]

order=10100;221836;222078;222150;222427;222509;222542;22259
Beneath the
C:\Users\Username\AppData\Roaming\Winamp\Plugins\ml
directory was an omServices subdirectory with files named
omService_{0000xxxxxx}.ini where xxxxxx was a sequence of
digits, e.g., omService_{0000221836}.ini, which had the
following lines in it.
[OnlineService]

id=221836

name=Song of the Day

url=http://www.spinner.com/winamp-mp3-of-the-day

icon=http://download.nullsoft.com/customize/component/2009/1/22/W/icon_image/Mp3_of_the_Day.png

flags=0x00000001

version=3

generation=2
I put a
365.png file to serve as an icon in
C:\Users\Username\AppData\Roaming\Winamp\Plugins\ml\omServices and created a
file omService_{0000000365}.ini and put the following lines
in it.
[OnlineService]

id=000365

name=Live365

url=http://www.live365.com

icon=live365.png

flags=0x00000001

version=1

generation=1
When I did so and reopened Winamp, I found that the
ml_online.ini had 365 added to the
order line as shown below:
[Setup]

[ml_online_config]

maxbandwidth=350

minbandwidth=1

[Navigation]

order=10100;221836;222078;222150;222427;222509;222542;222598;222598;365
Live365 was then at the bottom of the list of online services in WinAmp.
[/os/windows/software/audio/winamp/live365]
permanent link
Wed, Mar 06, 2013 4:44 pm
Closing Windows 8 Metro Applications
When you open a Windows 8
Metro
app, there is no immediately apparent way to close the application
when you are done with it. You won't see an "x" at the upper, right-hand corner
of Metro applications windows and Moving the mouse pointer to the corners of
the window doesn't show a way to close it. You can close the application
by hitting Alt-F4, i.e., by hitting the
Alt and
F4 keys
simultaneously.
An alternative method of closing one of the applications is to hit
Ctrl-Alt-Del to bring up the Windows Task Manager and then
select the application to close by clicking on it and then choosing End
Task.
References:
-
How to close Windows 8 apps, and how to disable SmartScreen
By Sebatian Anthony
Date: November 15, 2012
ExtremeTech
[/os/windows/win8]
permanent link
Wed, Mar 06, 2013 4:11 pm
Personalizing Windows 8
To change the background that appears on a Windows 8 system when the
system is locked, i.e., when it is waiting for you to enter the userid
and password, you can follow the steps below. By default, the system
shows a stylized image of the Seattle Tower in Seattle, Washington in the
U.S.
-
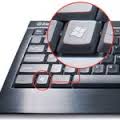
Hit the Windows key and
the I key simultaneously. The Windows key is the one with a Windows
logo on it normally at the lower, left-hand corner of the keyboard as shown
below:
-
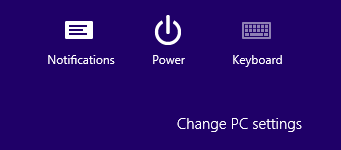
Then select "Change PC Settings" which will be at the bottom of the panel
that opens on the right of your screen.
-
With Personalize selected and Lock screen highlighted at
the top of the window, you can then
pick one of the other 5 images shown below the one for the Seattle Tower,
or click on Browse to select another image of your choosing. Click
on Choose Picture when you find the one you wish to use.

If you wish to change the picture that appears for your account, you can
follow the same procedure as above, but choose Account picture,
instead of Lock screen. An image can be displayed as a small
96 x 96 pixel image, a large 448 x 448 pixel image, or a video
(dynamic image) - see
Guidelines for user names and account pictures (Windows).
You can also change the Start Screen colors by choosing
Start screen.
[/os/windows/win8]
permanent link
Wed, Mar 06, 2013 2:59 pm
Copying Windows 7 Themes to a Windows 8 System
To copy the
themes that someone downloaded to her Windows 7 system to
her new Windows 8 system, I located the
.themepack files on
the Windows 7 system, which I found in
C:\Users\Username\AppData\Local\Temp, where
Username was the name for her account on the Windows 7 system.
Then on her Windows 8 system, I just double-clicked on each Windows Theme
Pack file to install it on the new system.
[/os/windows/win8]
permanent link
Wed, Mar 06, 2013 12:43 pm
Adding a Link to a Website to the Windows 8 Start Screen
If you wish to add a shortcut to the Windows 8
Start Screen
so that you can click on an icon on the Start Screen to go to the
URL for a website, you can
do so by taking the following steps using Internet Explorer 10.
-
Go to the website in Internet Explorer.
-
Click on Tools. If you don't see the Tools menu, hit the
Ctrl and T keys simultaneously to bring up the Tools
menu.
-
Select Add site to Start Screen.
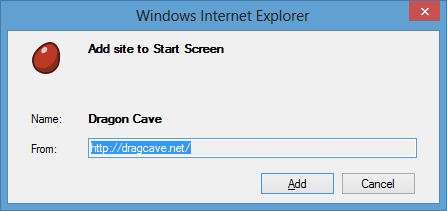
-
A Windows Internet Explorer window will open showing the
name that will be used for the item to be added to the Start Screen with
the URL in the From field. Click on Add to add the
site to the Start Screen.
References:
-
How to Pin a Website (Windows)
Microsoft Developer Network
[/os/windows/win8]
permanent link
Sun, Mar 03, 2013 9:59 pm
MUSHclient 4.84 Help Function for Windows 8
I installed
MUSHclient 4.84,
which is a free program for accessing a
MUSH server from a Microsoft Windows system on a Windows 8 system.
Afterwards, when I tried the "help" function, I saw the following:
The Help for this program was created in Windows Help format, which depends on
a feature that isn't included in Windows 8 or Windows RT. For more info, go to
the
Microsoft Support website.
At
I cannot open Help that was created in the Windows Help format
(WinHlp32.exe), there are download links for Windows Help program
(WinHlp32.exe) for various versions of Windows. The one for Windows 8
is at
Windows Help program (WinHlp32.exe) for Windows 8.
After installing
Windows
Help program (WinHlp32.exe) for Windows 8, I was able to use the
Help function in MUSHclient without even needing to restart the
program.
The same issue exists when MUSHclient is installed on Windows 7 - see
Windows Help Under Windows 7.
[/gaming/mushclient]
permanent link
Sun, Mar 03, 2013 8:48 pm
Sending a Test Message When Setting Up Outlook 2013
While setting up a
POP3 account
for a user using Microsoft Outlook 2013, I received the message below when
I clicked on
Test Account Settings:
Send test e-mail message: An unknown error occurred, error code: 0x800c8101
I found a June 18, 2012 posting by
CharlieBrady at
Email configuration who stated the problem can occur because there
is a bug in Outlook 2013's "test email" function.
Unfortunately, this is what you should expect to see. Outlook has a bug
in its "test email" function. It sends a test message with an illegal
format - it has no "Date" header. This is documented in the wiki:
http://wiki.contribs.org/Email#Outlook_test_message_doesn.27t_come_through
SME server does not accept those illegal messages, as such messages are usually spam. Legitimate mail clients do not generate such messages.
So I unchecked "Automatically test account settngs when Next is clicked"
and proceeded to complete the setup of the email account for the user.
After it was set up, I sent an email using Outlook 2013 from the account to
two other addresses, one outside the user's email server, which uses
Sendmail to send email,
and verified that both were received.
[/os/windows/office/outlook]
permanent link
Sun, Mar 03, 2013 8:45 pm
Outlook 2013 Incompatible with Exchange 2003
When trying to set up Microsoft Outlook 2013 for a user to use a Microsoft
Exchange 2003 server, I received the following message:
The resource that you are trying to use is located on an unsupported
version of Microsoft Exchange. Contact your e-mail administrator for
assistance.
That was followed by the message below:
Cannot start Microsoft Outlook. Cannot open the Outlook window. The
set of folders cannot be opened. The file
C:\Users\JDoe\AppData\Local\Microsoft\Outlook\JDoe@example.com.ost
is not an Outlook data file (.ost).
At
Office 2013 known issues, I found the following:
Workaround Outlook 2013 isn't supported on Exchange 2003 and connectivity is blocked. Please connect Outlook 2013 to Exchange 2007, 2010, or 2013.
[/os/windows/office/outlook]
permanent link
Sun, Mar 03, 2013 7:01 pm
Adding a Tile to the Windows 8 Start Screen
If you wish to add a tile to the Microsoft Windows 8 Start Screen, you can
do so by clicking on the
Start button which will appear at the lower,
left-hand corner of the screen when you move the mouse there, and then
typing the name of the application you wish to add or by right-clicking on
an empty area of the desktop and then clicking on
All Apps when
it appears at the lower, right-hand corner of the screen, which will show
all applications. Once you see the application you wish to add to the Start
Screen, right-click on it and select
Pin to Start. The item
will then appear on the Start Screen at the end of the entries when you
scroll to the right. If you wish to add it to a particular group of tiles you
can drag it to an existing group or create a new group by following
the instructions at
Creating Application Groups in Windows 8.
References:
-
Quick Tip: Create a tile on the Windows 8 Start Screen
Date: November 21, 2012
By Mark Kaelin
TechRepublic - A Resource for
IT Professionals
[/os/windows/win8]
permanent link

Privacy Policy
Contact

