←November→
| Sun |
Mon |
Tue |
Wed |
Thu |
Fri |
Sat |
| |
1 |
2 |
3 |
4 |
5 |
6 |
| 7 |
8 |
9 |
10 |
11 |
12 |
13 |
| 14 |
15 |
16 |
17 |
18 |
19 |
20 |
| 21 |
22 |
23 |
24 |
25 |
26 |
27 |
| 28 |
29 |
30 |
|
|
|
|
|
|
Thu, Nov 11, 2010 9:27 am
Zooming In and Out on a Webpage
If you are using Internet Explorer 8 and find a webpage hard to read,
because the text appears too small, you can "zoom in" on the webpage,
i.e., enlarge the font size, by hitting the Ctrl and "+" (plus)
keys simultaneously. You can zoom out, i.e., reduce the font size, by hitting
the Ctrl and "-" keys simultaneously.
A webpage designer can choose to specify fonts and their size for a webpage
or can rely on the user's browser to pick what is best for the user based
on the browser's default settings. So some pages may be harder to read than
others, if the webpage designer selected a font that is smaller than the
default size.
You can do the same thing on a Mac system with Safari using the command and "+"
key to zoom in or the command and "-" key to zoom out.
[/network/web/browser/ie]
permanent link
Tue, Oct 26, 2010 11:24 am
Viewing Full Message Headers in Outlook 2007
There are occasions where you may need to view the full message headers of
a message that you have received in Outlook 2007, e.g., if you need to determine
if a message actually originated from the "from" email address used in the
message, since "from" addresses are easily spoofed by spammers. The full
message headers, which reveal the origination IP address for the message and
the email servers through which the message has passed, are, by default, hidden
in Outlook. To reveal them take the
following
steps.
[/os/windows/office/outlook]
permanent link
Tue, Oct 19, 2010 11:06 am
Session Recovery with Safari
With Safari 5.0.2 under Mac OS X, if Safari crashes, you can recover the tabs
that were open in the prior session by clicking on
History and
choosing "Reopen All Windows from Last Session."
[/network/web/browser/safari]
permanent link
Sun, Oct 17, 2010 10:01 pm
PRTG Network Monitor
If you would like to use a Microsoft Windows system for
Simple Network Management
Protocol (SNMP) or
Windows Management Instrumentation (WMI) monitoring of systems,
Paessler AG provides a free edition
of their
PRTG Network Monitor
software, that provides a lot of capabilities, though there is a limit
of 10-20 sensors with the free version (you can increase the default limit
from 10 to 20 by putting a small banner for the program on your website).
But for small businesses or personal use, that may provide all of the
monitoring capability you need.
The company also provides other free SNMP and network tools at
Free network tools for
system administrators
[ More Info ]
[/os/windows/software/network/snmp]
permanent link
Thu, Oct 14, 2010 7:44 pm
Installing SNMP Under Windows XP
To install Simple Network Protocol Management (SNMP) support on a Windows
XP system, you can follow
these steps.
[/network/snmp]
permanent link
Tue, Oct 12, 2010 11:54 pm
Obtaining the CPU Speed from a Command Line
You can obtain the CPU speed from the command line on a Windows system, such
as a Windows XP or Small Business Server (SBS) 2003 system by using the
command
wmic cpu get CurrentClockSpeed. Note: when you first
run the command, you may see "Please wait while WMIC is being installed."
or "Please wait while WMIC compiles updated MOF files." You may have to
wait a few minutes before seeing the results, but the next time you issue
a
wmic cpu get command you shouldn't have that delay. Also
note that this command is not available on Windows 2000 or prior versions
of Microsoft Windows.
The clock speed will be displayed in MegaHertz (MHz); if you want the value
in GigaHertz (GHz), just divide by 1,000.
C:\>wmic cpu get currentclockspeed
CurrentClockSpeed
1300
In the above case, the speed is 1300 Mhz, which is 1.30 GHz. The 1.30 GHz
value could also be obtained through the Windows Graphical User Interface
(GUI) by clicking on Start, selecting Control Panel, and then
System on a SBS 2003 system.
You may also be able to get the processor speed along with the name using
wmic cpu get name, but the speed won't necessarily
be displayed on all systems. The name will tell you whether it is an Intel
or AMD processor.
C:\>wmic cpu get name
Name
Intel(R) Celeron(R) CPU 1.80GHz
The following information was returned for a system with an AMD processor.
C:\>wmic cpu get name
Name
AMD Duron(tm)
References:
-
Hertz
-
Using WMIC For Gathering System Info
Deepak Gulati's niche on the web
[/os/windows/commands]
permanent link
Sun, Oct 10, 2010 10:14 pm
jqs.exe
I checked the running processes on a Windows XP Professional system
with the
tasklist command. I saw a process,
jqs.exe, I didn't recognize. I searched for its location
on the hard drive and found it at the following location.
C:\>dir /s jqs.exe
 Volume in drive C has no label.
 Volume Serial Number is 4CA9-07E6

 Directory of C:\Program Files\Java\jre6\bin

07/17/2010  05:00 AM           153,376 jqs.exe
               1 File(s)        153,376 bytes

     Total Files Listed:
               1 File(s)        153,376 bytes
               0 Dir(s)  14,939,205,632 bytes free
At JQS.EXE, I
also found that the process is associated with Java.
Experienced computer users might guess that the process is related to Java
and that is the case indeed. Jqs.exe is the Java Quick Starter which was
designed to improve the startup time of Java applets and applications
by prefetching Java Runtime Environment (JRE) files frequently into
memory. That's mainly interesting for users who work with Java on a
day to day basis. Everyone else might be better of disabling the Java
Quick Starter. Think of a user who encounters one Java applet per month
(or week), would it make sense to run the process all the time because
of those few instances where it might start the application or applet
faster? (see also Java Portable on how to use a portable version of Java
on the computer)
Jqs.exe is definitely querying the Windows Registry for instance. The
performance increase might not be huge but you will free up some computer
memory and some I/O processes on the computer system.
When I checked, I found jqs.exe was using about 2 KB of
memory on the system.
C:\>tasklist /fi "imagename eq jqs.exe"

Image Name                   PID Session Name     Session#    Mem Usage
========================= ====== ================ ======== ============
jqs.exe                     1740 Console                 0      1,824 K
The ghacks.net webpage also provides
instructions for disabling the Java Quick Starter (JQS), if you wish.
Now, if you want to disable the Java Quick Starter process you can do
that in the Windows Control Panel. You find a Java entry there which
will open the Java Control Panel.
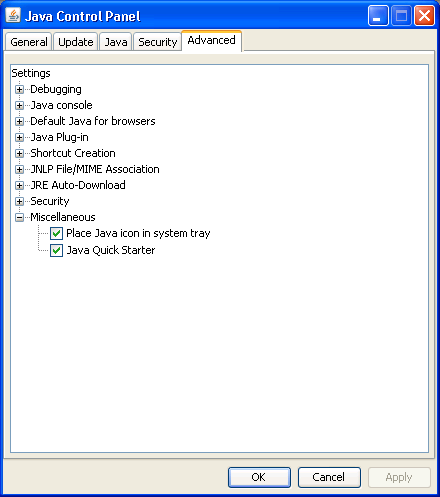
A click on Advanced and the selection of Miscellaneous will display
the activated Java Quick Starter entry. Uncheck the box to disable the
process. This will be visible in the Windows Task Manager immediately.
You might also be interested in finding out how to run
Java Portable
which is another option to make sure that no background processes are
running.
The image below shows the "Java Quick Starter" option under the
Miscellaneous section of the Java Control Panel.
Unchecking that option will keep jqs.exe from continually
running, if you don't feel you need the Java Quick Starter to be
running.
[/os/windows/processes]
permanent link
Sun, Oct 10, 2010 3:30 pm
Keys to Enter BIOS and Select Boot Menu
I often need to know what keys to hit to enter the BIOS setup routine or to
select the boot menu on various systems, so I thought I would start a table
today to hold that information, which I will update anytime I find myself
needing that information for a particular system. The table is
here.
[/hardware/pc/bios]
permanent link
Sun, Oct 03, 2010 10:37 pm
Scan of Windows XP System on 2010-10-03 with Verizon Internet Security Suite
I ran a scan of a Windows XP Service Pack 2 system with an
up-to-date version of Verizon Internet Security Suite on 2010-10-03.
The software, which states it is "Powered by McAfee" reported the following:
During the full scan, McAfee detected one item that requires your
attention. View the scan details to fix this issue now.
Results
Items Scanned: 324912
Items Detected: 88
Items Fixed: 87
Items Remaining: 1
Potentially Unwanted Programs
Adware-Url.gen
Files Affected
C:\Program Files\Free Offers from Freeze.com\afactory.url
C:\Program Files\Free Offers from Freeze.com\bingocafe.url
C:\Program Files\Free Offers from Freeze.com\gamepipe.url
C:\Program Files\Free Offers from Freeze.com\gifart.url
C:\Program Files\Free Offers from Freeze.com\graflatscreen.url
C:\Program Files\Free Offers from Freeze.com\pcpowerscan.url
C:\Program Files\Free Offers from Freeze.com\spcasino_sep.url
I chose to have Verizon Internet Security Suite quarantine
the files. When I checked on what else it had found, I found it reporting
it had quarantined an instance of
Spy-Agent.bw!zip, which it found in a
file, bill.zip, that it found at C:\Documents
and Settings\Jeanne\My Documents\Email\Embedded\bill.zip, i.e., it
appeared to have quarantined an attachment to an email message. There was
no indication that the file had actually led to any infection of the system,
just that a zip file containing the malware had been detected. The webpage
for that malware contained a link to a McAfee webpage
Spy-Agent.bw, which
indicated McAfee first discovered that malware on August 20, 2007.
The scan also found a lot of cookies wich the antivirus program deleted, but I
consider those fairly innocuous.
[/security/scans]
permanent link
Sun, Oct 03, 2010 1:21 pm
Accessing a Windows 7 System via Remote Desktop
I needed to access a Windows 7 Professional system from a Windows Server 2003
Small Business Server (SBS) using Remote Desktop. First I needed to enable
Remote Desktop access on the Windows 7 system. I then added the account that
I needed to use for remote access to the
Remote Desktop Users group.
[
More Info ]
[/os/windows/software/remote-control]
permanent link
Fri, Oct 01, 2010 9:23 am
Obtaining the Version of OS X from the Command Line
To obtain the version of OS X from a command line, i.e., from a Terminal
window, you can use the command
system_profiler SPSoftwareDataType
.
$ system_profiler SPSoftwareDataType
Software:

    System Software Overview:

      System Version: Mac OS X 10.3.9 (7W98)
      Kernel Version: Darwin 7.9.0
      Boot Volume: Macintosh HD
      Computer Name: john  smith's Computer
      User Name: JOHN SMITH (jsmith)
The above command provides both the version of OS X, which is 10.3.9 in
the example shown and the kernel version, which is 7.9.0.
To view just the version of OS X, you can use the command
sw_vers -productVersion.
$ sw_vers -productVersion
10.3.9
$
If you needed the version of the kernel, you can also use the
traditional uname -a command used on Unix and Linux systems
or uname -r to get just the kernel version.
$ uname -a
Darwin joe-smiths-Computer.local 7.9.0 Darwin Kernel Version 7.9.0: Wed Mar 30 2
0:11:17 PST 2005; root:xnu/xnu-517.12.7.obj~1/RELEASE_PPC  Power Macintosh powerpc
$ uname -r
7.9.0
To match a version number to a codename, e.g. OS X 10.3 has a codename of
"Panther", see the table below.
Mac OS X Version Information
| Version |
Codename |
Date Announced |
Release Date |
Most Recent Version |
| Mac OS X Server 1.0 |
Hera |
|
March 16, 1999 |
1.2v3 (October 27, 2000) |
| Public Beta |
Kodiak |
|
September 13, 2000 |
|
| 10.0 |
Cheetah |
|
March 24, 2001 |
10.0.4 (June 22, 2001) |
| 10.1 |
Puma |
July 18, 2001 |
September 25, 2001 |
10.1.5 (June 6, 2002) |
| 10.2 |
Jaguar |
May 6, 2002 |
August 24, 2002 |
10.2.8 (October 3, 2003) |
| 10.3 |
Panther |
June 23, 2003 |
October 24, 2003 |
10.3.9 (April 15, 2005) |
| 10.4 |
Tiger |
May 4, 2004 |
April 29, 2005 |
10.4.11 (November 14, 2007) |
| 10.5 |
Leopard |
June 26, 2006 |
October 26, 2007 |
10.5.8 (August 5, 2009) |
| 10.6 |
Snow Leopard |
June 9, 2008 |
August 28, 2009 |
10.6.4 (June 15, 2010) |
References:
-
OS X Version From Command Line
Date: September 12, 2006
The macosxhints Forums
[/os/os-x]
permanent link
Tue, Sep 21, 2010 9:51 pm
Installing ELOG on a Mac OS X System
I encountered a number of problems when trying to get
ELOG to run on
a Mac OS X 10.5.8 (Leopard) system today.
[ More Info ]
[/os/os-x]
permanent link
Tue, Sep 21, 2010 7:02 am
Installing gcc under OS X
Apple provides the gcc C compiler for Apple systems. If it isn't already on
the system you can download the compiler from Apple's website for free.
[ More Info ]
[/os/os-x]
permanent link
Sun, Sep 05, 2010 3:35 pm
eBay Gallery Plus Option Automatically Checked in Turbo Lister 2
My wife noticed while she was posting items for sell on
eBay with Turbo Lister
2 today that the checkbox for adding a Gallery Plus picture was being checked
automatically. She didn't want an additional fee for this feature and was
annoyed that the box was being checked. She pointed out to me that many other
people were complaining of the same problem at
Turbo Lister adding Gallery Plus to my Listings!
When I checked that webpage, though, I found some people stating that the
Gallery Plus images were free when sellers posted items for sale in some
categories, e.g., collectibles. Someone posted the following from an eBay
announcement in 2009:
We are excited to announce that we are making eBay individual pictures,
Picture Pack and Gallery Plus free for items listed in the following categories
— Collectibles, Art, Pottery & Glass, and Antiques. We are committed to
the success of our sellers and to continually improving the overall experience
for all of our customers — both buyers and sellers
When I checked an eBay
"help"
page on Gallery Plus, I found no mention of the above statement, but I
did find that information on the link from that page to an
eBay fees information
page.
When I checked the auction items in Turbo Lister 2 for which she was
seeing the box being checked even when she had unchecked it, I found she
had designated the category for them items as "collectibles", so I told her
she shouldn't see any Gallery Plus fee for those items.
[/os/windows/software/auction]
permanent link
Sat, Sep 04, 2010 9:47 pm
Installing Google Chromium on CentOS

If you have a Fedora 12 or Red Hat 6 (RHEL) or later versions of Linux on
a system and would like to install the
Google Chrome browser using the
YUM
package manager, you can do so using the following steps.
Note: You can determine which version of those operating systems or CentOS
you are using by examining the contents of /etc/redhat-release.
- Add Google's own YUM repository to be sure you obtain the latest
version of the chrome browser, which will allow you to easily ensure you can
keep it up-to-date. To do so, create the file
/etc/yum.repos.d/google.repo and place the following lines in it
depending on whether you are using a 32-bit version of Linux or a 64-bit
version. You can check whether you have a 64-bit version by issuing the
command uname -a. For a 64-bit version, you will see
x86_64 in the output.
32-bit
[google]

name=Google - i386

baseurl=http://dl.google.com/linux/rpm/stable/i386

enabled=1

gpgcheck=1

gpgkey=https://dl-ssl.google.com/linux/linux_signing_key.pub
64-bit
[google64]
name=Google - x86_64
baseurl=http://dl.google.com/linux/rpm/stable/x86_64
enabled=1
gpgcheck=1
gpgkey=https://dl-ssl.google.com/linux/linux_signing_key.pub
Note: you could also put both the 32-bit and 64-bit repo information in
the same file, if you wish.
- Install either the stable, beta, or unstable versions of Chrome from
the root account. I would recommend using the stable version.
## Install Google Chrome Stable version

yum install google-chrome-stable


## OR install Google Chrome Beta version##

yum install google-chrome-beta


## OR install Google Chrome Unstable version##

yum install google-chrome-unstable
However, if you are using CentOS 5, you
won't be able to install the Chrome browser using the above steps.
When I attempted to install the package on a CentOS 5.5 system, I saw
a message indicating that version 3.2 of the lsb package was needed:
Missing Dependency: lsb >= 3.2 is needed by package
google-chrome-stable-6.0.472.53-57914.x86_64 (google64)
# yum install google-chrome-stable
Loaded plugins: fastestmirror, priorities
Loading mirror speeds from cached hostfile
 * addons: hpc.arc.georgetown.edu
 * base: centos.mirror.netriplex.com
 * extras: mirror.vcu.edu
 * rpmforge: fr2.rpmfind.net
 * updates: mirrors.serveraxis.net
google64                                                 |  951 B     00:00
403 packages excluded due to repository priority protections
Setting up Install Process
Resolving Dependencies
--> Running transaction check
---> Package google-chrome-stable.x86_64 0:6.0.472.53-57914 set to be updated
--> Processing Dependency: lsb >= 3.2 for package: google-chrome-stable
--> Processing Dependency: xdg-utils for package: google-chrome-stable
--> Running transaction check
---> Package google-chrome-stable.x86_64 0:6.0.472.53-57914 set to be updated
--> Processing Dependency: lsb >= 3.2 for package: google-chrome-stable
---> Package xdg-utils.noarch 0:1.0.2-2.el5.centos set to be updated
--> Finished Dependency Resolution
google-chrome-stable-6.0.472.53-57914.x86_64 from google64 has depsolving proble
ms
  --> Missing Dependency: lsb >= 3.2 is needed by package google-chrome-stable-6
.0.472.53-57914.x86_64 (google64)
Error: Missing Dependency: lsb >= 3.2 is needed by package google-chrome-stable-
6.0.472.53-57914.x86_64 (google64)
 You could try using --skip-broken to work around the problem
 You could try running: package-cleanup --problems
                        package-cleanup --dupes
                        rpm -Va --nofiles --nodigest
The program package-cleanup is found in the yum-utils package.
When I tried updating the lsb package, I saw the following:
# yum install lsb
Loaded plugins: fastestmirror, priorities
Loading mirror speeds from cached hostfile
 * addons: hpc.arc.georgetown.edu
 * base: mirrors.serveraxis.net
 * extras: mirror.vcu.edu
 * rpmforge: fr2.rpmfind.net
 * updates: mirrors.serveraxis.net
403 packages excluded due to repository priority protections
Setting up Install Process
Package redhat-lsb-3.1-12.3.EL.el5.centos.x86_64 already installed and latest ve
rsion
Package redhat-lsb-3.1-12.3.EL.el5.centos.i386 already installed and latest vers
ion
Nothing to do
I had similar results when I changed the contents of google.repo
to try the 32-bit version, instead.
I found lots of other people reporting the same problem with earlier versions
of Red Hat Enterprise Linux (RHEL) 5 and versions of Fedora prior to 12.
E.g., there are similar reports at
How to install google Chrome in RHEL 5. and
Add support for RHEL/CentOS for OS compatibility. At
the latter problem report webpage, I found a suggestion from
andrewrjones that people wanting to use chrome on CentOS check Chris
Staite's webpage, Chrome
on CentOS where he provides Chromium for CentOS. Chromium is Google's
open source alternative to their Chrome browser.
You can download
Chromium for CentOS 5 from his website or from this website.
Chromium is an open-source browser
project behind the Google Chrome
browser that aims to build a safer, faster, and more stable way for all users
to experience the web.
Once you've downloaded it, you will need to unzip it and untar it.
When you extract the contents of the tar file, a chrome
directory will be created beneath the current directory. Make that
the working directory and run chrome-wrapper.
# gunzip chrome.tar.gz

# tar -xvf chrome.tar

# cd chrome

# ./chrome-wrapper
You will then be asked to choose the search engine you wish to use from
Google, Yahoo!, or Bing.

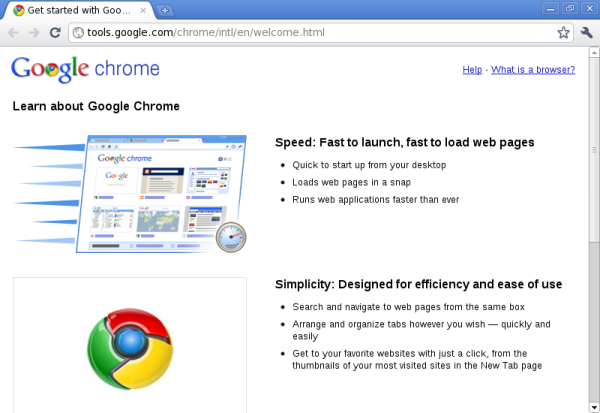
Once you've started Chromium, you can control and customize it, by
clicking on the wrench symbol in the upper, right-hand corner of the
Chromium window.
When I ran chrome-wrapper, I received the error message below,
but the program ran.
# ./chrome-wrapper

[5578:5592:5060312371904:ERROR:base/nss_util.cc(184)] Error initializing NSS with a persistent database (sql:/root/.pki/nssdb): NSS error code -8174
The program that Chris provides is a 32-bit one.
# file chrome
chrome: ELF 32-bit LSB executable, Intel 80386, version 1 (SYSV), dynamically linked (uses shared libs), not stripped
I found a discussion of the problems with Chrome and Chromium as well on
CentOS systems at
Google chrome for CentOS ?? that indicates Google has no interest
in supporting Chrome on CentOS 5. There's also helpful information there on the
Chromium software available from Chris Staite's site and how to resolve
problems encountered with it on CentOS systems, but, since I have a lot of
more pressing things to get done, I decided I couldn't afford to spend any
more time troubleshooting issues with Chrome and Chromium on CentOS and just
deleted the Chromium software from the system on which I had placed it.
References:
-
Install Google Chrome with YUM on Fedora 13, Red Hat (RHEL) 6
Published: February 20, 2010
If Not True Then False -
A Blog About Programming, Operating Systems and Applications
-
How to install google Chrome in RHEL 5
Date: February 4, 2010
Google Chrome Help
-
Add support for RHEL/CentOS for OS compatibility
Date: December 23, 2009
Google Chrome Help
-
Google Chrome
Google
-
The Chromium Projects
-
Google chrome for CentOS ??
Date: December 11, 2009
CentOS
[/os/unix/linux/centos]
permanent link
Mon, Aug 23, 2010 9:26 pm
Determining the Version of CentOS or Redhat Linux
To determine what version of
CentOS
or
Red Hat Linux is running on a system
look at the contents of
cat /etc/redhat-release.
References:
-
How To Determine CentOS or Red Hat Version
Posted by Jeff
Date: March 10, 2009
rackAID - Linux Server Management
Services for Small Business
[/os/unix/linux/centos]
permanent link
Tue, Aug 10, 2010 7:31 pm
Turbo Lister Postage Warning
When she tried to upload an item she intended to sell on eBay with Tubo Lister
version 8.7.101.2, my wife received the error message below:
Warning - The postage cost will be calculated based on dimensional
weight, not the actual weight of your package. Please check the weight
and dimensions of your package.
She had specified the dimensions and weight of the item and both domestic
and international shipping options, so it wasn't apparent to either of us
why she received the message. Apparently, the warning can be ignored, though.
I found someone else,
exdwh
posting the following at
Re: error code: 21916962 on July 9, 2010.
That's only an informational warning.
The only way to 'get rid of this error' would be to substitute the
dimensional weight as calculated by the shipping carrier.
A better solution is to filter out the warnings you don't care about.
When she ignored the message and uploaded the item for sale with Turbo
Lister, the item looked fine on eBay.
[/os/windows/software/auction]
permanent link
Sun, Aug 08, 2010 8:12 pm
Determining Who Voted for Which Option in an SMF Poll
If you are using polls in a
Simple Machines Forum (SMF) forum, it is possible to determine
who voted for which option in a poll by using
phpMyAdmin or by entering
MySQL commands.
[More
Info ]
[/network/web/forums/smf]
permanent link
Sun, Aug 08, 2010 5:36 pm
Installing phpMyAdmin on a CentOS System Running Apache
To install
phpMyAdmin on a
CentOS system running an
Apache webserver, login as
root and issue the command
yum install phpmyadmin from a command
prompt.
Note: you may have to install the Remi Repository or the RPMForge Repository
to be able to locate and install phpMyAdmin. Instructions for configuring
yum to use one of those repositories can be found via the links
below.
Remi Repository
RPMForge
Repository
After installing the software you will need to restart Apache, which you
can do with apachectl restart or service httpd restart
. You can then try accessing phpMyAdmin by
http://example.com/phpmyadmin substituting your domain name or
IP address for example.com.
If you receive a "403 Forbidden" error with the message
"You don't have permission to access /phpmyadmin on this server.", it is
likely because you are attempting to access the software from outside of
the server itself. The orginal phpmyadmin.conf file contains the lines below:
#
#  Web application to manage MySQL
#

<Directory "/usr/share/phpmyadmin">
  Order Deny,Allow
  Deny from all
  Allow from 127.0.0.1
</Directory>

Alias /phpmyadmin /usr/share/phpmyadmin
Alias /phpMyAdmin /usr/share/phpmyadmin
Alias /mysqladmin /usr/share/phpmyadmin
The Deny from all line states that the default behavior
is to prevent any IP address from accessing phpMyAdmin. The next line,
Allow from 127.0.0.1 provides for the exception of accessing
the software from the server itself, i.e., the "localhost" address
127.0.0.1. You could change the "deny from all" to "allow from
all" to allow access from anywhere or put a "#" at the beginning of the line
to comment it out. Or, you could add additional IP addresses or
FQDN's after the
127.0.0.1 to allow access to phpMyAdmin from other systems.
E.g. you could change the line to Allow from 127.0.0.1 192.168
to also allow access from any IP address beginning with 192.168. Restart
Apache again.
If you then try accessing phpMyAdmin, e.g., you might use
http://192.168.0.10/phpmyadmin, if 192.168.0.10 was your
webserver's IP address, but get the error message The
configuration file now needs a secret passphrase (blowfish_secret).
then you need to edit /usr/share/phpmyadmin/config.inc.php.
Look for the following lines:
/*
 * This is needed for cookie based authentication to encrypt password in
 * cookie
 */
$cfg['blowfish_secret'] = ''; /* YOU MUST FILL IN THIS FOR COOKIE AUTH! */
Place a password between the two single quotes, e.g., you could have a
password of SomeGoodPassword with the following:
$cfg['blowfish_secret'] = 'SomeGoodPassword';
If you refresh the webpage, you should then see a phpMyAdmin login window
where you are prompted to enter a username and password, which should be
the mysql root account and it's password.
For further information on phpMyAdmin and MySQL, there is a book
by Marc Delisle,
Mastering phpMyAdmin for Effective MySQL Management.
References:
-
phpMyAdmin
-
RPMForge Packages and Yum Priorites
Date: May 3, 2008
MoonPoint Support
-
Remi Repository
Antoine Solutions Development A Free PHP IDE built on Open Source Software
-
Quick 'n' Easy LAMP Server For CentOS/RHEL
By: olddocks
Date: May 28, 2008
HowtoForge - Linux Howtos and Tutorials
[/network/web/tools/phpmyadmin]
permanent link
Sun, Aug 08, 2010 1:45 pm
Restricting Access to an Apache Virtual Host
To restrict access to an Apache Virtual Host
by IP address, you will need to have the
mod_authz_host module loaded in the Apache configuration file
httpd.conf, which can usually be found at
/etc/httpd/conf/httpd.conf on
a Linux system. To determine if it is loaded, look for a line similar to the
following in the configuration file:
LoadModule authz_host_module modules/mod_authz_host.so
You can restrict access to a website that is set up as a virtual host by
including information on what IP addresses should have access to documents
on the website in a directory section Directory as shown below.
<VirtualHost *:80>
    ServerName example.com
    ServerAlias www.example.com
    ServerAdmin webmaster@example.com
    DocumentRoot /home/www/example
    ErrorLog /home/www/example/logs/error.log
    CustomLog /home/www/example/logs/transfer.log common
    <Directory /home/www/example>
      Order Deny,Allow
      Deny from all
      Allow from 192.168 127.0.0.1
    </Directory>
</VirtualHost>
In the case above, access to the document root of the website, i.e., all
documents on the website, is restricted to allow access only from IP addresses
beginning with 192.168 and 127.0.0.1, which is the "localhost" address, meaning
the address of the server itself. Anyone trying to access example.com
from any other IP address would see the default webpage for the server, if any,
not the example.com website.
References:
-
Access Control
The Apache HTTP Server Project
-
Apache Module mod_authz_host
The Apache HTTP Server Project
-
Learn how to configure Apache
Date: September 29, 2003
TechRepublic Articles
[/network/web/server/apache]
permanent link
Sat, Aug 07, 2010 10:23 pm
Configuring Outlook 2003 to Check a Gmail Account
Microsoft Office Outlook can be configured to download email from
a Gmail account by following
these steps.
[/os/windows/office/outlook]
permanent link
Sat, Aug 07, 2010 10:21 pm
Exporting a Gmail Contact List For Use in Microsoft Outlook
To export a Gmail contact list for use in Microsoft Outlook, take
the following steps:
- Log into your Gmail account.
- On the left side of the webpage for your Gmail account, you should
see Contacts; click on Contacts.
- Under Export, you will see "Who do you want to export",
select the contact list you wish to export by using the dropdown list
provided.
- For "Which export format", select "Outlook CSV format (for importing
into Outlook or another application)"
- Click on the Export button.
- Save the .csv file wherever you wish to place it on your system.
Now that you've saved the Comma Separated Value (CSV) file on your system,
you can import it into Microsoft Outlook. To do so in Outlook 2003, take
the following steps:
- Select Contacts.
- If you wish to create a new separate Outlook contact list for the
Gmail contact list, click on File, select New, then
Folder. In the Name field, type
a name for the Folder. Leave "Folder contains" set to "Contact Items",
then click on OK.
- Click on File.
- Select Import and Export
- For the action to perform, select "Import from another program or file.
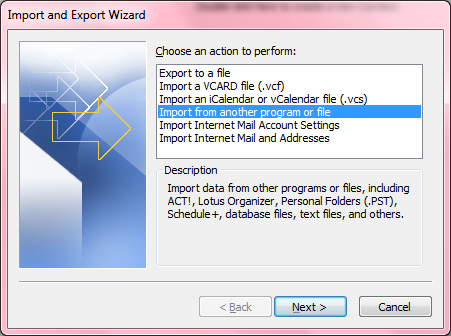
- Click on Next.
- For "Select file type to import from", select
"Comma Separated Values (Windows)".
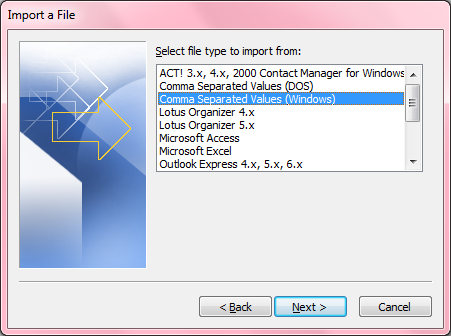
- Click on Next.
- For "file to import", you have 3 options:
Replace duplicates with items imported
Allow duplicates to be created
Do not import duplicate items
The selection you make among those 3 options is a matter of personal
preference. If you aren't importing into an existing contact list in
Outlook, but will, instead, be using the new one you just created, then it
doesn't matter much which option you select. If you're importing into an
existing list, e.g., you are updating an Outlook contact list again from one
you've previously imported into Outlook, you probably don't want to
have duplicate entries, so wouldn't want to select the second option
to allow duplicates to be created. If the Gmail list is the more
up-to-date one, you probably want to select "Replace duplicates with
items imported."
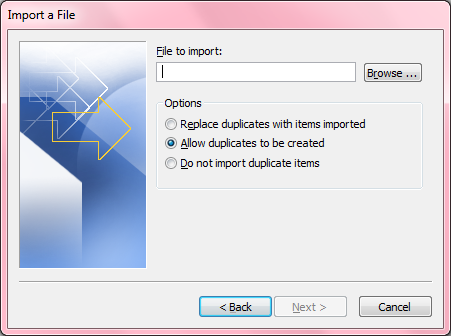
- Click on the Browse button and browse to the location
of the .csv file you created from the Gmail contact list. When you've
selected the file, click on Next.
- For "Select destination folder", choose the main contact list or
the one you created previously, then click on Next.
- Click on the Finish button.
[/os/windows/office/outlook]
permanent link
Wed, Aug 04, 2010 10:12 pm
CD and DVD Preferences under Mac OS X
If you put a blank disc in the disc drive in a Mac OS X system, but
you don't see an icon appear on the desktop representing that disc, you
may need to change the
System Preferences settings for CDs and
DVDs. If the configuration is set to "ignore", then you won't see an icon
representing the blank disc appear on the desktop. To change the settings, take
the following steps:
- Click on the Apple icon at the top left of your screen and select
System Preferences.
- Select CDs & DVDs.
- Check the settings for "When you insert a blank CD" and "When you
insert a blank DVD." If they are set to "ignore", then that explains why
no icon appears on the desktop when you insert a blank disc.
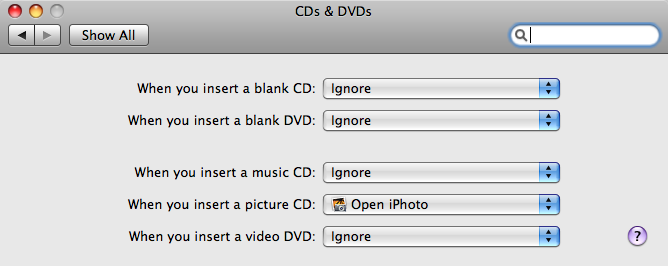
- You can choose from the following options:
- Ask what to do
- Open Finder
- Open iTunes
- Open Disk Utility
- Open other application...
- Run script...
- Ignore
- You can choose Open Finder to have an icon appear on the
desktop for the disc, e.g., "Untitled CD" for a blank CD. When you've changed
the setting, you can close the CDs & DVDs window.
-
References:
-
Mac OS X 10.2, 10.3: You put in a blank disc, but it doesn't appear
Last Modified: January 8, 2007
Article: TA22349
Apple - Support
[/os/os-x]
permanent link
Tue, Jul 20, 2010 10:10 pm
Installing a New SMF Theme
For
Simple Machines Forum (SMF)
1.1.11, if you have downloaded the Zip file for the theme to your PC, you can
take the following steps to place the theme on the server where your
forum resides:
- Log into the forum as the administrator for the forum.
- Click on Admin.
- Click on Themes and Layout under Configuration.
- Under Install a New Theme, click on the Browse button
beneath the "From a file" option and browse to the location of the .zip theme
file you downloaded and select it.
- Click on the Install button.
- Another small window will open where you will see "Install a new theme?"
Click on the OK button. You should then see a page stating
"Installed Successfully". If you click on the Themes and Settings
tab, you should see the new theme listed.
If you ever want to delete the theme, take the following steps:
- Log into the forum as the administrator for the forum.
- Click on Admin.
- Click on Themes and Layout under Configuration.
- Click on the Themes and Settings tab.
- Find the theme you want to delete. At the right-side of the entry
for that theme, you should see an icon that looks like a piece of
paper with a red "x" over it. Click on that icon to delete the theme.
[/network/web/forums/smf]
permanent link
Fri, Jul 16, 2010 3:37 pm
Hpbpro.exe and Hpboid.exe Processes Slowing System
A user reported that her system had been running abysmally slow for quite
awhile. I scanned the system for malware, but found none. Instead, I found
the problem to be a multitude of
hpboid.exe and
hpbpro.exe
processes running on the system. I've
seen this problem before and
many others have experienced the same problem. The processes are associated
with an HP printer - this user shares an HP printer, which is connected by USB
to her system, with others on her Local Area Network (LAN). It appears that
they are created when someone sends output to the printer associated with
the processes.
Below shows the number I found once when I checked to see how many of each
of these processes was running. I've seen even more instances of the processes
running at other times. They consume memory and, when a significant number of
them accumulate, they can slow a system significantly.
C:\Documents and Settings\Administrator>tasklist /fi "imagename eq hpboid.exe"

Image Name                   PID Session Name     Session#    Mem Usage
========================= ====== ================ ======== ============
HPBOID.EXE                  4044 Console                 0        532 K
HPBOID.EXE                  3152 Console                 0        572 K
HPBOID.EXE                  3748 Console                 0        580 K
HPBOID.EXE                  1340 Console                 0        560 K
HPBOID.EXE                  3712 Console                 0        576 K
HPBOID.EXE                  1984 Console                 0        576 K
HPBOID.EXE                   760 Console                 0        780 K
HPBOID.EXE                  3412 Console                 0        772 K
HPBOID.EXE                  3772 Console                 0        776 K
HPBOID.EXE                  2756 Console                 0        776 K
HPBOID.EXE                  1372 Console                 0        740 K
HPBOID.EXE                  5636 Console                 0        796 K
HPBOID.EXE                  4200 Console                 0      2,308 K
HPBOID.EXE                  5472 Console                 0      2,324 K
HPBOID.EXE                   960 Console                 0      2,316 K
HPBOID.EXE                   836 Console                 0      2,312 K

C:\Documents and Settings\Administrator>tasklist /fi "imagename eq hpbpro.exe"

Image Name                   PID Session Name     Session#    Mem Usage
========================= ====== ================ ======== ============
HPBPRO.EXE                  2460 Console                 0        552 K
HPBPRO.EXE                  1476 Console                 0        568 K
HPBPRO.EXE                  4028 Console                 0        584 K
HPBPRO.EXE                  2708 Console                 0        776 K
HPBPRO.EXE                  5056 Console                 0      2,384 K
I created a batch file,
kill_hp_processes.bat to deal with the problem.
@echo off

REM Name: kill_hp_processes.bat

REM Created by: Jim Cameron
REM Created on: July 9, 2010
REM Last updated: July 16, 2010
REM Version: 1.2

REM Description:
REM Check for errant HP processes: hpboid and hpbpro.exe.
REM These processes can start and never end until the system
REM is rebooted. When they accumulate they can consume
REM significant amounts of memory and potentially CPU cycles
REM reaching the point where the system's performance is
REM considerably degraded.

REM Specify log file
set log="c:\kill_hp_processes.log"

REM Put the date and time in the log file
echo %date% %time% >> %log%

REM List the hpboid.exe processes running.
tasklist /fi "imagename eq hpboid.exe" >> %log%
REM Count the number of hpboid.exe processes running.
for /f "delims=" %%a in ('tasklist /fi "imagename eq hpboid.exe" ^| find /c /i "hpboid.exe"') do set numprocesses=%%a
echo.
echo Number of hpboid.exe processes running: %numprocesses%  >> %log%
if %numprocesses$ NEQ 0 taskkill /f /fi "imagename eq hpboid.exe"


REM List the hpbpro.exe processes running.
tasklist /fi "imagename eq hpbpro.exe" >> %log%
REM Count the number of hpbpro.exe processes running.
for /f "delims=" %%a in ('tasklist /fi "imagename eq hpbpro.exe" ^| find /c /i "hpbpro.exe"') do set numprocesses=%%a
echo.
echo Number of hpbpro.exe processes running: %numprocesses%  >> %log%
if %numprocesses$ NEQ 0 taskkill /f /fi "imagename eq hpbpro.exe"

REM put a blank line in the file to separate the entries added at this time
REM from those that will be added at a later time.
echo.
I log the killing of the errant HP processes to see how many are
killed every time the batch job runs. Log file entries for a particular
instance of the batch file running are shown below:
Fri 07/16/2010 15:00:00.71

Image Name                   PID Session Name     Session#    Mem Usage
========================= ====== ================ ======== ============
HPBOID.EXE                  4044 Console                 0        532 K
HPBOID.EXE                  3152 Console                 0        572 K
HPBOID.EXE                  3748 Console                 0        580 K
HPBOID.EXE                  1340 Console                 0        560 K
HPBOID.EXE                  3712 Console                 0        576 K
HPBOID.EXE                  1984 Console                 0        576 K
HPBOID.EXE                   760 Console                 0        780 K
HPBOID.EXE                  3412 Console                 0        772 K
HPBOID.EXE                  3772 Console                 0        776 K
HPBOID.EXE                  2756 Console                 0        776 K
HPBOID.EXE                  1372 Console                 0        740 K
HPBOID.EXE                  5636 Console                 0        796 K
HPBOID.EXE                  4200 Console                 0      2,308 K
HPBOID.EXE                  5472 Console                 0      2,324 K
HPBOID.EXE                   960 Console                 0      2,316 K
HPBOID.EXE                   836 Console                 0      2,312 K
Number of hpboid.exe processes running: 16

Image Name                   PID Session Name     Session#    Mem Usage
========================= ====== ================ ======== ============
HPBPRO.EXE                  2460 Console                 0        552 K
HPBPRO.EXE                  1476 Console                 0        568 K
HPBPRO.EXE                  4028 Console                 0        584 K
HPBPRO.EXE                  2708 Console                 0        776 K
HPBPRO.EXE                  5056 Console                 0      2,384 K
Number of hpbpro.exe processes running: 5
I used the Windows at command to schedule the process to
run at 11:00 AM and 3:00 PM on weekdays to kill any instances of the two
processes. I used the at command twice since when I first had
it running only at 3:00 PM, too many of the processes were accumulating
during the day before the batch job ran. I use progra~1
for the "program files" directory, when submitting the batch job to run
with the at command, because that is a "shorthand" version that
Windows understands for that directory, which allows me not to worry about
spaces in the directory name.
C:\Documents and Settings\Administrator\My Documents>at 11:00 /every:M,T,W,Th,F
c:\progra~1\utility\kill_hp_processes.bat
Added a new job with job ID = 5

C:\Documents and Settings\Administrator\My Documents>at
Status ID   Day                     Time          Command Line
-------------------------------------------------------------------------------
        4   Each M T W Th F         3:00 PM       c:\progra~1\utility\kill_hp_processes.bat
        5   Each M T W Th F         11:00 AM      c:\progra~1\utility\kill_hp_processes.bat
References:
-
Multiple Hbpoid.exe and Hpbpro.exe Processes Running
Date: October 23, 2008
MoonPoint Support
-
HPBPRO.EXE & HPBOID.EXE
Date: February 12, 2007
Hewlett-Packard Development Company, L.P.
[/os/windows/printers]
permanent link
Mon, Jul 12, 2010 11:33 am
Setting a Variable to be the Output of a Command
In a Windows batch file, I needed to set a variable to be the output of a
command. You can use the
for command for that purpose as
shown below. In the example below, I wanted to count the number of
hpboid.exe processes running on a system.
REM Count the number of hpboid.exe processes running.

for /f "delims=" %%a in ('tasklist /fi "imagename eq hpboid.exe" ^| find /c /i "hpboid.exe"') do set numprocesses=%%a

echo Number of hpboid.exe processes running: %numprocesses%  >> %log%
The tasklist /fi "imagename eq hpboid.exe" command uses
the tasklist command with the /fi option to filter
the output of running processes to just those named hpboid.exe.
I then want to "pipe" the output to the find command. I use
the /i option to have find ignore the case of the
letters in hpboid.exe, i.e., I want to count a process whether it
is named hpboid.exe or HPBOID.exe, etc. I use the
/c option to tell find to display only the count of
lines containing the string hpboid.exe.
For Windows, and I presume DOS as well, you
need to put a caret, i.e., a ^ in front of the pipe character,
| character to "escape" how it would otherwise be interpreted.
The variable numprocesses is set to be the count of the
hpboid.exe processes running, which I then send to a log file,
i.e., %log%, which is a variable that was set earlier in the
batch file.
References:
-
Escaping a Character in a Windows Batch File
Date: July 12, 2010
MoonPoint Support
-
Escape Characters
Date: January 17, 2008
Batcheero
-
Escape character
Wikipedia, the free encyclopedia
[/os/windows/commands/batch]
permanent link
Mon, Jul 12, 2010 11:16 am
Escaping a Character in a Windows Batch File
I had the following in a Microsoft Windows batch file:
REM Count the number of hpboid.exe processes running.

for /f "delims=" %%a in ('tasklist /fi "imagename eq hpboid.exe" | find /c /i "hpboid.exe"') do set numprocesses=%%a

echo Number of hpboid.exe processes running: %numprocesses%  >> %log%
When I ran the batch file, I would see | was unexpected at this
time.. I then realized I needed to "escape" the meaning of the |
at that point in the code. For Windows, and I presume DOS as well, you
can put a caret, i.e., a ^, in front of a character to "escape"
how it would otherwise be interpreted. So the following worked, instead:
for /f "delims=" %%a in ('tasklist /fi "imagename eq hpboid.exe" ^| find /c /i "hpboid.exe"') do set numprocesses=%%a
If you are using a variable, e.g. %myvariable% in a
for loop in a batch file,
you need to use another percent sign, i.e., a % before each of
the % characters used for the variable name. I.e., you need to
use %%myvariable%%. You can think of the additional %
"escaping" the meaning of the other one.
References:
-
Escape Characters
Date: January 17, 2008
Batcheero
-
Escape character
Wikipedia, the free encyclopedia
[/os/windows/commands/batch]
permanent link
Sat, Jul 10, 2010 10:10 pm
Creating a Shortcut When Installing With WPKG
When installing software with
WPKG, you
can create a shortcut under
Start/All Programs that will allow
a user to start the program by using the
%WPKG_ROOT%\tools\CreateShortCut.js script.
For instance on a particular Windows 7 system, there is an
Audio & Video item within All Programs. I want
to add a shortcut for the GSpot
Codec Information Appliance, which has an executable program named
gspot.exe, which I am installing in C:\Program Files\Audio
and Video\GSpot. To add the shortcut when I install the program,
I can put the following in the
gspot.xml package file I use
for its installation. The value for name is the name I want
to use for the menu item. The target value is the location
where the executable file, in this case, gspot.exe, is located.
<!-- Create the shortcut pointing to gspot.exe. By default, this will get
created in %PUBLIC%\Desktop, which is usually C:\Users\Public\Desktop, so it
will need to be moved under the start menu. -->
<install cmd='cmd /c %WPKG_ROOT%\tools\CreateShortcut.js /target:"%ProgramFiles%\Audio and Video\GSpot\gspot.exe" /name:"GSpot"' />
<install cmd='cmd /c move "%Public%\Desktop\GSpot.lnk" "%PROGRAMDATA%\Microsoft\Windows\Start Menu\Programs\Audio & Video\."' />
Note: I have to use & in place of the & in
"Audio & Video", because otherwise WPKG will complain about white space
not being allowed whenever I try to install the package, since the ampersand
has a special meaning in HTML/XML code.
I also have to use the move command to move the shortcut to
the appropriate location for a Start Menu item, since it will be placed
at %PUBLIC%\Desktop by default. You can determine the value
of %PUBLIC% on a particular system by getting a command prompt
and issuing the command echo %PUBLIC%. It usually equates to
C:\Users\Public.
The complete gspot.xml
file.
References:
-
Create Desktop Icon
WPKG | Open Source Software Deployment and
Distribution
-
Using GSpot to Identify
Missing Codecs
Date: August 23, 2008
MoonPoint Support
[/os/windows/software/wpkg]
permanent link
Sat, Jul 10, 2010 12:20 pm
Disabling Guest Logins
To disable guest logins on a
Simple Machines Forum 1.1.11 forum, take the following steps:
- Log into the forum under an administrator account.
- Click on the ADMIN tab.
- Under Configuration, select Features and Options.
- Uncheck "Allow guests to browse the forum".
- Click on the Save button.
[/network/web/forums/smf]
permanent link
Sun, Jul 04, 2010 4:56 pm
Windows NT 5.2
If you run the
winver command on a system and see the
operating system listed as Windows NT 5.2, there are actually several
versions of Windows as well as
ReactOS that identify themselves as
Windows NT 5.2
-
Windows
Server 2003
-
Windows
Small Business Server 2003
-
Windows XP 64-bit Edition
-
Windows XP Professional x64 Edition
-
Windows Home Server
-
ReactOS
References:
-
Windows NT 5.2
Wikipedia, the free encyclopedia
[/os/windows/commands]
permanent link
Sat, Jun 26, 2010 3:44 pm
Redirect Users at Login and Logout to SMF
Note: these instructions were written for Simple Machines Forum (SMF)
1.1.11
To redirect users to a specific webpage that you have created when they
login or logout of Simple Machines
Forum (SMF), you can use the
Redirect on
Login and/or Logout mod. Download the RedirectLoginLogout zip file
(the latest version as of 2010-06-20 is 0.4), which contains the following
files:
package-info.xml
readme.txt
install.xml
install2.xml
To install the package you downloaded, while logged into SMF under an
adminisrator account, take the following steps:
- Click on the Admin tab.
- Under the Main section on the left of the page, click on
Packages.
- When you see the password prompt, enter the password for the
administrator account you are using and then click on the Login
button.
- Click on the Download Packages tab.
- If you downloaded the package to your local system, click on the
Browse button under Upload a Package.
- Find the zip file of the mod you downloaded and select it, then
click on the Upload button. You should see a
Package uploaded successfully message with
"Redirect on Login and/or Logout mod" listed. That indicates the
zip file was placed in the forum's Packages directory on the
server.
- Now click on the Browse Packages tab. Under Modification
Packages, you should see "Redirect on Long and/or Logout mod" listed.
- Click on Apply Mod.
- If you are prompted for FTP information for the account on the server
where you have SMF installed, complete the form with username and password.
- If you saw the prompt mentioned in the step above, you may need to click on
the Proceed button. If you see "550 Failed to change
directory", then the correct directory for SMF couldn't be located. You
may need to put in the complete path to the directory where SMF is located,
e.g.
/home/jdoe/www/hvia/forum. When the mod has been put in
the correct location, you should see the Installation Readme displayed.
- You now need to install the mod by clicking on the Install Now
button beneath Install Actions. You should see a message stating
"The package was installed successfully. You should now be able to use
whatever functionality it adds or changes; or not be able to use
functionality it removes.
Now, to use the mod, log into SMF under an administrator account then
take the following steps:
- Click on the Admin tab.
- Click on Features and Options under Configuration.
- Under Basic Features, you should see an Enable Login
Redirect section, which will have an "Enter Login URL" and
"Enter Logout URL" within it. Enter the URLs for the pages to which
you wish to redirect users on Login/Logout and check the Enable
Logon Redirect and Enable Logout Redirect boxes as
desired.
- Click on the Save button.
References:
-
Download Packages
SMF Online Manual
[/network/web/forums/smf]
permanent link
Mon, Jun 21, 2010 6:10 pm
Finding Large Files on a Windows System from the Command Line
You can find all files over 99 MB in size and store the file names in a text
file with the command below:
dir C:\ /a-d/s | findstr "[0-9][0-9][0-9],[0-9].*,[0-9]" | findstr /v
"[er](s)" > bigfiles.txt
You can use dir /a-d to select only files and not directories.
The /a option means that you want to display files with the
specified attributes. Directories are specified by d; specifying
a -d means select everything that is not a directory.
The /s option for the dir command indicates that you
want to display files in the specified directory and all of its subdirectories.
You can use the findstr command to filter the output of the
dir command. If I only wanted to see files that were at least
10 MB or more, I could use findstr "[0-9][0-9],[0-9].*,". To send
the output of the dir command to the findstr command,
you use the |, which is the pipe symbol, e.g.,
dir /a-d/s | findstr "[0-9][0-9],[0-9].*,". The information between
the double quotes is a "regular expression" that tells the findstr
command what to look for in the input it receives. I want it to look for
two numbers, followed by a comma, then another number, then zero or more
characters and then another comma. The [0-9] tells
finstr to look for any character in the numeric set, i.e., 0, 1,
2, 3, 4, 5, 6, 7, 8, or 9. Since I include [0-9] twice,
findstr looks for two numbers, one after the other. The dot,
., is used to represent any character and the *
following it states the character can occur zero or more times. Then another
comma should appear. That command
dir /a-d/s | findstr "[0-9][0-9],[0-9].*,", might produce the
following output.
C:\Documents and Settings\administrator>dir /a-d/s | findstr "[0-9][0-9],[0-9].*
,"
07/30/2002  04:27p          35,417,061 savceclt.exe
               5 File(s)     36,390,066 bytes
             217 File(s)     38,486,808 bytes
               0 Dir(s)     469,125,120 bytes free
I don't want the "File(s) and "Dir(s)" lines. I can eliminate them by sending
the outpout of the findstr command to another findstr
command, i.e., dir /a-d/s | findstr "[0-9][0-9],[0-9].*," |
findstr /v "[er](s)". The /v option to findstr
tells findstr to display only lines that do not contain a match.
In this case, I tell it to look for either an "e" or "r" followed by "(s)"
and to discard any lines that match.
:\Documents and Settings\administrator>dir /a-d/s | findstr "[0-9][0-9],[0-9].*
," | findstr /v "[er](s)"
07/30/2002  04:27p          35,417,061 savceclt.exe
In the case above, I've found all files greater than 10 MB in the
administrator's "My Documents" directory or beneath it. If I want to
search the entire system for files 100 MB or greater, I could use the
following commands:
C:\Documents and Settings\administrator>dir C:\ /a-d/s | findstr "[0-9][0-9][0-9
],[0-9].*,[0-9]" | findstr /v "[er](s)" > bigfiles.txt
Those commands start at the root directory, C:\ and search
for all files within that directory or beneath it that are over 99 MB. The
>bigfiles.txt redirects the output of the last command to
a file named bigfiles.txt.
Examing the bigfiles.txt file, I might see something like
the following:
C:\Documents and Settings\administrator>type bigfiles.txt
06/21/2010  05:21p         267,948,032 hiberfil.sys
06/21/2010  05:21p         314,572,800 pagefile.sys
06/09/2010  05:49p         277,297,548 Deleted Items.dbx
06/09/2010  05:49p         151,866,224 Inbox.dbx
06/09/2010  05:49p         144,463,812 Sent Items.dbx
10/27/2009  08:51p         949,861,964 Inbox
06/20/2010  07:48p       1,014,070,855 Sent
03/13/2010  04:42p       2,148,821,701 Inbox
06/21/2010  03:47p         388,459,482 Sent
06/21/2010  05:00p         201,147,392 personal.pst
 Directory of C:\Program Files\PhoneTools\vocfiles\WAVMS,11025,8,1
07/27/2007  09:03a         119,977,472 500dc2a.msp
07/27/2007  09:03a         119,977,472 5a34890.msp
09/14/2007  01:16p         113,491,064 MAINSP3.CAB
In the case above, there was one line that
was included that I didn't actually want just because it did fit
the pattern I was looking for, i.e., the WAVMS,11025,8,1 line.
But I would expect entries like that to be rare, so I'm not concerned
about it in this case.
The directory where the file was found won't be listed, but you can look
through bigfiles.txt and then locate particular files listed
in it and then make the current directory the root directory with
cd \ and then search all subdirectories for the file name as
in the example below:
C:\Documents and Settings\administrator>cd \

C:\>dir /s 500dc2a.msp
 Volume in drive C has no label.
 Volume Serial Number is F4D7-D263

 Directory of C:\WINDOWS\Installer

07/27/2007  09:03a         119,977,472 500dc2a.msp
               1 File(s)    119,977,472 bytes

     Total Files Listed:
               1 File(s)    119,977,472 bytes
               0 Dir(s)     471,283,200 bytes free
[/os/windows/commands]
permanent link
Sun, Jun 20, 2010 4:46 pm
SMF Packages Directory or One of the Files Not Writable
If you get the error message below when attempting to install a
package under
Simple Machines Forum
(SMF), create a
temp directory beneath the
Packages
directory and then change its permissions so that it is world writable.
Then try installing the package again. I had the problem occur after I deleted
a package. I got the error message when I tried installing the package after
deleting it.
$ cd forum/Packages

$ mkdir temp

$ chmod 777 temp
The Packages/temp directory is where packages to be installed
are unzipped.
References:
-
Packages directory or one of the files in it are not writable!
Date: October 5, 2008
Simple Machines Forum
[/network/web/forums/smf]
permanent link
Sat, Jun 19, 2010 10:18 pm
SMF Login and Registration Integration
If you want to have a login and regisration option on the main page for
your website and would like to integrate the login and regisration with the
Simple Machines Forum (SMF) login
and registration rather than force users to login to SMF and other parts
of the site separately, you can use
http://example.com/forum/index.php?action=login where
example.com is the name of the server where you are running
SMF. You specify the location of the
index.php file,
e.g.,
/forum/index.php, if it is located in a directory named
forum beneath the root directory for the web site.
If you just want to have a page where they see nothing but a username
and password prompt with a button to click on, you could create a file
named login.php with the following code within it:
<html>

<head>
<title>Login</title>
</head>

<body>

<?php

include_once('forum/SSI.php');
ssi_login();

?>

</body>
</html>
Note: the include_once function must be given the location
of the SMF SSI.php file, e.g., forum/SSI.php, if
it was located in a directory named forum beneath the root
directory of the website.
That would display the following on a page:
You must not be logged into SMF when you attempt to access
login.php, otherwise the login and password prompts won't
be displayed when you access login.php.
If you wanted to have a register link on the main page for
your site that would take someone to the SMF registration form, you could use
<a href="http://example.com/forum/index.php?action=register">Register</a>
for a registration link on the page.
a link.
If you don't want to allow anyone access to any area of SMF without the
person first logging in, e.g., you want them to see a login page if
they use http://example.com/forum, then you need to deny all
guest access to the forum. You can do so by logging into the administrator
account for the forum, then clicking on the admin tab, then
click on Features and Options under Configuration,
then uncheck Allow guests to browse the forum, then click on
the Save button.
References
-
Site Home Page/SMF Login Integration?
Date: April 20, 2008
Simple Machines Forum
-
How To: Get SMF SSI.php Stuff to Display on your Wordpress Blog
Date: August 21, 2008
Simple Machines Forum
[/network/web/forums/smf]
permanent link
Tue, Jun 15, 2010 7:30 am
Leave Me Bee & Stop Bugging Me!
If a wasp or bee gets into the house, reach for the hair spray.
Most insect sprays only infuriate them, but the hair spray stiffens their
wings, immobilizing them immediately. This works on all winged insects.
If one happens to escape and sting you, apply a poultice of baking soda
and water. Or, try applying a fresh cut slice of raw onion to the sting to
help draw out the poison. Hold the onion in place with tape.
A great substitute for insect repellent is white vinegar. Apply it liberally
to the skin with a cotton ball. Bugs hate the way you taste and the smell
of vinegar disappears once it dries. Great for kids!
To prevent ants from coming in the house or getting into cupboards,
sprinkle dried mint or red pepper where they are entering the house and
in the cupboards.
Source:
Mary Ellen's Best of Helpful Hints
I know the hair spray trick works. Just don't do what a friend who used
that trick did after a wasp was brought to the ground after being sprayed;
he then picked up the wasp with a tissue and got stung on his hand through
the tissue. The spray keeps a bee or wasp from flying, but not from stinging.
My wife, who observed, the incident, said he had a dumbfounded look on
his face when he got stung, as if he couldn't believe he had just been stung.
He was only half awake when it happened and commented "Well, I'm f---ing
awake now."
[/info/tips]
permanent link
Sun, Jun 13, 2010 5:14 pm
Winamp Crashing When Adding Smart View
Whenever my wife tried choosing a preset, such as "Audio by Genre" to organize
her music in Winamp, Winamp 5.572 would crash. She would right-click on
Local Media, select
Add Smart View and then select a
preset for "choose a preset", which would cause Winamp to immediately crash.
I found a solution at
Media Library
problems and crash. The solution was to clear the media library even
though she didn't have anything in the library.
The solution posted by
ScottVickery there is listed below:
One more clue lending credence to this being a problem with a corrupt
library. I cleared the Media Library (Winamp Preferences / Media Library
/ Local Media - Clear Media Library button), then rescanned (Winamp
Preferences / Media Library / Local Media / Watch Folders tab - Rescan
now button), and, I can again view my Local Media Audio node in the tree.
Clearing the media library doesn't delete the music files from the PC,
it just removes them from Winampls media library. In my wife's case, she
didn't have any watch folders.
[/os/windows/software/audio/winamp]
permanent link
Tue, May 18, 2010 4:17 pm
Id Command
If you need to determine your
user
identifier (uid) and
group
identifer (gid) on a Unix or
Linux system, you can use the
id command.
[/os/unix/commands]
permanent link
Thu, May 13, 2010 6:28 pm
Remote Printing via SSH Port Forwarding
I need to print from my MacBook Pro laptop when I'm using a wireless
connection to a Xerox WorkCentre 5030 printer on a wired network
behind a firewall. The ports I would need to use to send print jobs
to the printer aren't open on the firewall, but I can make an
SSH connection from
the wireless network to a server behind the firewall. So that gives me
a means to print from the laptop while it is on the wireless network. I
can simply
port forward print jobs via an SSH tunnel.
I can use the Terminal program which is in the Applications/Utilities
folder on the Mac laptop - the Terminal program comes with OS X.
If the server behind the firewall is accessible as server1.example.com and
my userid on it is jsmith, and the printer I want to access has an IP address
of 192.168.1.50, I can use the following command:
ssh -L 9100:192.168.1.50:9100 jsmith@server1.example.com
That -L option allows me to specify a port on the local system,
i.e. my laptop, to be forwarded to some other port on whatever system I
specify after the first ":". In this case, once I've established an SSH
connection to server1.example.com, any data I send to
TCP
port 9100 on the laptop will automatically be forwarded through the SSH tunnel
I've established to port 9100 on 192.168.1.50. I don't have to specify an
IP address, I could also use a name, such as printer1.example.com, if that
was a name assigned to the printer and that name was usable outside of the
firewall.
The reason I used port 9100, is that port is used by the Xerox WorkCentre
5030 to listen for print jobs over the network. That port is a de facto
standard port used by many networked printers. It is used by Hewlett
Packard (HP) on their JetDirect cards and is widely used by other printer
manufacturers as well. The connection established via this port is usually full
duplex and provides error messages and status information during printing.
Port forwarding via port 9100 also has the advantage over using port 515,
i.e., the LPD (RFC 1179) protocol, in that it doesn't require the use of
the root account on the Mac, since the port number is above 1023.
I also need to add a printer to the Mac that points to the SSH tunnel.
To do so, I can use the steps below (note: you should establish the
SSH connection first prior to adding the printer, so that your system
can communicate with the printer to determine options the printer
supports):
- Click on the "Apple" at the top left corner of the screen.
- Select System Preferences.
- Under Hardware, select Print & Fax.
- Click on the "lock" icon to make changes and provide the correct password.
- Click on the "+" to add a new printer.
- For Protocol, select "HP Jetdirect - Socket".
- For Address, put
127.0.0.1, which is the "loopback"
address for the local system (you could also use
localhost, instead).
- You can leave Queue blank.
- For Name, put in some name that is meaningful to you, e.g., I
used
Xerox 5030 (port forwarded) to distinguish the printer
I created from Xerox 5030, which I use when the laptop is on
the same network as the printer.
- For location, put in whatever you wish to describe the location of the
printer.
- For Print Using, select the printer to which you will be printing,
so the correct printer driver is installed.
- Then click on the Add button.
Now, whenever I've established the SSH connection, I can print to the printer
I added. I can print to other printers behind the firewall by adding a
printer to the Mac with a different name and the appropriate driver, e.g.,
I also added an HP Color LaserJet CP3525 printer. If its address is
192.168.1.61, I can print to it instead by using
ssh -L 9100:192.168.1.61:9100 jsmith@server1.example.com,
instead of 192.168.1.61 for the other printer. You can only
port forward port 9100 to one destination at a time, so I would need to exit
from the prior SSH connection first, if I was already port forwarding port 9100
to the other printer.
[/os/os-x]
permanent link
Wed, May 12, 2010 8:48 pm
Detecting Altered Images
If you see an image posted somewhere on the Internet or have one sent to you
by email that you suspect has been
"
photoshopped", i.e. digitally altered, are there any methods that will
assist you in making that determination? There are indeed methods and tools
to assist you. If the image is a
jpeg image, you can upload the image
or submit the URL for its location on the web to the
Image Error Level Analyzer.
Additional information on how to detect "shopped" images can be found at
Body By Victoria and
Photoshopping and Digital Forensics.
[/os/windows/software/graphics/adobe/photoshop]
permanent link
Fri, May 07, 2010 8:13 pm
Burning an ISO File to Disc Under Linux
To burn a .iso file to a disc, you can use the
cdrecord command
under Linux, if you have the
cdrecord package
installed. E.g.,
cdrecord -v slax-6.1.2.iso. The
-v
option, increments the general verbosity level by one. This can be used to
display the progress of the writing process.
CDRecord is a command line CD/DVD recording program.
Cdrecord is an application for creating audio and data CDs. Cdrecord
works with many different brands of CD recorders, fully supports
multi-sessions and provides human-readable error messages.
[/os/unix/linux/utilities/cd-dvd]
permanent link
Mon, May 03, 2010 5:01 pm
Creating a Firewall Rule in a NetScreen Firewall from the Command Line
To create a firewall rule to allow traffic for a custom service, e.g.,
SSH on a nonstandard port, through the firewall, you can create the custom
service and a policy, aka firewall rule, associated with the policy.
You can use the get policy command to obtain a list of existing
policies, aka firewall rules.
ns5xp-> get policy
Total regular policies 1, Default deny.
    ID From     To       Src-address  Dst-address  Service  Action State   ASTLCB
     1 Trust    Untrust  Any          Any          ANY      Permit enabled -----X
You can use the get service command to obtain a list of existing
services. You will see the standard services, e.g., SSH, TELNET, TFTP, etc.,
as well as any custom services you've created.
Let's asume I want to use port 1222 for SSH connections to a system
named Server1, which is on the trusted side of the firewall with IP address
192.168.0.4. In this case the firewall is not using
Network
Address Translation (NAT). I could use the following commands:
set address trust "Server1" 192.168.0.4 255.255.255.255 "Web server #1"

set service "Server1 SSH" protocol tcp src-port 0-65535 dst-port 1222-1222

set policy id 2 name "Server1 SSH" from "Untrust" to "Trust"  "Any" "Server1"
"Server1 SSH" permit log count
With the set address command, I indicate that the system is on
the trusted side of the firewall and that I want to associate the name
Server1 with the IP address for the system, which is 192.168.0.4.
Since the name is associated with one specific IP address, I use a subnet mask
of 255.255.255.255. I then add a comment about the system, i.e.,
"Web server #1" in this case.
I then create a custom service, which I name "Server1 SSH". It
uses the TCP protocol. I don't care about the source port, but the nonstandard
destination port I am using for SSH is 1222. I put in
1222-1222 for the port range, since I'm just using one port.
For the above policy, I'm assuming that there is no existing policy id
2, so I'm using that for the policy number. After
the policy id number is specified, in this case 2, I specify a name
for the policy to make its purpose clear, Server1 SSH
in this case. I then specify the direction of the data flow, which is
from "Untrust" to "Trust". I want to allow any source IP
address to connect, so I use "Any" for the source and then
use "Server1", which is the named address I created with a
prior command, for the destination. I then specify the service. If it
was for SMTP email, I could have used SMTP, but, in this
case, I'm using the custom "Server1 SSH" service I set up
with a prior command. I then specify permit, since I want
to permit the traffic, not block it. I've also chosen to log the traffic
and count the packets.
If I don't want to make any further changes, I can use the
exit command. I'll then be prompted as to whether I want
to save the changes I've made.
ns5xp-> exit
Configuration modified, save? [y]/n y
If I want to view the service and policy I created, I can use the
get service and get policy id commands.
ns5xp-> get service "Server1 SSH"
Name:       Server1 SSH
Category:   other          ID:  0   Flag:  User-defined


Transport    Src port     Dst port   ICMPtype,code  Timeout(min) Application
tcp           0/65535  47050/47050                        30

ns5xp-> get policy id 2
name:"Server1 SSH" (id 2), zone Untrust -> Trust,action Permit, status "enabled"
src "Any", dst "Server1", serv "Server1 SSH"
Policies on this vpn tunnel: 0
nat off, url filtering OFF
vpn unknown vpn, policy flag 0000, session backup: on
traffic shapping off, scheduler n/a, serv flag 00
log yes, log count 1, alert no, counter yes(1) byte rate(sec/min) 0/0
total octets 0, counter(session/packet/octet) 0/0/1
priority 7, diffserv marking Off
tadapter: state off, gbw/mbw 0/-1
No Authentication
No User, User Group or Group expression set
Additional information on creating firewall rules can be found in
Juniper Network's
Concepts & Examples ScreenOS Reference Guide Volume 2: Fundamentals.
References:
-
Concepts & Examples ScreenOS Reference Guide Volume 2: Fundamentals
Juniper Networks
[/security/firewalls/netscreen]
permanent link
Sun, May 02, 2010 9:00 pm
Streaming Video to a Wii Using TVersity
I installed TVersity 1.8 Beta
software to stream video stored on a Windows 7 PC to a Wii today. TVersity
is free software that allows one to stream video and music from a Windows
PC to console systems, such as the Wii, Xbox 360 and PS3.
[ More Info ]
[/os/windows/software]
permanent link
Sun, Apr 25, 2010 3:02 pm
Tue, Apr 13, 2010 8:35 pm
Online File Analysis
In performing PC support, by far the most common complaint I've had to deal
with has been malware infections. For any files I download, I normally submit
them to at least one and sometimes all of the following sites, which will scan
a file you upload to the site with multiple antivirus programs:
Sometimes, a particular antivirus program won't yet recognize
some new malware, but other such programs will recognize
it. Of course, one also has to bear in mine that
false
positives do occur, so if only one antivirus program reports a program is
infected it could be a false positive.
I also use Sunbelt Software's
CWSandbox on-line malware analyzer. You can submit a file to that service
and it will install the software within a sandbox on a Sunbelt system and then
give you the results of the analysis of the file submitted, including files and
registry entries created, network activity, and process details. For a sample
of a report see the report created for the installation file for
Totally Free Burner
named TotallyFreeBurner.exe, which I submitted to the analysis service:
Malware Report for ID: 12057226
Note: Totally Free Burner doesn't contain malware; I just normally check all
software before I install it on my system or someone else's system.
If you know the MD5 checksum for
a file, which the virus scanning services I listed above provide, you can
determine if there is an existing Sunbelt CWSandbox report for it by using a
URL of the following form:
http://research.sunbelt-software.com/partnerresource/MD5.aspx?md5=<md5
checksum>
E.g.,
http://research.sunbelt-software.com/partnerresource/MD5.aspx?md5=dece7e4cbd0c3ca7d6523fc0b5ee95b1
for the 6.0 version of Totally Free Burner I downloaded
from the developer's website and then uploaded to Sunbelt's CWSandbox service.
There are also a number of free tools that you can use to determine the
MD5 checksum of a file. The MD5 checksum is determined by performing a
mathematical calculation on the contents of a file and should be unique
for a given file (there is a very slim possibility that may not be true,
but for all practical purposes you can consider it unique).
FileAlyzer© from the developer of
Spybot Search
& Destroy will show you the MD5 checksum for a file, in addition to
providing other information, as will
digestIT 2004. Both are free.
[/security/antivirus]
permanent link
Sun, Apr 11, 2010 9:16 pm
Getting Free Credit Reports
You can get a free credit report from the 3 major credit reporting companies,
TransUnion, Equifax, and Experian through
www.annualcreditreport.com. You will need to provide your Social Security
Number (SSN). From that site you can go to the 3 reporting companies one by
one and get a report from each.
You are entitled to one free report from each nationwide credit reporting
company per year. It is entirely your choice whether you order all three
credit reports at the same time or order one now and others later. The
advantage of ordering all three at the same time is that you can compare
them. However, you will not be eligible for another free credit report
from the Central Source, i.e., through annualcreditreport.com, for 12 months. On
the other hand, the advantage of ordering one now and others later
(for example, one credit report every four months) is that you can keep
track of any changes or new information that may appear on your credit
report. Remember, you are entitled to receive one free credit report
through the Central Source every 12 months from each of the nationwide
consumer credit reporting companies – Equifax, Experian and TransUnion
– so if you order from Yonly one company today you can still order
from the other two companies at a later date.
You can't get a free credit score, which is a mathematical algorithm
that is used to evaluate information in an individual's credit file.
A credit score is used by a lender to help determine whether a person
qualifies for a particular credit card, loan, or service. Most credit
scores estimate the risk a company incurs by lending a person money
or providing them with a service — specifically, the likelihood
that the person will make payments on time in the next two to three
years. Generally, the higher the score, the less risk the person
represents. You can opt to pay for the credit score, if you choose.
There are lots of services that purport to give you free credit reports that
can actually prove to be quite costly. The way they work is that you get a
"free" report by providing a credit card to pay for a monthly credit monitoring
service. The trick is that the companies can make it almost impossible for you
to cancel the service, so you may pay $80 or more a year for the "free" service.
Just because you see it advertised on TV, don't think the company advertised
won't try that trick.
E.g., the Federal Trade Commission (FTC) charged freecreditreport.com
with deceiving consumers. I've included information from
FTC Sues
Imposter Web Sites Offering "Free Credit Reports below:
How consumers were deceived. Consumerinfo.com and
freecreditreport.com advertised "free credit reports," but failed to
inform consumers that they were automatically signing up for credit
report monitoring services and would be charged $79.95 if they did
not cancel within 30 days. The FTC also charged that the web site
freecreditreport.com failed to inform consumers that it was not associated
with the official annual free credit report program established by recent
amendments to the Fair Credit Reporting Act.
Consumers were drawn to Consumerinfo.com and freecreditreport.com web
sites through radio, television, e-mail and Internet ads promising free
credit reports and free monitoring services. In some cases, consumers
were led to the sites through an Internet search for terms such as "free
credit report," "free credit score," and "free credit history." Consumers
who visited the sites were required to supply a great deal of personal
information in addition to a valid credit card number. When membership
was not cancelled within 30 days, credit card accounts were charged.
For Experian, to return to your report in the near future, log on to
www.experian.com/consumerExperian and select “View your report
again” or “Dispute” and then enter the report number
provided when you first view the report. The experian site offers a
service called VantageScore® that currently
charges you $7.95 to get your credit score. TransUnion offers the credit score
for $14.95, but you have to sign up for a monthly service.
References:
-
FTC Sues Imposter Web Sites Offering "Free Credit Reports"
Privacy Rights Clearinghouse
-
The Federal Trade Commission's Information on Free Annual Credit Reports
Federal Trade Commission
-
Can You Really Get a Free Credit Report -- Without Getting Scammed?
Scambusters.org
-
The credit score rating scale; range
The Credit Scoring Site
[/financial]
permanent link
Sat, Apr 03, 2010 12:49 pm
Playing VOB Files with VLC
A
Video Object (VOB) file is a
container format in
DVD-Video
media. VOB can contain
video,
audio,
subtitle and
menu contents
multiplexed together into a stream form. VOB is based
on the
MPEG program stream format, but with additional
limitations and specifications in the private streams. The MPEG program stream
has provisions for non-standard data (as used in VOB files) in the form of
so-called private streams. VOB files are a very strict subset of the MPEG
program stream standard. While all VOB files are MPEG program streams, not all
MPEG program streams comply with the definition for a VOB file.
You can play .VOB files with
applications such as
PowerDVD, VLC media player, and
WinDVD.
The VLC media player is free. It is a highly portable multimedia player and
multimedia framework capable of reading most audio and video formats (MPEG-2,
MPEG-4, H.264, DivX, MPEG-1, mp3, ogg, aac ...) as well as DVDs, Audio CDs
VCDs, and various streaming protocols.
The VLC setup file, vlc-1.0.5-win32.exe uses the
Nullsoft Scriptable Install
System (NSIS) for the installation.
[/os/windows/software/audio-video/VOB]
permanent link
Sat, Apr 03, 2010 11:32 am
Combined Community Codec Pack
A family member needed to play
.mkv video files. The .mkv extension is used for
Matroska video files.
Matroska is an extensible open source, standard multimedia container.
Matroska is usually found as .MKV files (matroska video), .MKA files (matroska
audio) and .MKS files (subtitles). The developer home page is located at
Matroska Media Container. There is
a downloads link there for
CCCP (Combined Community Codec Pack),
which takes you to the Combined Community
Codec Pack website.
The installation file uses the
Inno Setup installation
system. If you have any concerns about the safety of the software you might
install, I've provided links to the malware scan reports for the 2009-09-09
version of the Combined Community Codec Pack below.
Virustotal is a "service that analyzes
suspicious files and facilitates the quick detection of viruses, worms,
trojans, and all kinds of malware detected by antivirus engines."
VirSCAN provides a similar service.
Both sites scan uploaded files with multiple antivirus programs; none found
any malware within the codec pack setup file.
Virustotal
VirSCAN
When you install the 2009-09-09 version of the codec pack, you can choose from
the following components. All will be installed by default unless you deselect
them.
CoreWavPack 1.1.1
FFDShow Tryout r3065 2009-08-30
FLV Splitter r1264
Haali Media Splitter 1.9.42.1 2009-01-11
MPV (MPEG2) Decoder r1264
VSFilter 2.39 r1264
Media Player Classic Homecinema 1.3.1264
If you install all of the above, you will need at least 22.3 MB of free disk
space. By default, a "Combined Community Codec Pack" folder will be created
beneath the Start Menu with shorcuts for the codec pack.
Under Select Additional Tasks, you also have the following options:
General
  Set Perceived Types
  Register Extensions in Windows Media Player
Haali Media Splitter
  Enable Shell Extensions
    Enable Thumbnails
The "general" ones are selected by default, but not the "Haali Media
Splitter" options. I selected those as well. You can also choose to
open the settings window for the application during the installation.
The Combined Community Codec Pack provides support for the following
FFDShow Video Decoders:
DivX
Flash Video (FLV1 & FLV4)
Generic MPEG4
H.264/AVC
Theora
Xvid
The following FFDShow Audio Decoders are supported:
AAC
AC3
DTS
EAC3
FLAC
LPCM
MP1/2
MP3
True Audio
TrueHD
Vorbis
You can also change the file associations for various file types, such as
.avi, .mkv, .mp4, and .ogm files.
To be able to play those files by just double-clicking on them,
you may need to change file associations. For instance, under Windows 7, if
you want to play the files with Windows Media Player, you can right-click
on a file of one of those types, e.g., an .mkv file, and choose
Properties. Then click on the Change button to change
the "opens with" application.
[/os/windows/software/audio-video/MKV]
permanent link
Mon, Mar 22, 2010 9:09 pm
FTP Server on Mac OS X
To enable an FTP server on a Mac OS X system, take the following steps:
- Click on the Apple menu in the upper left-hand corner of the menu bar.
- Select System Preferences.
- Click on File Sharing in the services list at the left side of
the window. If it is grayed out, click on the lock icon at the bottom of
the window to unlock the settings, so that you can make changes.
The File Sharing status indicator will go from "Off" to "On".
- Click on the Options button.
- Choose the "Share files and folders using FTP" option.
- Choose the account or accounts for which you wish to allow FTP access.
- Click on Done.
[/os/os-x]
permanent link
Sun, Mar 21, 2010 2:52 pm
JRE and WPKG
Java is a programming language and computing platform released by Sun
Microsystems in 1995. It is the underlying technology that powers
programs including utilities, games, and business applications. Java runs on
more than 850 million personal computers worldwide, and on billions of devices
worldwide, including mobile and TV devices.
Java Runtime Environment (JRE) software can be downloaded from
Java Downloads for All
Operating Systems. For Microsoft Windows systems, you can choose from
a 32-bit or a 64-bit versions. For a silent install, you can use
jre-6u18-windows-i586-s.exe /quiet /norestart.
After installation, you will see an "Java(TM) 6 Update 18" entry under
"Uninstall or change a program", corresponding to the registry entry for
HKEY_LOCAL_MACHINE\SOFTWARE\Microsoft\Windows\CurrentVersion\Uninstall\{26A24AE4-039D-4CA4-87B4-2F83216018FF}\DisplayName.
The uninstall string is MsiExec.exe
/X{26A24AE4-039D-4CA4-87B4-2F83216018FF}, corresponding to the registry
entry for
HKEY_LOCAL_MACHINE\SOFTWARE\Microsoft\Windows\CurrentVersion\Uninstall\{26A24AE4-039D-4CA4-87B4-2F83216018FF}\UninstallString. For a quiet
uninstall, you can use
MsiExec.exe /X{26A24AE4-039D-4CA4-87B4-2F83216018FF} /q.
The WPKG package I used is shown below:
<?xml version="1.0" encoding="UTF-8"?>

<packages>

<!-- Version 6 Update 18 - offline (32-bit) version -->

<package
   id="JRE"
   name="Java Runtime Environment (JRE)"
   revision="618"
   priority="3"
   reboot="false">

<check type="uninstall" condition="exists" path="Java(TM) 6 Update 18" />

<install cmd='%SOFTWARE%\java\jre-6u18-windows-i586-s.exe /quiet /norestart' />

<remove cmd='MsiExec.exe /X{26A24AE4-039D-4CA4-87B4-2F83216018FF} /q'/>

</package>

</packages>
If you use 32-bit and 64-bit browsers interchangeably, you will need to
install both 32-bit and 64-bit Java in order to have the Java plug-in for both
browsers.
The software will be installed to C:\Program Files\Java\jre6\ by
default. After installing Java, restart your browser and
verify Java has been
installed correctly (note: it may work even without restarting your
browser). You can also go to
How do I test
whether Java is working on my computer? to test the Java installation.
[/os/windows/software/wpkg]
permanent link
Sun, Mar 21, 2010 11:23 am
Embedding Userid and Password in a URL
With versions of Internet Explorer from 3.0 to 6.0, the following syntax for
HTTP or HTTPS URLs was supported:
http(s)://username:password@server/resource.ext
Using the syntax of http:// or https:// followed
by username:Password@ and then the URL, you could supply a username
and password in the address bar. This could be useful in cases where you had
to script access to a webpage or file download from a password protected
directory on a website. Using this technique you could use a command in a batch
file to gain access to the protected resource.
However, after version 6.0 of Internet Explorer, Microsoft disabled this
capability. The rationale for disabling the capability is explained at
Internet Explorer does not support user names and passwords in Web site
addresses (HTTP or HTTPS URLs). Microsoft states there that the
capability was disabled, because it could be used by a malicious person
to mislead someone into thinking he was going to a trusted side when in
actuality he would be directed to another site.
E.g., other information, besides a username and password, could be placed before
the "@", for example someone could use
http://www.wingtiptoys.com@example.com. A user might only notice
the http://www.wingtiptoys.com in the address bar, whereas the
URL would actually be taking the user to http://example.com.
In this case, Internet Explorer 6 Service Pack 1 (SP1) and Internet Explorer 6
for Microsoft Windows Server 2003 only display "http://example.com" in the
address bar. However, earlier versions of Internet Explorer display
"http://www.wingtiptoys.com@example.com" in the address bar, but users might
think they were going to www.wingtiptoys.com, whereas they would actually be
taken to example.com.
If you want later versions of Internet Explorer to retain the behavior of
prior versions, you can disable the new default behavior in Windows Explorer
and Internet Explorer. To do so, create iexplore.exe and
explorer.exe DWORD values in one of the following registry keys and set
their value data to 0.
- For all users of the program, set the value in the
following registry key:
HKEY_LOCAL_MACHINE\Software\Microsoft\Internet Explorer\Main\FeatureControl\FEATURE_HTTP_USERNAME_PASSWORD_DISABLE
- For the current user of the program only, set the value in
the following registry key:
HKEY_CURRENT_USER\Software\Microsoft\Internet Explorer\Main\FeatureControl\FEATURE_HTTP_USERNAME_PASSWORD_DISABLE
On the support webpage, Microsoft states that, if users attempt to use the
previously supported syntax with later versions of Internet Explorer,
users will see a webpage that has
the title "Invalid syntax error". When I used the technique to try to access a
protected file on a site using Internet Explorer 8.0 on a Windows 7 system, I
received a message stating "Windows cannot find" followed by the URL and then
"Check the spelling and try again."
The syntax of http://username:password@example.com/directory/filename.ext
still worked on the same system with
Firefox 3.6
References:
-
Internet Explorer does not support user names and passwords in Web site
addresses (HTTP or HTTPS URLs)
Article ID: 834489
Last Review: November 15, 2007
Revision: 11.4
Microsoft Support
[/network/web/browser/ie]
permanent link
Fri, Mar 19, 2010 3:15 pm
Securely Deleting a File from a Mac OS X System
If you just use the
rm command or drag a file to the
trash on a Mac OS X system, then it is possible for a technically
knowledgeable person to recover the information in that file. A
normal delete removes what is essentially a pointer to where the
file is stored on a disk drive, but doesn't overwrite the areas on
the disk where the file is stored. A normal file deletion is sort
of like removing an entry from a book's table of contents and
index; someone could read the entire book and still obtain the
information to which the entry pointed.
There is a secure way to delete the contents of a file, though,
by overwriting the areas on the disk where the file is stored. If
you overwrite the data on the areas with new data the old data is
no longer accessible.
Note: if you only overwrite the areas occupied by the file once, it is
still possible for someone to recover the contents of the file, but then
it reqires not just technical knowledge, but specialized equipment. E.g.
a company specializing in data recovery or a government agency with skilled
forensics personnel and specialized equipment might still be able to recover
the information from traces of the magnetic signals left by the old data,
but for most purposes the data can be considered unrecoverable. However,
if the data is overwritten multiple times, it becomes unrecoverable even
with such equipment.
There is a utility that comes with the Mac OS X operating system that will
securely overwrite a file. That utility is srm, which will
overwrite a file multiple times making it unrecoverable. The utility
is run from a shell prompt, which you can obtain by using the
Finder and going to Applications, Utilities, and
then double-clicking on Terminal. The syntax for the command is
srm [OPTION]... FILE..., e.g. srm somefile.doc.
You can obtain further information on the utility by opening a terminal
window on a Mac OS X system and typing man srm.
NAME
       srm - securely remove files or directories

SYNOPSIS
       srm [OPTION]... FILE...

DESCRIPTION
       srm  removes each specified file by overwriting, renaming, and truncat-
       ing it before unlinking. This prevents other people from undeleting  or
       recovering any information about the file from the command line.

       srm,  like  every  program  that  uses the getopt function to parse its
       arguments, lets you use the -- option to indicate  that  all  following
       arguments are non-options.  To remove a file called '-f' in the current
       directory, you could type either "srm -- -f" or "srm ./-f".

OPTIONS
       -d, --directory
              ignored (for compatibility with rm(1))

       -f, --force
              ignore nonexistent files, never prompt

       -i, --interactive
              prompt before any removal

       -r, -R, --recursive
              remove the contents of directories recursively

       -s, --simple
              only overwrite with a single pass of random data

       -m, --medium
              overwrite the file with 7 US DoD compliant passes  (0xF6,  0x00,
              0xFF, random, 0x00, 0xFF, random)

       -z, --zero
              after overwriting, zero blocks used by file

       -n, --nounlink
              overwrite file, but do not rename or unlink it

       -v, --verbose
              explain what is being done

       --help display this help and exit

       --version
              output version information and exit

NOTES
       srm can not remove write protected files owned by another user, regard-
       less of the permissions on the directory containing the file.

       The -s option overrides the -m option, if both are present.  If neither
       is specified, the 35-pass Gutmann algorithm is used.

       Development  and  discussion  of  srm is carried out at <http://source-
       forge.net/project/?group_id=3297>,  which  is   also   accessible   via
       <http://srm.sourceforge.net>.
References:
-
Secure File Delete on Mac OS X
Date: August 16, 2007
Exxamine's Weblog
[/os/os-x]
permanent link
Fri, Mar 19, 2010 12:55 pm
Obtaining an IP Address via DHCP
If a Knoppix system doesn't have an IP address assigned to an Ethernet
interface, you can obtain one by downing the interface with
ifdown eth0 and then brining it back up with
ifup
eth0
, which will cause the system to try to obtain an address via
DHCP.
[/os/unix/linux/knoppix]
permanent link
Fri, Mar 19, 2010 12:07 pm
Mounting a Windows Hibernated Drive under Knoppix
After shutting down a Windows Vista laptop into
hibernation
mode, I wanted to copy the hibernation file,
hiberfil.sys
from the Windows Vista laptop's hard disk drive to an external USB drive to
analyze it on another system. I removed the drive from the laptop and put it
into a
Thermaltake Black Widow hard dirve eSATA + USB Docking Station, which
I attached the system I would use for the backup. I was unable to boot that
system from a
BartPE boot
disc, so I booted the system instead from a
Knoppix Linux Live CD. However, when
I connected the docking station with the laptop drive in it to the system,
I received the message below:
| Error - Konqueror |
Windows is hibernated, won't mount.
Failed to mount '/dev/sdb1': Operation not permitted
The NTFS partition is hibernated. Please resume
WIndows and turned it
off properly, so mounting could be done safely.
OK
|
I only needed to mount the drive in read-only mode to copy
hiberfil.sys from it, so I obtained a command prompt and opened
a Bash shell,
switched to the root account and mounted the device in read-only mode. I had
another external USB drive attached, which was to hold the backup, as
/dev/sda1. The laptop drive had two partitions on it: the Windows
Vista partition, which was /dev/sdb1 and a recovery partition,
which was /dev/sdb2.
knoppix@Knoppix:~$ sudo bash
root@Knoppix:~# mount -r /dev/sdb1 /media/sdb1
After copying hiberfil.sys from the laptop drive to the other
external USB drive, I unmounted the laptop drive.
root@Knoppix:~# umount /dev/sdb2
root@Knoppix:~# umount /dev/sdb1
I checked the contents of the backup copy of hiberfil.sys
with the od command. I saw that the first 4 bytes of the file
were "HIBR", which indicates the system containing the file was last shutdown
into hibernate mode rather than to a normal shutdown state.
To view just the first 8 bytes of the file with od, you can use
od -a -N 8.
root@Knoppix:~# od -a -N 8 /mnt/hdd/hiberfil.sys
0000000   w   a   k   e ht nul nul nul
0000010
References:
-
Hibernation
(computing)
Wikipedia, the free encyclopedia
-
Mounting a Hibernated Drive
Date: November 27, 2007
MoonPoint Support
[/os/unix/linux/knoppix]
permanent link
Mon, Mar 15, 2010 8:36 pm
Windows NT Backup Restore Utility for Windows 7 and for Windows Server 2008 R2
If you have a backup made with the backup utility, NTBackup, that comes with
Windows XP, but want to restore files from the backup on a Windows 7 system you
have to download the
Windows NT Backup Restore Utility for Windows 7 and for Windows Server 2008 R2
from Microsoft. The Windows NT Removable Storage Manager (RSM) is no
longer included in Windows 7 or in Windows Server 2008 R2, but this utility
will allow you to restore files in a Windows
.bkf backup file made with
the backup utility on Windows XP and Windows Server 2003 to
computers that are running Windows 7 and Microsoft Windows Server 2008 R2.
There are versions of the Update for Windows 7 (KB974674) utility for 32-bit
and 64-bit versions of Windows 7 as well as for all supported x64-based versions
of Windows Server 2008 R2 and all supported IA-64-based versions of Windows
Server 2008 R2.
The utility is distributed as an
.MSU file, e.g.
Windows6.1-KB974674-x86.msu for the 32-bit
version for Windows XP. An .msu file is a Microsoft Update Stanalone Package
file.
References:
-
Windows NT Backup - Restore in Win 7?
Date: June 5, 2009
Microsoft TechNet:
Resources for IT Professionals
-
Description of the Windows
NT Backup Restore Utility for Windows 7 and for Windows Server 2008 R2
Article ID: 974674
Last Review: January 27, 2010
Revision: 2.0
Microsoft Support
[/os/windows/win7/Backup]
permanent link
Sun, Mar 14, 2010 3:22 pm
Changing the Location of the Data File for Sierra Hallmark Studio Deluxe
By default, the data file used to store calendar events for
Sierra Hallmark Studio Deluxe 1.0 is located in the directory
c:\program files\Sierra\CardStudio\Data. The file that holds
the event data is
PLANR32.DAT. You will also see
backpage.cc1 and
PLANR32.BAK in the same directory. The location of
the file is stored in the
Windows registry
at
HKEY_LOCAL_MACHINE\SOFTWARE\Sierra OnLine\Hallmark Card
Studio\Deluxe\1\Paths\DataPath
.
c:\>reg query "HKEY_LOCAL_MACHINE\SOFTWARE\Sierra OnLine\Hallmark Card Studio\De
luxe\1\Paths" /v DataPath

HKEY_LOCAL_MACHINE\SOFTWARE\Sierra OnLine\Hallmark Card Studio\Deluxe\1\Paths
    DataPath    REG_SZ    c:\program files\Sierra\CardStudio\Data
You can change the location by editing the registry with
regedit or by
using the reg
add command. E.g., if you wanted to have Card Studio Deluxe store
events at a shared network location where multiple computers running the
software could use the same data, you could alter the registry to point
to that location. E.g., to point to a shared directory
\\Server\Sierra\CardStudio\Data, you could use the
following:
c:\>reg add "HKEY_LOCAL_MACHINE\SOFTWARE\Sierra OnLine\Hallmark Card Studio\Delu
xe\1\Paths" /v DataPath /t REG_SZ /d \\Server\Sierra\CardStudio\Data /f
The operation completed successfully.
References:
-
Sierra's Hallmark Card Studio Deluxe Data Location
MoonPoint Support
[/os/windows/software/graphics/sierra]
permanent link
Sun, Mar 14, 2010 12:57 pm
DC++ 0.75 Silent Install
DC++ is an open source client
for Windows for the
Direct Connect /
Advanced Direct
Connect network.
Direct Connect allows you to share files over the Internet without restrictions
or limits. The client is completely free of advertisements and has a nice, easy
to use interface. Firewall and router support is integrated and it is easy and
convenient to use functionality like multi-hub connections, auto-connections
and resuming of downloads.
The software is licensed under
GNU GPL 2.
DCPlusPlus 0.75 uses the Nullsoft
Install System (NSIS) v2.31. Since it uses NSIS, you can perform a
silent
installation by using the /S option. It will install in
C:\Program Files\DC++ by default, but you can perform a silent
install and still select the destination location by using the
/D=directory option. E.g., to install the software in
C:\Program Files\P2P\DC++, you could use the following:
DCPlusPlus-0.75.exe /S /D=%PROGRAMFILES%\P2P\DC++
Note: you have to use a capital "S" for the silent installation and the
/D must appear at the end of the line. Also, don't use quotes even
if the directory path has spaces in it, e.g., if you aren't using the variable
%PROGRAMFILES%, which equates to C:\Program Files
on most systems (you can see its value by issuing the command
echo %PROGRAMFILES% at a command line). And, if you don't use
%PROGRAMFILES%, you need to use the drive location also, e.g.,
C:\Program Files. Any interventing directories that don't exist
will be created.
When you first run DC++ after the installation, you may be prompted to allow
DC++ network communications.
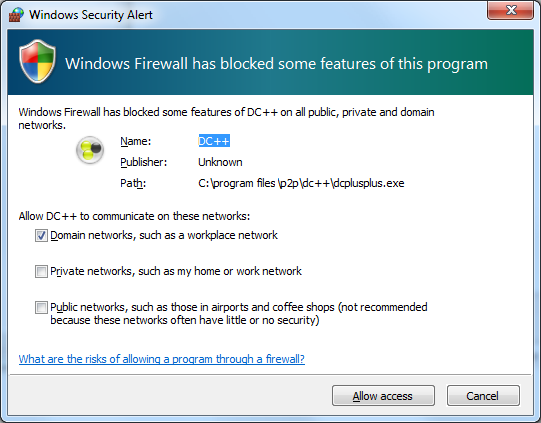
You can uninstall the software by running uninstall.exe from
the directory where you installed the software, e.g.
%PROGRAMFILES%\P2P\DC++\uninstall.exe /S. You can use the
/S for a silent uninstall, but you will still see a window
asking "Also remove queue and settings?"
A package file for a silent install using
WPKG, is shown below:
<?xml version="1.0" encoding="UTF-8"?>

<packages>

<package
   id="DC++"
   name="DC++"
   revision="0750"
   priority="1"
   reboot="false">

   <check type="uninstall" condition="exists" path="DC++ 0.750"/>

   <install cmd='%SOFTWARE%\P2P\DCPlusPlus-0.75.exe /S /D=%PROGRAMFILES%\P2P\DC++"'/>

   <remove cmd='"%PROGRAMFILES%\P2P\DC++\uninstall.exe" /S'/>

</package>

</packages>
References:
- DC++
-
Direct
Connect (file sharing)
Wikipedia, the free encyclopedia
-
Advanced Direct
Connect network
Wikipedia, the free encyclopedia
-
Nullsoft Scriptable Install System
Wikipedia, the free encyclopedia
-
WPKG | Open Source Software Deployment and
Distribution
[/os/windows/software/wpkg]
permanent link
Sat, Mar 13, 2010 5:43 pm
Firefox and SQLite
Starting in Firefox 3, bookmarks and browsing history are stored in the
places.sqlite file,
located in the
Firefox profile folder. On a Windows 7 system, the file will be in
a directory similar to
C:\Users\AcctName\AppData\Roaming\Mozilla\Firefox\Profiles\q3wdrb9w.default.
AcctName will be the name for the particular account.
The
\q3wdrb9w.default is a specific example; you would see a
sequence of 8 numbers and letters that is unique to a particular profile on
that system followed by
.default. Note: you will have to turn on
the display of hidden files and folders to see the directory (see
Show hidden files for instructions on how to do this for
Windows 7).
Places.sqlite is used in Firefox 3 instead of the older
bookmarks.html and
history.dat files (the older
files are left in the profile folder for backward compatibility).
I opened a places.sqlite file with
SQLite. Note: Firefox must be closed
when you try opening the file or you will get the error message "Error:
database is locked".
C:\Users\Administrator\Downloads>sqlite3 C:\Users\Administrator\AppData\Roaming\
Mozilla\Firefox\Profiles\q3wdrb9w.default\places.sqlite
SQLite version 3.6.23
Enter ".help" for instructions
Enter SQL statements terminated with a ";"
sqlite>
I then used .tables to see what tables were in it.
sqlite> .tables
moz_anno_attributes  moz_favicons         moz_keywords
moz_annos            moz_historyvisits    moz_places
moz_bookmarks        moz_inputhistory
moz_bookmarks_roots  moz_items_annos
The places.sqlite file contains the following tables:
- moz_anno_attributes - Annotation Attributes
- moz_annos - Annotations
- moz_bookmarks - Bookmarks
- moz_bookmarks_roots - Bookmark roots i.e. places, menu, toolbar, tags,
unfiled
- moz_favicons - Favourite icons - including URL of icon
- moz_historyvisits - A history of the number of times a site has been
visited
- moz_inputhistory - A history of URLS typed by the user
- moz_items_annos - Item annotations
- moz_keywords - Keywords
- moz_places - Places/Sites visited - referenced by moz_historyvisits
You can see what the columns are in a table using the .schema
command, so I can use .schema moz_bookmarks for further information
about the "bookmarks" table.
sqlite> .schema moz_bookmarks
CREATE TABLE moz_bookmarks (  id INTEGER PRIMARY KEY, type INTEGER, fk INTEGER D
EFAULT NULL, parent INTEGER, position INTEGER, title LONGVARCHAR, keyword_id INT
EGER, folder_type TEXT, dateAdded INTEGER, lastModified INTEGER);
CREATE INDEX moz_bookmarks_itemindex ON moz_bookmarks (fk, type);
CREATE INDEX moz_bookmarks_itemlastmodifiedindex ON moz_bookmarks (fk, lastModif
ied);
CREATE INDEX moz_bookmarks_parentindex ON moz_bookmarks (parent, position);
CREATE TRIGGER moz_bookmarks_beforedelete_v1_trigger BEFORE DELETE ON moz_bookma
rks FOR EACH ROW WHEN OLD.keyword_id NOT NULL BEGIN DELETE FROM moz_keywords WHE
RE id = OLD.keyword_id AND NOT EXISTS ( SELECT id FROM moz_bookmarks WHERE keywo
rd_id = OLD.keyword_id AND id <> OLD.id LIMIT 1 );END;
A diagram of
the layout of the tables provides further information as does the
The Places
database.
I can see that there is a column named "title". So I can view the value for
"title" for all entries in the table with select title from
moz_bookmarks. Note: you may see a lot of what may appear to be
extraneous bookmarks, i.e. webpages not bookmarked by the user. That's because
you also see what you would see if you clicked on Bookmarks,
Bookmarks Toolbar, Latest Headlines.
You can exit from sqlite with .exit, .quit,
or Ctrl-C.
If you prefer a GUI
to browse SQLite databases, you can use
SQLite Database
Browser, which can provide a graphical interface for browsing the
databases on a Windows system.
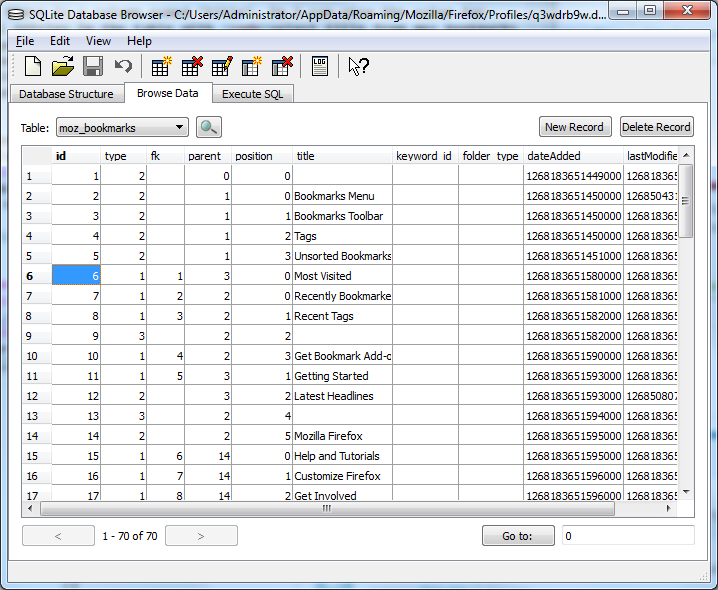
To install the program, just unzip the files in the .zip file, once you've
downloaded it, to the directory you want to use for it.
References:
-
SQLite
-
Locked or
damaged places.sqlite
MozillaZine Knowledge Base
-
Places.sqlite
MozillaZine Knowledge Base
-
The Places
database
Mozilla Developer Center
-
SQLite Database
Browser
SourceForge
-
Improving
Iceweasel Performance
April 3, 2009
Zenwalk Support
[/network/web/browser/firefox]
permanent link
Sat, Mar 13, 2010 10:15 am
Transferring Files Via the Remote Desktop
If you want to transfer files between your local system and a remote system
using the
remote
desktop software that comes with Windows you can do so via the following
procedure (note: this procedure was written for Windows 7, but should be
similar for prior versions).
- Click on the Start button.
- Select All Programs.
- Select Accessories.
- Select Remote Desktop Connection.
- When the Remote Desktop Connection window opens, click on
Options.
- Click on the Local Resources tab.
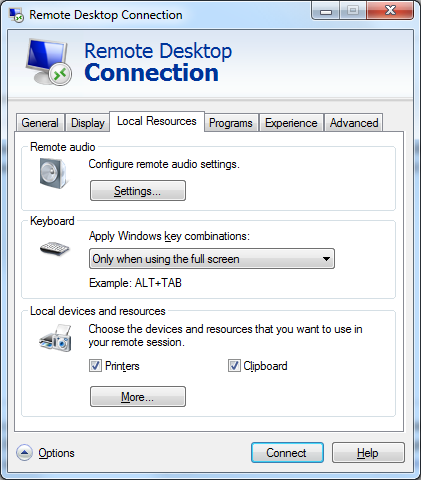
- Click on the More button.
- Click on Drives to share all drives. If yo only want to share
some local drives, click on the "+" to the left of drives and select only
the drives you want to share.
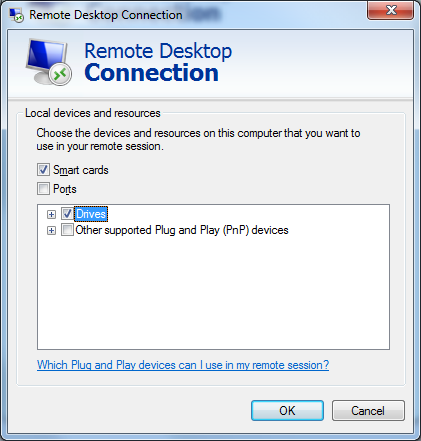
- Click on OK.
- Click on Connect.
If you go to My Computer on the remote system or use Windows
Explorer, you should see the drives on the local system from which you
connected listed among the drives visible on the remote system.
References:
-
Transfer files via the Remote Desktop
Setup32.com
[/os/windows/software/remote-control/rdp]
permanent link
Tue, Mar 09, 2010 10:36 pm
Transferring Winamp 5.572 Info to Another PC
I needed to copy the Winamp settings from my wife's laptop to her desktop
system. Both systems are running Windows 7. I found the bookmarks in
C:\Users\acctname\AppData\Roaming\Winamp
. I also needed to copy her list of online services, since I had
added the
Live365 Internet
Radio to the list of services - see
Adding Live365 to
WinAmp's Online Services List, so I copied the contents of the
C:\Users\acctname\AppData\Roaming\Winamp\Plugins\ml
directory, including subdirectories from one system to the other.
Acctname represents the account name under which she logs on.
Note: you need to display hidden files and folders to see the
directory - see
Show hidden files for instructions on how to do this under Windows 7,
if you don't know how to do so.
[/os/windows/software/audio/winamp]
permanent link
Tue, Mar 09, 2010 9:47 pm
Winamp Media Player Silent Installation
I wanted to do a silent install on Winamp. When I went to the
Winamp website, I found that the latest
version available for download was
5.572. The file available for download was
winamp5572_full_emusic-7plus_en-us.exe. Winamp, which was
developed by
Nullsoft, was acquired by AOL,
which is bundling
eMusic, which I didn't
want. At
WinampWithoutEMusic, I learned that you can download versions of
Winamp without the eMusic add-on by removing the
emusic-7plus_ portion of the file name. By using
winamp5572_full_en-us.exe, I was able to get the same version without
the eMusic add-on. There's similar information at
Super Bowl XL, Download Winamp without Emusic.
After downloading it, I examined it with
FileAlyzer
. I saw "Nullsoft Install System v2.45.1" within the file. Winamp is
installed with the Nullsoft
Scriptable Install System (NSIS), which is to be expected given that Winamp
was developed by Nullsoft.
For a default installation, Winamp will be installed in
C:\Program Files\Winamp and Winamp Toolbar will be installed in
C:\Program Files\Winamp Toolbar.
A "silent" install can be peformed by using a /S option. Note:
it has to be a capital "S", e.g. winamp5572_full_en-us.exe /S.
If you use the silent install option, the Winamp Toolbar will be installed by
default within Internet Explorer and Firefox. During the installation any open
instances of the browsers will be closed automatically. When you reopen the
browsers you will see the Winamp toolbar within the browsers.
The Winamp and Winamp Toolbar uninstall strings in the
Windows registry
for a default installation
are at
HKEY_LOCAL_MACHINE\SOFTWARE\Microsoft\Windows\CurrentVersion\Uninstall
are shown below:
| Name | UninstallString |
|---|
| Winamp | "C:\Program Files\Winamp\UninstWA.exe" |
| Winamp Toolbar | "C:\Program Files\Winamp Toolbar\uninstall.exe" |
A silent uninstall can be performed for Winamp with
"C:\Program Files\Winamp\UninstWA.exe". A silent uninstall can be
performed for the toolbar with
"C:\Program Files\Winamp Toolbar\uninstall.exe" /S. Use a capital
"S" for the silent option. Note: a silent uninstall of the Winamp toolbar will
close any open browser windows.
One can specify the installation directory with
/D=installdirectory
I could specify winamp5572_full_en-us.exe /D=C:\Program
Files\Audio and Video\Winamp at the command line and the GUI installation
method would show the directory I picked. I had to put the C:
there for that to occur, though. For a silent install, I could use the
following to specify the location:
winamp5572_full_en-us.exe /S /D=C:\Program Files\Audio and Video\Winamp\
Again, I needed to have the
C:\ at the beginning of the directory location. Also, don't use
quotes even if the directory path has spaces in it and the /D
option has to be the last option on the line.
Unfortunately, the toolbar is still installed and goes into its default location
of C:\Program Files\Winamp Toolbar. But I remove it with
"C:\Program Files\Winamp Toolbar\uninstall.exe" /S. Unfortunately,
that only removes the toolbar from Internet Explorer and I have to manually
remove it from Firefox.
References:
-
WinampWithoutEMusic
Last modified: February 13, 2010
Jurand Nogiec
-
Super Bowl XL, Download Winamp without Emusic
Date: February 6, 2006
INeedAttention.com
-
Nullsoft Scriptable Install System
Wikipedia, the free encyclopedia
-
Winamp Media Player 5.56 Installation
Date: November 24, 2009
MoonPoint Support
[/os/windows/software/audio/winamp]
permanent link
Sat, Mar 06, 2010 6:40 pm
Windows Help Under Windows 7
When I opened
MUSHclient on a Windows 7 system, I saw the message "Failed to launch help."
A
Windows Help and Support window opened stating the following:
The Help for this program was created in Windows Help format, which depends on
a feature that isn't included in this version of Windows. However, you can
download a program that will allow you to view Help created in the Windows
Help format.
At
I cannot open Help
files that require the Windows Help (WinHlp32.exe) program, Microsoft
provides the following information:
On computers that are running Windows Vista, Windows 7, Windows Server 2008, or
Windows Server 2008 R2, you may be unable to open Help files that require the
Windows Help (WinHlp32.exe) program. This article contains information about a
download that helps you fix this problem.
Microsoft stopped including the 32-bit Help file viewer in Windows releases
beginning with Windows Vista and Windows Server 2008. To support customers who
still rely on legacy .hlp files, the Microsoft Download Center provides
WinHlp32.exe downloads for Windows Vista, Windows 7, Windows Server 2008, and
Windows Server 2008 R2.
The version of the program for Windows 7 can be downloaded from
Windows Help program (WinHlp32.exe) for Windows 7. That page provides
the following overview statement:
Windows Help (WinHlp32.exe) is a Help program that has been included with
Microsoft Windows versions starting with the Microsoft Windows 3.1 operating
system. However, the Windows Help program has not had a major update for many
releases and no longer meets Microsoft's standards. Therefore, starting with
the release of Windows Vista and continuing in Windows 7, the Windows Help
program will not ship as a feature of Windows. If you want to view 32-bit .hlp
files, you must download and install the program (WinHlp32.exe) from the
Microsoft Download Center.
There are two versions of the software available, one for 64-bit systems
and one for 32-bit systems. The download files are
.msu files. You can install
the software by just double-clicking on the downloaded file from the Windows
Explorer, which will open a Windows Update Standalone Installer
window, where you would see the propmpt "Do you want to install the following
Windows software update? Update for WIndows (KB917607)". During the
installation, winhlp32.exe is placed in %systemroot,
e.g. C:\Windows.
For a silent installation, you can use the Windows Update Standalone
Installer, wusa.exe, with
the /quiet option (quiet mode, no user interaction, reboot
as needed). It isn't necessary to reboot after installing Windows Help.
You can specify /norestart (when combined with /quiet,
installer will NOT initiate reboot. You can see other options by using
wusa /?.
The following command performs a silent install for the 32-bit version:
wusa /quiet /norestart Windows6.1-KB917607-x86.msu
To silently uninstall the software, you can use the command below.
wusa Windows6.1-KB917607-x86.msu /uninstall /quiet /norestart
A package file that can be used with WPKG
to silently install Windows Help for Windows 7 is shown below. Note:
though Windows Help will no longer work after the uninstall,
c:\windows\winhlp32.exe isn't actually removed, though other
files installed with it, such as c:\windows\system32\ftlx0411.dll
are removed. You may have to take ownership of winhlp32.exe
to remove it - see
Add "Take Ownership" to Explorer Right-Click Menu in Win 7 or Vista,
since otherwise only TrustedInstaller has full rights to the
file.
<?xml version="1.0" encoding="UTF-8"?>

<packages>

<package
  id="WinHelp"
  name="Windows Help"
  revision="1"
  reboot="false"
  priority="10">

  <check type='logical' condition='and'>
     <!-- The uninstall process doesn't remove winhlp32.exe, but does remove
     ftlx0411.dll -->
     <check type="file" condition="exists"
      path="%SystemRoot%\system32\ftlx0411.dll" />
     <check type="file" condition="exists"
      path="%SystemRoot%\winhlp32.exe" />
  </check>
  <install cmd='wusa %SOFTWARE%\utilities\miscellaneous\Windows6.1-KB917607-x86.msu /quiet /norestart ' />
  <remove cmd='wusa %SOFTWARE%\utilities\miscellaneous\Windows6.1-KB917607-x86.msu /uninstall /quiet /norestart' />
  <upgrade cmd='' />

</package>

</packages>
References:
-
I cannot open Help files that require the Windows Help (WinHlp32.exe) program
Article ID: 917607
Last Review: October 27, 2009
Revision: 20.3
Microsoft Support
-
Windows Help program (WinHlp32.exe) for Windows 7
Version: 1.0
Date Published: 10/14/2009
Microsoft Corporation
-
Is it possible to silently run the Vista installation package for MSI 4.5?
Windows Installer Team Blog
-
silent installation paramters for Windows6.1-KB958559-x64.msu
Date: July 7, 2009
Microsoft
TechNet: Resources for IT Professionals
-
Permission from Trusted installer!
Date: May 18, 2009
Mcirsoft TechNet:
Resources for IT Professionals
-
Add "Take Ownership" to Explorer Right-Click Menu in Win 7 or Vista
How-To Geek
[/os/windows/software/wpkg]
permanent link
Sat, Mar 06, 2010 5:57 pm
Using Multiple Install Conditions with WPKG
There can be zero or more conditions checked prior to installing software
with
WPKG. To perform multiple checks,
enclose the checks with
<check type="logical"
condition="logicalcondition">
and
</check>.
You can use
not,
and,
or,
atleast, or
atmost for
logicalcondition. E.g. to have WPKG check for
the existence of two files
c:\windows\system32\ftlx0411.dll and
c:\windows\winhlp32.exe, you could use the following:
<check type='logical' condition='and'>
     <!-- The uninstall process doesn't remove winhlp32.exe, but does remove
     ftlx0411.dll -->
     <check type="file" condition="exists"
      path="%SystemRoot%\system32\ftlx0411.dll" />
     <check type="file" condition="exists"
      path="%SystemRoot%\winhlp32.exe" />
</check>
In this case, WPKG will only consider the software installed if both files
exist. If only one of them exists, the installation will proceed.
References:
-
Packages.xml
WPKG | Open Source Software Deployment and
Distribution
-
Re: [wpkg-users] Check command
Date: June 11, 2009
wpkg-users
[/os/windows/software/wpkg]
permanent link
Sat, Mar 06, 2010 5:43 pm
Incorrect Installed Software in WPKG
If
WPKG is showing an incorrect list
of installed software, e.g. it shows a program is installed, but the
program is no longer installed because it was removed outside of WPKG,
you can correct the problem by editing
C:\Windows\System32\wpkg.xml on the system where the
software was installed. Just remove the
section of the file applying to that package. E.g. from the
package id="pkgid" name="pkgname" revision="1"
reboot="false" priority="0">
to the
</package> for
the particular package. Then, if you use
wpkg.js /show:pkgid
the package will no longer be shown as installed.
[/os/windows/software/wpkg]
permanent link
Tue, Mar 02, 2010 4:09 pm
OS X Line Endings
Operating systems handle the line endings in text files in
different ways. For
DOS
and
Microsoft Windows,
the end of a line is marked by a
carriage return (CR)
and a
line feed (LF)
character.
The CR and LF characters were used originally on
teletypewriters, aka
teleprinters, which were electromechanical typewriters used for
telecommunications or to control early computers. Though, later, the
carriage return would usually move the paper in the device to the next line
as well, initially it would cause the cylinder on which the paper was held (the
carriage) to return to the left side of the paper after a line of text had been
typed without advancing the paper to a new line. Today, the return
key you see on a computer's keyboard is a descendant of the carriage return
on the earlier teletype machines. In most word processors today, hitting
the return key will move the cursor to the beginning of the next line.
If you are working on a text file, e.g. one with a .txt extension, on a DOS
or Microsoft Windows system, when you hit the return key two characters
are inserted in the file at that point, a carriage return (CR) character
followed by a line feed character, which have the following
hexadecimal
representations.
| Description | Hex |
|---|
| Carriage Return (CR) | 0D |
| Line Feed (LF) | 0A |
But, if you are working on a
Linux or Unix system,
then only the LF character is inserted at the end of a line when you hit
return. This may be due to a desire to reduce disk storage space for text
files on early Unix computers; disk storage was much more limited than it
is today.
Mac systems use
yet another convention with
OS X, even though it is a
Unix-based operating system, with a heritage in
BSD Unix . They use just the CR
character to mark the end of a line.
| OS | Newline | Hexadecimal |
|---|
| DOS/Windows | CRLF | 0D 0A |
| Linux/Unix | LF | 0A |
| Mac OS/OS X | CR | 0D |
So most Mac applications will, when you save a file as a text file,
put just a CR at the end of the line. However, if you are editing
a file from the command line on a Mac OS X system with a program,
such as Vi, which is
an editor that comes with Mac OS X, but which was originally developed
for Unix, it will save a file with the LF (hex 0A) character at the
end of lines.
E.g., I can create a text file test.txt with vi and put just
the following two lines in it:
123

456
If I examine the contents of the file with the od program, I see the
following, if I use the -c option to display
ASCII
characters or backslash escapes:
GS01:Documents jsmith$ od -c test.txt
0000000    1   2   3  \n   4   5   6  \n
0000010
The \n at the end of each line represents a newline
But, if I use
-ax to see the
ASCII
and hexadecimal contents of the file, I see the following:
GS01:Documents jsmith$ od -ax test.txt
0000000    1   2   3  nl   4   5   6  nl
             3231    0a33    3534    0a36
0000010
I see that the lines are terminated with the hexidecimal 0A character
for the newline character. Note: the hexadecimal representation that
appears below the ASCII representation has the bytes reversed, i.e.
32 represents 2 and 31 represents
1.
If you need to convert a file that uses the Mac style of terminating lines
with a CR character to the Linux/Unix style of using a LF character,
then you can use the following procedure within vi taken
from
Using the shell (Terminal) in Mac OS X.
Type "1,$s/" and then press CTRL-V followed by CTRL-M. When you
press CTRL-V nothing appears to happen, but the CTRL-M shows up as
"^M". Continue with "/" and then CTRL-V again. Hit RETURN (which
will show up as ^M and you could do that too - I just like it this
way) and finally "/g". On your screen the whole thing looks like:
:1,$s/^M/^M/g
What does that mean? It means "Starting at line 1 and stopping
at the end of the file (1,$), substitute (s) any CTRL-M (/^M/) with
Unix CTRL-M (^M/) and do it for the entire line rather than just
the first CTRL-M you find (g) (On most other Unixes I'd just do
s/^M//g ; I don't know why Mac OS X didn't let me do that). It is
a little strange that you replace ^M with ^M but get something
entirely different, but that's a subject for another day. The
morbidly curious can start by typing "man stty" if they need to
know now.
You can then use wq to save the file under the same name
or wq newfilename.txt to give the converted version a new name.
Or, alternatively, if you don't want to use the vi editor, you can use
the following:
cat file1 | tr "\\r" "\\n" > file2
That will use the translate, i.e. tr, command to translate
all instances of the carriage return character, represented by \r
to the newline character, in this case the LF character used on Unix systems.
If you wish, you could also create a script, e.g.,
mac2unix
to perform the translation:
test $# -eq 2 -a "$1" != "$2" && tr "\015" "\012" < $1 > $2 ||
echo "Usage: mac2unix f1 f2"
After changing the permissions on the file with chmod 755
mac2unix, you could use mac2unix file1 file to convert the
contents of file1 to file2.
I receive email messages from a Unix system that contain
gpg encrypted data on a Mac OS
X system. If I try to decrypt them with gpg --decrypt file1.gpg
>file2.txt on the Mac system, I receive the error message
gpg: [don't know]: invalid packet (ctb=53). So I first need
to convert file1 with this procedure before running gpg to
decrypt it.
If you needed to convert a file on a Mac system to the text format for
a DOS or Microsoft Windows system, you could create a script, e.g.
mac2dos to perform the conversion:
test $# -eq 2 -a "$1" != "$2" && { mac2unix $1 $2; unix2dos $2 $2 } || echo "Usage: mac2dos f1 f2"
That script would rely on the mac2unix script you created
previously.
To go the other way, e.g. from DOS/Windows to the Mac text format or
from Unix to the MAC format, you could use the following:
dos2mac
test $# -eq 2 -a "$1" != "$2" && tr -d "\012" < $1 > $2 || echo
"Usage: dos2mac f1 f2"
unix2mac
test $# -eq 2 -a "$1" != "$2" && tr "\012" "\015" < $1 > $2 ||
echo "Usage: unix2mac f1 f2"
References
-
Carriage return
Wikipedia, the free encyclopedia
-
Newline
Wikipedia, the free encyclopedia
-
Teleprinter
Wikipedia, the free encyclopedia
-
Using the shell
(Terminal) in Mac OS X
Date: December 2002
MacOSX articles
at APLawrence.com
-
Vi
Wikipedia, the free encyclopedia
-
Line Breaks
Date: July 1, 2003
By: Rodney Sparapani/Medical College of Wisconsin
The ESS-help
Archives
-
Why is the line terminator CR+LF?
Date: March 18, 2004
By:
oldnewthing
The Old New Thing
[/os/os-x]
permanent link
Sat, Feb 27, 2010 9:12 pm
Windows Easy Transfer from Windows XP or Vista to Windows 7
If you are upgrading a prior version of Windows, such as Windows XP or
vista, to Windows 7, you can use the Windows Easy Transfer program to
transfer files and settings for accounts on the system.
[ More Info ]
[/os/windows/win7]
permanent link
Sat, Feb 27, 2010 7:20 pm
Windows 7 Upgrade Advisor
You can use the
Windows 7 Upgrade Advisor to check on whether a system is compatible with
Windows 7.
After installing the software, start it and click on Start check.
The check of the system may take several minutes. When it completes,
you will see a list of the issues found.
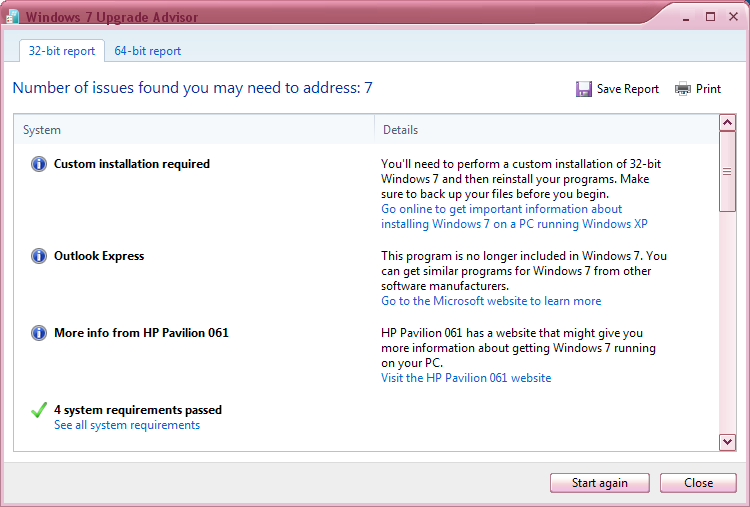
If you scroll down through the issues found, you can determine if any
issues were found with hardware in or attached to the system, such
as a video card in the computer or a printer attached to the system,
by examining the Devices section.
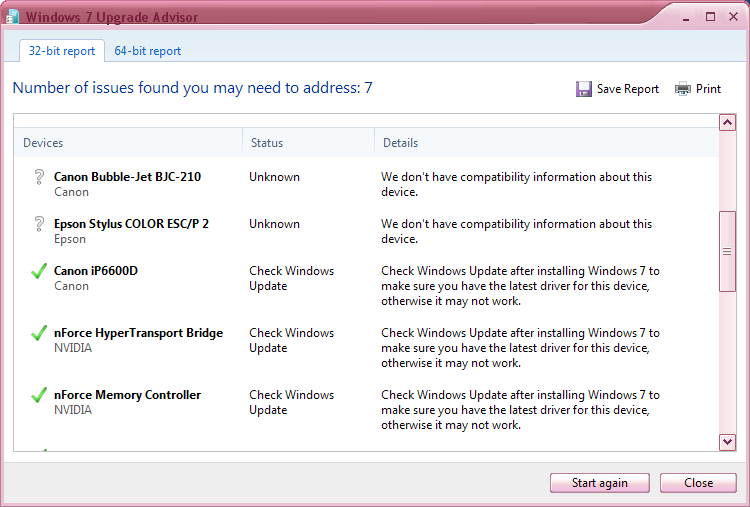
If you click on Save Report, you can save a report on what the Windows
Upgrade Advisor found in .mht or .html format. A compatibility report for an
HP Pavilion a1630n system can be seen
here. The report
indicates the NVIDIA GeForce 6150 LE video card in the system is
compatible with Windows 7 and that Windows Aero support should be available.
[/os/windows/win7]
permanent link
Fri, Feb 19, 2010 11:14 pm
Files for Windows Live Messenger Custom Emoticons
In trying to determine how to copy Windows Live Messenger version 2009
emoticon files from one system to another, I found a
C:\Users\acctname\AppData\Local\Microsoft\Messenger\user@example.com\ObjectStore\CustomEmoticons
directory on a Windows 7 system. For the directory path
acctname is the
particular Windows account. The email
address used for logging into Windows Live Messenger would appear in place
of
user@example.com. The equivalent directory on the Windows XP
system from which I was going to copy the custom icons was
\Documents and Settings\acctname\Local Settings\Application Data\Microsoft\Messenger\user@example.com\ObjectStore\CustomEmoticons.
The directory contained .dt2 and .id2 files.
When I checked .dt2 files with
FileAlyzer, I found that they were actually
GIF files. Most were
GIF89a files, but some were GIF87a files as is revealed by the first 6
bytes in the files. GIF89a files have 47 49 46 38 39 61 as
the first six bytes in the files while GIF87a files have
47 49 46 38 37 61 as the first six bytes. If you change the
extension on a file from .dt2 to .gif, you can view the file with an
image viewing program.
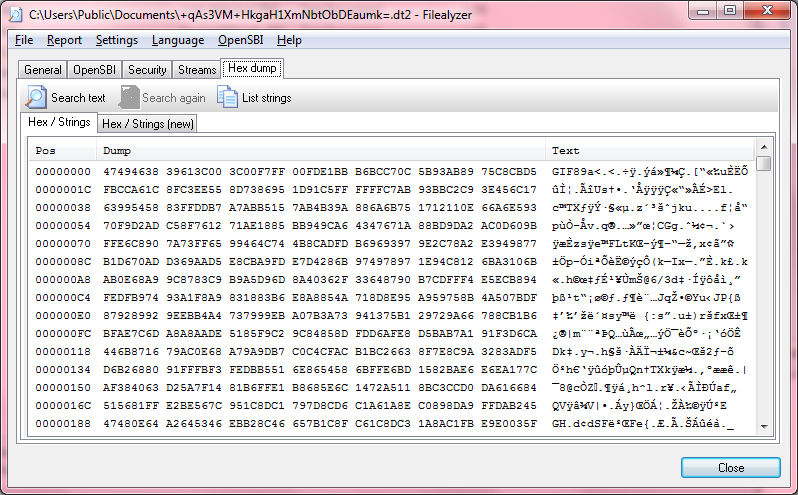
There is a .dt2 and .id2 file for each emoticon with names similar
to the example shown below.
ZysU6LltaOP0MVYOBvV4YcbnHr4=.dt2

ZysU6LltaOP0MVYOBvV4YcbnHr4=.id2
These are associated with the emoticons you see in the Custom emoticons
section when you select an emoticon within Windows Live Messenger.
I was able to transfer all of the custom icons for Windows Live Messenger
from the Windows XP system to the Windows 7 system, by copying all the
files in the CustomIcons folder on the Windows XP system to
that folder on the Windows 7 system. Where the files already exist, you can
choose to skip or copy over those files.
Note: if you have Windows Live Messenger open on the destination system
at the time you copy the files to it, you will need to close all Windows
Live Messenger windows and close the program and then reopen it to see
the custom icons you copied.
References:
-
GIF
Wikipedia, the free encyclopedia
-
Decrypting Messenger Id2 files
Date: July 2, 2007
Fanatic Live
[/network/chat/live_messenger]
permanent link
Fri, Feb 19, 2010 8:48 pm
Mac GNU Privacy Guard 2.x
A version of
GNU
Privacy Guard is available for
Mac OS X
systems from
Mac GNU
Privacy Guard. A .zip file,
MacGPG2-2.0.14RC2.zip, can be downloaded from
Mac GNU Privacy Guard v2.x Files.
To install the software, once you've downloaded it, unzip
the contents of the zip file, which you can do from a shell
prompt with the unzip command. Then use the
Finder to locate the .mpkg file that was extracted
from the .zip file. Double-click on it to start the MacGPG2
Installer.
Click on Continue to continue with the installation.
The next step will be to view the Read Me
information, followed by the display of the GNU General Public
License Version 3, which covers the use of the software.
After agreeing to the license, you will be informed of the
amount of space that will be used by the software, which is
21.6 MB for version 2.0.14RC2. When you proceed with the
installation, the gpg executable will be installed in
/usr/local/bin.
You can see other files installed during the installation
with lsbom -fls
/Library/Receipts/macgpg2.pkg/Contents/Archive.bom.
$ lsbom -fls /Library/Receipts/macgpg2.pkg/Contents/Archive.bom
./Applications/start-gpg-agent.app/Contents/Info.plist
./Applications/start-gpg-agent.app/Contents/MacOS/applet
./Applications/start-gpg-agent.app/Contents/PkgInfo
./Applications/start-gpg-agent.app/Contents/Resources/._applet.icns
./Applications/start-gpg-agent.app/Contents/Resources/Scripts/._main
.scpt
./Applications/start-gpg-agent.app/Contents/Resources/Scripts/main.s
cpt
./Applications/start-gpg-agent.app/Contents/Resources/applet.icns
./Applications/start-gpg-agent.app/Contents/Resources/applet.rsrc
./Applications/start-gpg-agent.app/Contents/Resources/description.rt
fd/TXT.rtf
./Library/LaunchAgents/com.sourceforge.macgpg2.gpg-agent.plist
./private/etc/paths.d/MacGPG2
./usr/local/sbin/MacGPG2-login.sh
./usr/local/sbin/MacGPG2-logout.sh
Your keyrings, such as
pubring.gpg, will be installed in
/Users/acctname/.gnupg/. where
acctname represents the particular account
you are using. If you have keyrings already on another system,
you can copy those keyrings to that location. I.e., you can
copy pubring.gpg, secring.gpg, and
trustdb.gpg from the other system. You can see
what keys are in your public keyring with gpg
--list-keys.
References:
-
GNU Privacy Guard
Wikipedia, the
free encyclopedia
-
Mac GNU Privacy Guard
SourceForge
-
Uninstall applications installed from packages
Date: January 11, 2010
By:
oblahdioblidaa
Mac OS X Hints
[/os/os-x/software/security]
permanent link
Mon, Feb 15, 2010 10:37 pm
Taskbar Color Not Changing for Themes on a Windows 7 System
My wife reported that the taskbar color on her Windows 7 desktop system was not
changing when she changed the theme as it did on her laptop. The background
color would change for a theme, but the taskbar color remained the same gray
color.
I right-clicked on the desktop and chose Personalize. At
the bottom of the window where one could select a theme, there was an
option to Troubleshooot problems with transparency and other Aero effects
. I clicked on that option. A window then appeared where I could
click on Next to troubleshoot Aero problems.
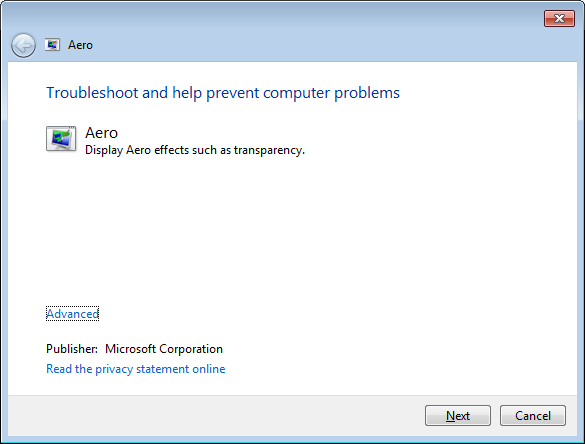
When I clicked on Next, I saw a window with "Update the driver
for your video card" and the message that "The current
video card may support Aero with a driver that is compliant with the Windows
Display Driver Model (WDDM). Contact the manufacturer of your computer or
video card for a WDDM-compatible driver."
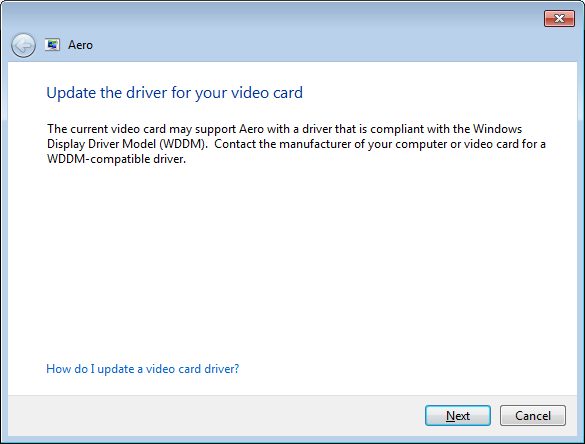
I clicked on Next and saw a "Troubleshooting has completed" window
stating the following:
Problems found
Video card driver doesn't support Aero effects
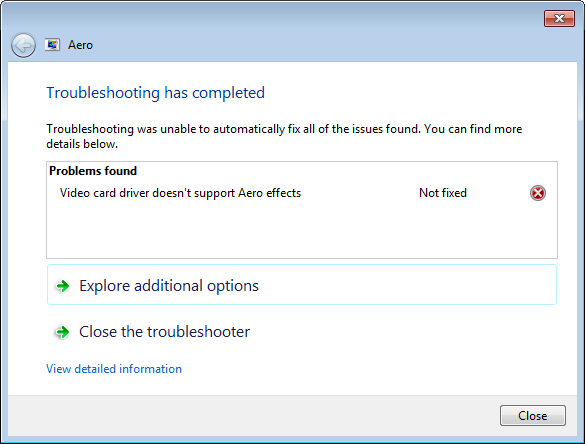
I decided to check the
Windows Experience Index (WEI) score for the system. I clicked on the
Start button  and selected
Control Panel. The View by settng was Category. I
changed it to Large icons and then selected Performance
Information and Tools, which showed me the WEI score was 1.0.
The WEI assesses key
system components on a scale of 1.0 to 7.9. A system is rated with an overall
score, called the base score, and with subscores for each of five individual
hardware components: processor, memory, graphics, gaming graphics, and primary
hard disk. The base score is determined from the lowest of the five subscores,
because a system's performance is limited by its slowest or least-powerful
hardware component.
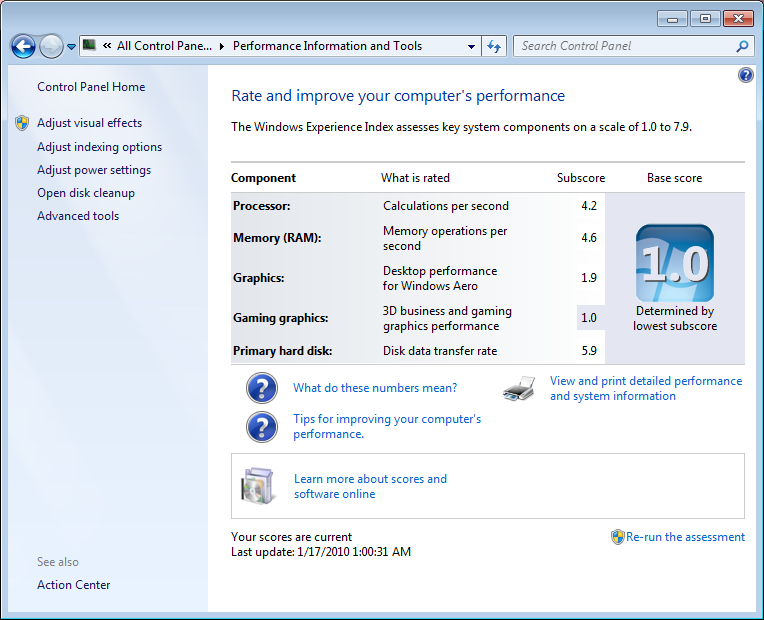
In this case the values were as follows:
| Component | What is rated | Subscore |
|---|
| Processor: | Calculations per second | 4.2 |
| Memory (RAM): | Memory operations per second |
4.6 |
| Graphics: | Desktop performance for Windows Aero |
1.9 |
| Gaming graphics: | 3D business and gaming graphics
performance | 1.0 |
| Primary hard disk: | Disk data transfer rate |
5.9 |
In this case the overall score was 1.0, because of the gaming graphics
score. I clicked on Re-run the assessment. The only score that changed
was the one for memory, which changed from 4.6 to 4.9. I had replaced the
memory modules in the system.
According to the table provided at
Winows Experience Index, a value of 3.0 is typically needed to have
Windows Aero automatically enabled.
[/os/windows/win7/video]
permanent link
Mon, Feb 15, 2010 9:04 pm
Unattended Installation of Paint Shop Pro 9
The Paint Shop Pro 9.01 installation program,
English_PaintShopPro901_Jasc_PREMIUMESD.exe appears to be an
InstallShield
PackagefortheWeb (PFTW), i.e. an
InstallShield tree bundled up into one file. If you open the file
in
WinRAR,
WinZip, or similar program, you will see
the following files within it.
| Name | Size |
|---|
| \Data1.cab | 107,916,138 |
| \0x0409.ini | 4,632 |
| \instmsia.exe | 1,708,856 |
| \instmsiw.exe | 1,822,520 |
| \Jasc Paint Shop Pro 9.msi | 2,120,312 |
| \setup.exe | 225,280 |
| \Setup.ini | 1,221 |
When you run English_PaintShopPro901_Jasc_PREMIUMESD.exe without
any options it will extract the files listed above to
C:\Program Files\Jasc Software
Inc\Setup Files\English PaintShopPro901 Jasc PREMIUM ESD
. The
setup.exe file will be executed, which will install
Paint Shop Pro 9 to the default installation directory of
%PROGRAMFILES%\Jasc Software Inc\Paint Shop Pro 9\, e.g.,
C:\Program Files\Jasc Software Inc\Paint Shop Pro 9\.
If you run the program from the command line and specify
INSTALLDIR, though, you can change where the software is
installed. E.g., you could use the following:
c:\Users\JDoe\Downloads>English_PaintShopPro901_Jasc_PREMIUMESD.exe /s /a
/w /v" /qn /l* C:\Users\Public\Documents\PSP9.log INSTALLDIR=\"
C:\Program Files\Graphics\Paint Shop Pro 9\" ALLUSERS=2"
The options used are listed below:
/s : Silent mode
For an InstallScript MSI or InstallScript project, the command
Setup.exe /s runs the installation in silent mode, by default based on
the responses contained in a response file called Setup.iss in the same
directory. (Response files are created by running Setup.exe with the
/r option.) To specify an alternative file name or location of the
response file, use the /f1 option.
/a : Add
The /a ... ("add") switch allows you to add switches to the command line of the
underlying setup.exe process. You may provide any of the normal InstallShield
switches here, including /r, /s, and
/sms.
Note: the PFTW package recognizes the /s and /a
switches. The /s switch instructs the PFTW package to run silently,
but this does not necessarily mean that the setup.exe program
within it will run silently.
/w : Wait (Basic MSI and InstallScript MSI projects)
For a Basic MSI project, the /w option forces Setup.exe to wait until the
installation is complete before exiting.
/v"ISSCRIPTCMDLINE=\" \"" : Pass arguments that should
be passed to the script (Basic MSI projects only)
This option specifices command-line parameters to be passed to the script. Any
property supported by InstallScript MSI (where appropriate) can be specified.
(The most common ones are /d and /z.)
For example, the following indicates that you want to debug the script, and that
the CMDLINE variable should contain
TEST.
Setup.exe /v"ISSCRIPTCMDLINE=\"-d -zTEST\""
Note that as shown above, when you want to specify that a double quote
character is not a delimiter for the command line but a delimiter for the
property, use \".
Note also that as with any public Windows Installer property, this property
should be specified with all uppercase letters.
So, I've put the \ before each of the double quotes in
INSTALLDIR=\"C:\Program Files\Graphics\Paint Shop Pro 9\
to "escape" the meaning of them on the command line. The option thus specifies
that the software should be installed in C:\Program
Files\Graphics\Paint Shop Pro 9\ rather than the default directory
of C:\Program Files\Jasc Software Inc\Paint Shop Pro 9\.
But the first switch I pass down to
msiexec, which is the
Microsoft Windows provided installer program is /qn. That
makes the installation non-interactive, i.e. yields an unattended installation.
You could use /qb, instead, for an unattended
installation, however, in this case there is still a brief display
of a window during the installation about preparation for the installation.
The /l* C:\Users\Public\Documents\PSP9.log specifies that
a log file should be produced with information on the installation.
Information on the ALLUSERS option can be found at
ALLUSERS Property webpage.
You can provide named options, or "properties", at the end of the command
line; which properties are supported depends on the package. If you wnat to
know which properties are supported for an installation you can install the
software with the /l* option and then look in the log file
after the installation is completed, which is what I did to determine what
property to use to specify the installation directory for the software.
The * after the l indicates that all types
of log messages should be included in the log file. You can see the
types of messages that can be logged at
Command-Line Switches for
the Microsoft Windows Installer Tool.
I saw the following in the log file:
Property(S): INSTALLDIR = C:\Program Files\Jasc Software Inc\Paint Shop Pro 9\
So I then knew I could specify the directory for an unintended install by
using INSTALLDIR=. I wanted to install the software in
C:\Program Files\Graphics\Paint Shop Pro 9\. Since the directory
path contains spaces, I had to enclose the path and file name in double quotes.
But, since those double quotes would be appearing within an outer set of
double quotes, I needed to put a forward slash before each one. Otherwise the
first double quote could be interprested as closing the outer set of double
quotes, so I used INSTALLDIR=\" C:\Program Files\Graphics\Paint Shop Pro
9\"
During the installation, the following registry keys are created:
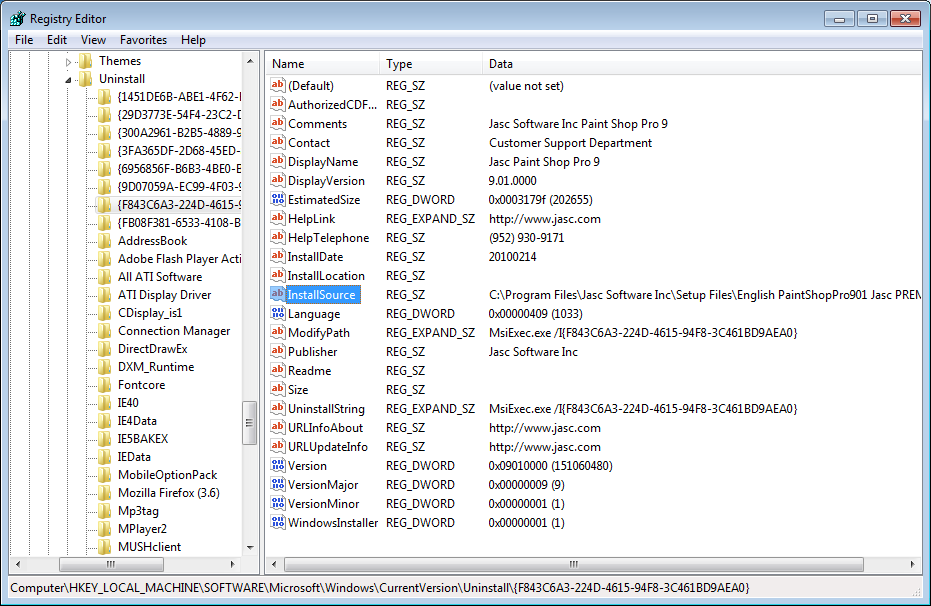
During the installation the setup files are extracted to
C:\Program Files\Jasc Software Inc\Soetup Files. I install
Paint Shop Pro 9 to C:\Program Files\Graphics\Paint Shop Pro 9
and delete the C:\Program Files\Jasc Software Inc directory and
every thing beneath it after the installation, since the setup files consume
108 MB of disk space. You can delete the directory from the command line
with rd /s /q "c:\Program Files\Jasc Software Inc\".
A silent uninstall can be peformed for Paint Shop Pro 9 using the command
MsiExec.exe /x{F843C6A3-224D-4615-94F8-3C461BD9AEA0} /q.
I created the following psp.xml file to be able to perform
a silent install of Paint Shop Pro 9 with
WPKG
<?xml version="1.0" encoding="UTF-8"?>

<packages>

<package
   id="PSP"
   name="Paint Shop Pro"
   revision="9"
   priority="3"
   reboot="false">

<check type="uninstall" condition="exists" path="Jasc Paint Shop Pro 9" />

<install cmd='%SOFTWARE%\Graphics\English_PaintShopPro901_Jasc_PREMIUMESD.exe /s /a /w /v"/qn
/l* c:\Users\Public\Documents\SysInfo\Reports\Install\PSP9.log
INSTALLDIR=\"C:\Program Files\Graphics\Paint Shop Pro 9\" ALLUSERS=2"' />

<remove cmd='MsiExec.exe /x{F843C6A3-224D-4615-94F8-3C461BD9AEA0} /q'/>

</package>

</packages>
References:
-
InstallShield
Unattended, A Windows deployment
system
-
Setup.exe and Update.exe Command-Line Parameters
Flexera Software - Knowledge Base
-
InstallShield
Flexera Software
-
ALLUSERS Property
MSDN: Microsoft Development, MSDN
Subscriptions, Resources and More
-
Command-Line Switches for the Microsoft Windows Installer Tool
Microsoft Support
-
Paint Shop Pro
WPKG | Open Source Software Deployment and
Distribution
[/os/windows/software/wpkg]
permanent link
Sun, Feb 14, 2010 5:19 pm
Firefox 3.6 Silent Install with WPKG
An "unattended", aka "silent" install can be performed on
Firefox 3.6. Instructions on performing
a silent install can be found at
Installer: Command Line Arguments.
You can use the -ms option with the setup file, though
this is listed as being a deprecated option. However, the alternative
option, /S, for a silent install is listed as being broken
currently [This is as of February 14, 2010]. Or you can use the option
/INI=<full path to configuration ini file>. You
can't mix the /S or -ms options with the
/INI file. If you place the /INI option after
one of those options, the /INI option
will be ignored and there's really no need to do so, since a silent installation
will be performed when you specify the /INI option.
Configuration ini file, e.g. firefox.ini syntax:
[Install]
; The name of the directory where the application will be installed in the
; system's program files directory. The security
; context the installer is running in must have write access to the
; installation directory. Also, the directory must not exist or if it exists
; it must be a directory and not a file. If any of these conditions are not met
; the installer will abort the installation with an error level of 2. If this
; value is specified then InstallDirectoryPath will be ignored.
; InstallDirectoryName=Mozilla Firefox

; The full path to the directory to install the application. The security
; context the installer is running in must have write access to the
; installation directory. Also, the directory must not exist or if it exists
; it must be a directory and not a file. If any of these conditions are not met
; the installer will abort the installation with an error level of 2.
; InstallDirectoryPath=c:\firefox\

; By default all of the following shortcuts are created. To prevent the
; creation of a shortcut specify false for the shortcut you don't want created.
;
; Create a shortcut for the application in the current user's QuickLaunch
; directory.
; QuickLaunchShortcut=false
;
; Create a shortcut for the application on the desktop. This will create the
; shortcut in the All Users Desktop directory and if that fails this will
; attempt to create the shortcuts in the current user's Start Menu directory.
; DesktopShortcut=false
;
; Create shortcuts for the application in the Start Menu. This will create the
; shortcuts in the All Users Start Menu directory and if that fails this will
; attempt to create the shortcuts in the current user's Start Menu directory.
; StartMenuShortcuts=false

; The directory name to use for the StartMenu folder.
; note: if StartMenuShortcuts=false is specified then this will be ignored.
; StartMenuDirectoryName=Mozilla Firefox
If you want to spcify the directory where Firefox should be installed,
rather than having it go into the default location, e.g.
C:\Program Files\Mozilla Firefox, leave the semicolon
in front of InstallDirectoryName="Mozilla Firefox" to keep it
commented out. But remove the semicolon from the InstallDirectoryPath
option. E.g., if I wanted to specify
C:\Program Files\Network\Web\Firefox as the installation directory,
I could put the following in that line:
InstallDirectoryPath=c:\Program Files\Network\Web\Mozilla Firefox
I normally don't want the desktop cluttered with shortcuts, so I would
remove the semicolon from in front of DesktopShortcut=false to
keep a shortcut for Firefox being added to the desktop.
By default, a start menu entry will be made named
Mozilla Firefox, but, if I instead wanted the start menu entry
to go under Network
Web\Mozilla Firefox, I could use
StartMenuDirectoryName=Network\Web\Mozilla Firefox for the
StartMenuDirectoryName option.
To perform an unattended install using
WPKG, I could use the following for a firefox.xml package file:
<?xml version="1.0" encoding="UTF-8"?>

<packages>

<package
	id="Firefox"
	name="Mozilla Firefox 3.6"
	revision="3600"
	reboot="false"
	priority="30">

	<check type="uninstall" condition="exists" path="Mozilla Firefox (3.6)" />
	<install cmd="taskkill /F /IM Firefox.exe">
		<exit code="0" />
		<exit code="128" />
                <exit code="-1073741515" />
	</install>
	<install cmd='"%SOFTWARE%\network\web\Firefox Setup 3.6.exe" /ini=%SOFTWARE%\network\web\firefox.ini' />
	<upgrade cmd="taskkill /F /IM Firefox.exe">
		<exit code="0" />
		<exit code="128" />
                <exit code="-1073741515" />
	</upgrade>
	<upgrade cmd='"%SOFTWARE%\network\web\Firefox Setup 3.6.exe" /ini=%SOFTWARE%\network\web\firefox.ini' />
	<remove cmd="taskkill /F /IM Firefox.exe">
		<exit code="0" />
		<exit code="128" />
                <exit code="-1073741515" />
	</remove>
	<remove cmd='"%PROGRAMFILES%\Network\Web\Mozilla Firefox\uninstall\helper.exe" /s' />
</package>

</packages>
References:
-
Firefox - WPKG
WPKG
-
Installer:Command Line Arguments
mozilla wiki
[/os/windows/software/wpkg]
permanent link
Fri, Feb 12, 2010 3:57 pm
Using OpenSSL to calculate Message Digest
The
md5sum
command can be used to calculate an
MD5 message digest (MD5
is an abbreviation for "Message-Digest algorithm 5"), which is a
cryptographic hash function. The md5sum program is commonly
found on Linux systems and programs which the provide the same
functionality are also available for Microsoft Windows systems, e.g.
digestIT 2004. But, if such a program isn't present on a system, e.g.
an OS X system, but
OpenSSL is present,
you can use the
openssl command to obtain message digests,
which can allow you to verify that a file, such as an executable file,
was not changed since it was released by the originator.
If you issue the command openssl dgst filename,
openssl will, by default, provide the MD5 checksum for the file. You can
also use other cryptographic hash functions, such as
SHA,
SHA1,
MD2, or you
can specify MD5.
$ openssl dgst images.zip
MD5(images.zip)= 796faa884fb0125eda60cd5e8aa8daa1
$ openssl md5 images.zip
MD5(images.zip)= 796faa884fb0125eda60cd5e8aa8daa1
$ openssl sha1 images.zip
SHA1(images.zip)= 3070ac89b7a4327e217045b1cac790c1dc048d8f
$ openssl sha images.zip
SHA(images.zip)= 021e35f63c55e22355bea99f73df885659a46d15
$ openssl md2 images.zip
MD2(images.zip)= 47bd3f0cc33710997f2fe57b1f7cc2c5
The available message digest options include the following:
MESSAGE DIGEST COMMANDS

       md2       MD2 Digest

       md5       MD5 Digest

       mdc2      MDC2 Digest

       rmd160    RMD-160 Digest

       sha       SHA Digest

       sha1      SHA-1 Digest

       sha224    SHA-224 Digest

       sha256    SHA-256 Digest

       sha384    SHA-384 Digest

       sha512    SHA-512 Digest
[/security/encryption/openssl]
permanent link
Thu, Feb 11, 2010 10:24 pm
WPKG Package Settings File
I had an error in a package file that I used for installing Debugging
Tools for Windows with
WPKG. When
I created
windbg.xml, I copied an already installed package's
xml file to the
windbg.xml. I forgot to change the uninstall
condition to match what it should be for Debugging Tools for Windows, however.
I had the following in
windbg.xml:
<check type="uninstall" condition="exists" path="Vim 7.2.320"/>
As a result, when I tried using WPKG to uninstall and reinstall
the software, I was unable to do so. To fix the problem, I edited
C:\Windows\system32\wpkg.xml and changed that line
in the file to the correct uninstall condition, which is the following:
<check type="uninstall" condition="exists" path="Debugging Tools
 for Windows (x86)"/>
The corrected windbg.xml file contains the following:
<?xml version="1.0" encoding="UTF-8"?>

<packages>

<!-- Debugging Tools for Windows 32-bit Version -->
<!-- Source: http://www.microsoft.com/whdc/devtools/debugging/installx86.mspx#a  -->

<package id="WinDbg" name="Debugging Tools for Windows" revision="1" reboot="false" priority="0">

  <check type="uninstall" condition="exists" path="Debugging Tools for Windows (x86)" />

  <install cmd='msiexec INSTDIR="C:\Program Files\Utilities\SysMgmt\Debugging Tools for Windows (x86)\" /i %SOFTWARE%\Utilities\SysMgmt\dbg_x86_6.11.1.404.msi  /q' />
  <upgrade cmd='%SOFTWARE%\Utilities\SysMgmt\dbg_x86_6.11.1.404.msi  /q' />
  <remove cmd='msiexec /x {300A2961-B2B5-4889-9CB9-5C2A570D08AD} /q' />

</package>

</packages>
References:
-
Unattended Install
for Debugging Tools for Windows
MoonPoint Support
[/os/windows/software/wpkg]
permanent link
Thu, Feb 11, 2010 6:02 pm
Troubleshooting with openssl
You can use the command
openssl s_client -connect xxx.xxx.xxx.xxx:yyyyy
command, where
xxx.xxx.xxx.xxx is the IP address of the
server and
yyyyy is the port number on the server used for
HTTPS. The port is usually
443, but does not have to be that port. You can, of course, also use
a
fully qualified domain name
(FQDN), such as paypal.com, instead of an IP address.
By using the command, one can determine if a system is responding
correctly using the HTTPS protocol. E.g. below is an example of a query
issued against paypal.com:
$ openssl s_client -connect paypal.com:443
CONNECTED(00000003)
depth=2 /C=US/O=VeriSign, Inc./OU=Class 3 Public Primary Certification Authority - G2/OU=(c) 1998 VeriSign, Inc. - For authorized use only/OU=VeriSign Trust Network
verify return:1
depth=1 /C=US/O=VeriSign, Inc./OU=VeriSign Trust Network/OU=Terms of use at https://www.verisign.com/rpa (c)09/CN=VeriSign Class 3 Secure Server CA - G2
verify return:1
depth=0 /C=US/ST=California/L=San Jose/O=PayPal, Inc./OU=Information Systems/CN=paypal.com
verify return:1
---
Certificate chain
 0 s:/C=US/ST=California/L=San Jose/O=PayPal, Inc./OU=Information Systems/CN=paypal.com
   i:/C=US/O=VeriSign, Inc./OU=VeriSign Trust Network/OU=Terms of use at https://www.verisign.com/rpa (c)09/CN=VeriSign Class 3 Secure Server CA - G2
 1 s:/C=US/O=VeriSign, Inc./OU=VeriSign Trust Network/OU=Terms of use at https://www.verisign.com/rpa (c)09/CN=VeriSign Class 3 Secure Server CA - G2
   i:/C=US/O=VeriSign, Inc./OU=Class 3 Public Primary Certification Authority - G2/OU=(c) 1998 VeriSign, Inc. - For authorized use only/OU=VeriSign Trust Network
---
Server certificate
-----BEGIN CERTIFICATE-----
MIIFDjCCA/agAwIBAgIQPma+WJDWF71INO8b3EN2LDANBgkqhkiG9w0BAQUFADCB
tTELMAkGA1UEBhMCVVMxFzAVBgNVBAoTDlZlcmlTaWduLCBJbmMuMR8wHQYDVQQL
ExZWZXJpU2lnbiBUcnVzdCBOZXR3b3JrMTswOQYDVQQLEzJUZXJtcyBvZiB1c2Ug
YXQgaHR0cHM6Ly93d3cudmVyaXNpZ24uY29tL3JwYSAoYykwOTEvMC0GA1UEAxMm
VmVyaVNpZ24gQ2xhc3MgMyBTZWN1cmUgU2VydmVyIENBIC0gRzIwHhcNMDkwNjEx
MDAwMDAwWhcNMTAwNjExMjM1OTU5WjB/MQswCQYDVQQGEwJVUzETMBEGA1UECBMK
Q2FsaWZvcm5pYTERMA8GA1UEBxQIU2FuIEpvc2UxFTATBgNVBAoUDFBheVBhbCwg
SW5jLjEcMBoGA1UECxQTSW5mb3JtYXRpb24gU3lzdGVtczETMBEGA1UEAxQKcGF5
cGFsLmNvbTCBnzANBgkqhkiG9w0BAQEFAAOBjQAwgYkCgYEAqCjJNlLuv02o0lG7
YPO3vreiUl5ptCTgbLD7TkYRrYivoZQUQZh0whOchbh3kabbPnqyVULcq4dGZeNx
eQLppc0n/YhxJnsPqoBoyg45/Xpc5HWKVuMsDMBRtTLwyjcfH7GVljUiDH/YoKL7
OCtpdJ+mgmLyqTWj+d8DpYWiDA0CAwEAAaOCAdEwggHNMAkGA1UdEwQCMAAwCwYD
VR0PBAQDAgWgMEUGA1UdHwQ+MDwwOqA4oDaGNGh0dHA6Ly9TVlJTZWN1cmUtRzIt
Y3JsLnZlcmlzaWduLmNvbS9TVlJTZWN1cmVHMi5jcmwwRAYDVR0gBD0wOzA5Bgtg
hkgBhvhFAQcXAzAqMCgGCCsGAQUFBwIBFhxodHRwczovL3d3dy52ZXJpc2lnbi5j
b20vcnBhMB0GA1UdJQQWMBQGCCsGAQUFBwMBBggrBgEFBQcDAjAfBgNVHSMEGDAW
gBSl7wsRzsBBA6NKZZBIshzgVy19RzB2BggrBgEFBQcBAQRqMGgwJAYIKwYBBQUH
MAGGGGh0dHA6Ly9vY3NwLnZlcmlzaWduLmNvbTBABggrBgEFBQcwAoY0aHR0cDov
L1NWUlNlY3VyZS1HMi1haWEudmVyaXNpZ24uY29tL1NWUlNlY3VyZUcyLmNlcjBu
BggrBgEFBQcBDARiMGChXqBcMFowWDBWFglpbWFnZS9naWYwITAfMAcGBSsOAwIa
BBRLa7kolgYMu9BSOJsprEsHiyEFGDAmFiRodHRwOi8vbG9nby52ZXJpc2lnbi5j
b20vdnNsb2dvMS5naWYwDQYJKoZIhvcNAQEFBQADggEBAA9sBxK8/hfHF6iKghED
jNTMpTLHT3lx8rdHnHD1UN5/lA0H8oMbjt6uzQVp9h9Xv/pOop/ItNNitdffTOnW
fVds+nMb56WSuX1d0fPn5KGGQcTMzTpA5Uxn3qnWXQc92O47qGEZSZ/aEYZjaHn2
VX5MFf2JXX1FQOyL288vCalmGAPLggjo3Hn0tWgK4Dd69l8JPm51FtEyijor/svw
FoxF7cJ6g92mgmu3JC10xhIXYDHiIAiTIzA3KCdAZikM4waZU8quRjgAIGrS0rRa
ohw0aAvy7gUrMWaws7+de3H0y/zQxfEbAsVzZ0+QA2WrGsa6EVKjcwW+VCJSLNZq
NeU=
-----END CERTIFICATE-----
subject=/C=US/ST=California/L=San Jose/O=PayPal, Inc./OU=Information Systems/CN=paypal.com
issuer=/C=US/O=VeriSign, Inc./OU=VeriSign Trust Network/OU=Terms of use at https://www.verisign.com/rpa (c)09/CN=VeriSign Class 3 Secure Server CA - G2
---
No client certificate CA names sent
---
SSL handshake has read 3029 bytes and written 308 bytes
---
New, TLSv1/SSLv3, Cipher is DES-CBC3-SHA
Server public key is 1024 bit
Compression: NONE
Expansion: NONE
SSL-Session:
    Protocol  : TLSv1
    Cipher    : DES-CBC3-SHA
    Session-ID: E24FE41E08BCBB5246EE5EAC08E7E4ACBB4708F0CD0089E9EF602E4F3C435922
    Session-ID-ctx:
    Master-Key: FFF8BF97F79796457EE44860212C5F887FFE8F62F4A6FC908DB1A382489BE5C2963C2D5F84BC526911FA5EB096634603
    Key-Arg   : None
    Krb5 Principal: None
    Start Time: 1262641575
    Timeout   : 300 (sec)
    Verify return code: 0 (ok)
---
You can check the expiration date of an SSL certificate by first retrieving
the certificate using commands such as in the first line below. You can then
check the expiration date with a command such as the one on the next line,
which shows that the current certificate for
PayPal expires at midnight
Greenwich Mean Time (GMT) on
June 11, 2010.
$ echo "" | openssl s_client -connect paypal.com:443 > certificate
depth=2 /C=US/O=VeriSign, Inc./OU=Class 3 Public Primary Certification Authority
 - G2/OU=(c) 1998 VeriSign, Inc. - For authorized use only/OU=VeriSign Trust Net
work
verify return:1
depth=1 /C=US/O=VeriSign, Inc./OU=VeriSign Trust Network/OU=Terms of use at https://www.verisign.com/rpa (c)09/CN=VeriSign Class 3 Secure Server CA - G2
verify return:1
depth=0 /C=US/ST=California/L=San Jose/O=PayPal, Inc./OU=Information Systems/CN=paypal.com
verify return:1
DONE
$ openssl x509 -in certificate -noout -enddate
notAfter=Jun 11 23:59:59 2010 GMT
Another example below shows the results returned for a self-signed
certificate:
# echo "" | /usr/local/ssl/bin/openssl s_client -connect 10.10.0.108:443 > certi
ficate
depth=0 /C=EU/ST=SomeState/L=SomeCity/O=SomeOranization/OU=SomeOrganizationUnit/
CN=localhost
verify error:num=18:self signed certificate
verify return:1
depth=0 /C=EU/ST=SomeState/L=SomeCity/O=SomeOranization/OU=SomeOrganizationUnit/
CN=localhost
verify return:1
DONE
# /usr/local/ssl/bin/openssl x509 -in certificate -noout -enddate
notAfter=Feb 12 11:44:04 2018 GMT
References:
-
OpenSSL: Documents, s_client(1)
OpenSSL: The Open Source toolkit for SLS/TLS
-
When does my certificate expire?
barndonhutchinson.com --
Linux, Solaris, and general UNIX notes.
[/security/encryption/openssl]
permanent link
Thu, Feb 11, 2010 5:53 pm
Unattended Install for Debugging Tools for Windows
I wanted to install
Debugging Tools for Windows on several systems. I wanted to do an
"unattended", aka "silent", installation where the installation would occur
automatically without any user intervention, except perhaps at most a
command being issued at a command prompt. The Debugging Tools for Windows
comes as an
.msi file,
which is a Microsoft Windows installation file.
At
Forcing MSI Installation Into a Specific Directory, I found a
suggestion to put TARGETDIR on the command line when using the
msiexec command.
E.g. to specify the directory where an application should be installed when the
installation file for that application is an
.msi file, the author of
that page suggested that you can use a command similar to the following:
msiexec TARGETDIR="C:\MyTargetDirectory" /i MyProject.msi
You can use the /q option to specify that the installation does
not present a GUI installer
window or prompt the user - see
Command-Line Options for other command line options.
That did not work in this case, however. So, I decided to try the webpage
author's suggestion to turn on logging during an installation of the software
where I performed the install normally from the GUI installation method. I
turned on verbose logging using the command
msiexec /i dbg_x86_6.11.1.404.msi /l*v c:\windbg.log, which
created a log file c:\windbg.log.
During the installation process, I chose a "custom" install and specified
the installation directory be C:\Program
Files\Utilities\SysMgmt\Debugging Tools for Windows (x86)\ rather than
the default installation directory of C:\Program Files\Debugging Tools
for Windows (x86)\. When the installation was completed, I saw the
following when I opened the log file with Notepad:
MSI (c) (44:D8) [16:44:12:281]: PROPERTY CHANGE: Modifying INSTDIR property. Its current value is 'C:\Program Files\Debugging Tools for Windows (x86)\'. Its new value: 'C:\'.
MSI (c) (44:D8) [16:44:13:291]: PROPERTY CHANGE: Modifying INSTDIR property. Its current value is 'C:\'. Its new value: 'C:\Program Files\'.
MSI (c) (44:D8) [16:44:16:866]: PROPERTY CHANGE: Modifying INSTDIR property. Its current value is 'C:\Program Files\'. Its new value: 'C:\Program Files\Utilities\'.
MSI (c) (44:D8) [16:44:18:062]: PROPERTY CHANGE: Modifying INSTDIR property. Its current value is 'C:\Program Files\Utilities\'. Its new value: 'C:\Program Files\Utilities\SysMgmt\'.
MSI (c) (44:D8) [16:44:24:941]: PROPERTY CHANGE: Modifying INSTDIR property. Its current value is 'C:\Program Files\Utilities\SysMgmt\'. Its new value: 'C:\Program Files\Utilities\SysMgmt\Debugging Tools for Windows (x86)\'.
MSI (c) (44:D8) [16:44:25:095]: PROPERTY CHANGE: Modifying _1394 property. Its current value is 'C:\Program Files\Debugging Tools for Windows (x86)\1394\'. Its new value: 'C:\Program Files\Utilities\SysMgmt\Debugging Tools for Windows (x86)\1394\'.
I could see that the property being modified was INSTDIR rather
than TARGETDIR, so I then tried the following command at the
command line:
msiexec INSTDIR="C:\Program Files\Utilities\SysMgmt\Debugging Tools for
Windows (x86)\" /i dbg_x86_6.11.1.404.msi /q
That put the software in the directory where I wanted it installed and
did not display a GUI window or any prompts.
To uninstall software installed through an MSI file, you can use
msiexec /x Package|ProductCode. In this case, after
the installation, I ran regedit and checked the registry key
HKEY_LOCAL_MACHINE\SOFTWARE\Microsoft\Windows\CurrentVersion\Uninstall.
I could see that the
HKEY_LOCAL_MACHINE\SOFTWARE\Microsoft\Windows\CurrentVersion\Uninstall\{300A2961-B2B5-4889-9CB9-5C2A570D08AD} registry key was the appropriate one,
since within it I saw the following:
| Name | Type | Size |
|---|
| DisplayName | REG_SZ |
Debugging Tools for Windows (x86) |
| DisplayVersion | REG_SZ |
6.11.1.404 |
| UninstallString | REG_EXPAND_SZ |
MsiExec.exe /I{300A2961-B2B5-4889-9CB9-5C2A570D08AD} |
That told me that the ProductCode for Debugging Tools for Windows is
{300A2961-B2B5-4889-9CB9-5C2A570D08AD}. However, if I used
MsiExec.exe /I{300A2961-B2B5-4889-9CB9-5C2A570D08AD} to uninstall
the software, I would get a GUI uninstall window where I would have to select
the "remove" option. For a silent uninstall from the command line, I can
use msiexec /x {300A2961-B2B5-4889-9CB9-5C2A570D08AD} /q. The
/x option indicates that you want to remove the software. The
/q option indicates you want a silent uninstall. Without the
/q option, you would be prompted to confirm the removal of the
software.
The DisplayName registry entry is what you will see under
"Uninstall or change a program" or "Add or Remove Programs" under the
Windows Control Panel. E.g., in this case, I would see
Debugging Tools for Windows (x86) there.
References:
-
Debugging Tools for Windows
WHDC - Windows
Hardware Developer Central
-
File Extension .MSI Details
FILExt - The File Extension Source
-
Windows Installer
Wikipedia, the free encyclopedia
-
Forcing MSI Installation Into a Specific Directory
Arthur Zubarev
-
Command-Line Options
MSDN: Microsoft Development, MSDN
Subscriptions, Resources, and More
-
Unattended/Silent Installation Switches for Windows Apps
Unattended, A Windows deployment system
[/os/windows/utilities/sysmgmt]
permanent link
Sat, Feb 06, 2010 4:37 pm
Installing FlieAlyzer with WPKG
I installed
FileAlyzer 1.6.0.4 on a Windows 7 system using
WPKG, which is open source
software for deployment and distribution of software. I created
a
filealyzer.xml file which I placed in WPGK's
packages directory on the server from which I install
software. The
filealyzer.xml file contained the following
commands:
<?xml version="1.0" encoding="UTF-8"?>

<packages>

<package
   id="FileAlyzer"
   name="FileAlyzer"
   revision="1"
   priority="3"
   reboot="false">

   <check type="uninstall" condition="exists" path="FileAlyzer"/>

   <install cmd='%SOFTWARE%\utilities\filealyz.exe /sp- /verysilent /Dir="%PROGRAMFILES%\Utilities\FileAlyzer"'/>

   <upgrade cmd='%SOFTWARE%\utilities\filealyz.exe /sp- /verysilent /Dir="%PROGRAMFILES%\Utilities\FileAlyzer"'/>

   <remove cmd='"%PROGRAMFILES%\Utilities\FileAlyzer\unins000.exe" /sp- /verysilent /norestart'/>

</package>

</packages>
%SOFTWARE% is a variable representing the directory on
the server where software to be installed is located. I was able to specify
the directory where the software should be installed with
/Dir="%PROGRAMFILES%\Utilities\FileAlyzer" rather than having
to accept the default installation directory, since FileAlyzer uses
Inno Setup, an open source
installer. If you don't specify the directory where it should be installed,
FileAlyzer will be installed in C:\Program
Files\Safer Networking\FileAlyzer
After FileAlyzer is installed, you can right-click on a file and
choose Analyze file with FileAlyzer.
[/os/windows/software/wpkg]
permanent link
Mon, Jan 18, 2010 5:56 pm
Finding Time of Last Reboot
On Windows systems, such as XP, Vista, Small Business Server 2003, or Windows 7,
you can determine the time a system was last booted from a command prompt
using the
systeminfo and
find commands.
C:\>systeminfo | find "System Boot"
System Boot Time:          8/31/2009, 10:36:15 AM
For older versions of Windows, such as Windows NT or Windows 2000, you can
use the
uptime utility available in the Resource Kit for that
version of Windows.
C:\Program Files\Reskit>uptime
\\JILL has been up for: 6 day(s), 9 hour(s), 34 minute(s), 7 second(s)
For Windows NT, you can download the uptime utility from
Uptime.exe Tool Allows You
to Estimate Server Availability with Windows NT 4.0 SP4 or Higher.
For Windows 2000, the tool can be downloaded from
Application Center 2000 - Uptime Tool.
[/os/windows/commands]
permanent link
Sun, Jan 10, 2010 7:51 pm
Problems with Treet.TV in SL on a Windows 7 System
After a couple of days of trying to get video to work for
Treet.TV channels on
SecondLife, I've still had no
success.
[ More Info ]
[/virtual_worlds/sl]
permanent link
Sat, Jan 09, 2010 9:09 pm
Checking Client IP address with PHP
I noticed that two PHP scripts,
BrowserInfo and
BrowserTest, that
I use to have people provide me with
information on their browser, such as the plugins available, were
not providing the IP address from which browsers were viewing the
scripts, because I hadn't updated them for a long time, but had
upgraded PHP on the website quite some time ago. The relevant
old code is shown below:
<?php
$IP = $HTTP_SERVER_VARS['REMOTE_ADDR'];
$FQDN = gethostbyaddr($HTTP_SERVER_VARS['REMOTE_ADDR']);
print ("<b>IP Address:</b> $IP<br>");
print ("<b>FQDN:</b> $FQDN<br>");
?>
I had to change the code to that shown below:
<?php
$IP = $_SERVER['REMOTE_ADDR'];
$FQDN = gethostbyaddr($_SERVER['REMOTE_ADDR']);
print ("<b>IP Address:</b> $IP<br>");
print ("<b>FQDN:</b> $FQDN<br>");
?>
References:
-
how to get client's IP address in PHP
Date: August 10, 2006
PHPBuilder.com
-
Predefined Variables
Last Updated; January 8, 2010
PHP: Hypertext Preprocessor
[/network/web/browser]
permanent link
Fri, Jan 08, 2010 12:53 pm
Hostile Host Check
I created a
Bash script
hostile-host-check to allow me to query
DShield, a
"cooperative network security community" to determine if an IP address I've
been notified is engaged in hostile activity is also listed in
DShield's database of IP addresses found by others to be associated with
hostile activity noted at their firewalls.
hostile-host-check.zip
[/security/attacks]
permanent link
Thu, Jan 07, 2010 11:19 am
KeePassX
If you are looking for a free cross-platform password management program,
try
KeePassX. It is
open source
software, which is available under the
GNU General Public License (GPL).
You can compile the software from source code or
download precompiled
binary versions for Linux, Mac OS X, and Windows.
Below is a screen shot from a Mac OS X entry showing fields that can
be filled for a new entry in the password database.
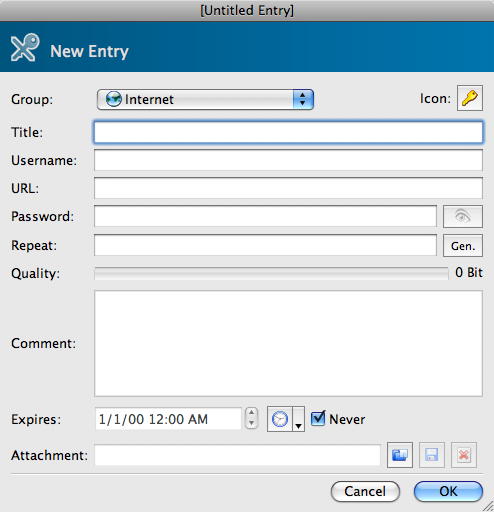
[/os/os-x]
permanent link
Thu, Jan 07, 2010 11:12 am
Capturing a Screen Shot
To take a screen shot on a Mac OS X system, you can use the
Grab
application that comes with the operating system. To use it,
take the following steps:
- With the finder, locate the Grab application which will be under
Applications/Utilities.
- Open
Grab
- Select Capture.
- Then select what you wish to capture. The choices are as follows:
- Selection
- Window
- Screen
- Timed Screen
- If you selected Window, you will see a Window Grab window
appear offering you the chance to choose the window you want to capture. You
can click on that window to select it and then click on the Choose
Window button to capture it with Grab.
- Click on File and then Save to save the screen capture
to a TIFF
file.
Grab will save images as
Tagged Image
File Format (TIFF) files. You can convert such files to another graphics
format, such as Joint
Photographic Experts Group (JPEG) format using the Preview
application that also comes with the operating system. Preview
is located in the Applications folder. To convert a file from
TIFF to JPEG using it, take the following steps:
- Open Preview, which is located in
Applications,
by double-clicking on it.
- Choose File.
- Chose Open and select the file to convert.
- Choose File.
- Choose Save As and select the file format you wish to use. You
can choose from the following file formats:
- GIF
- JPEG
- JPEG-2000
- Microsoft BMP
- OpenEXR
- PDF
- Photoshop
- PICT
- PNG
- SGI
- TGA
- TIFF
- Click on Save.
There are also other third-party applications that will allow you to
convert files in one graphics format to another.
As an alternative to running Grab and then Preview,you can open Preview and then from within it, select
File and then select Grab, which will allow you to capture
a window with Grab while inside Preview where you can select
the file format you wish to use when you save the image. That can save you
some steps in the process.
References:
-
Screenshot Hacks for Mac OS X
By: Wei-Meng Lee and
Derrick Story
Date: February 28, 2003
MacDevCenter.com -- macintosh
development, open source development
-
Mac OS X Screenshot Secrets
By: David Battino
Date: February 1, 2006
O'Reilly Digital Media Center
[/os/os-x]
permanent link
Tue, Jan 05, 2010 11:00 pm
Malware Scanning on Dell Inspiron 1526
The owner of a Dell Inspiron 1526 laptop running Microsoft Windows Vista
with Service Pack 2 installed was seeing popups warning the system was
infected with malware. When I logged into the system, I saw one such
warning. The Task Manager would not run nor could I get a command prompt
at the time.
When I checked the system, I didn't find any rogue antivirus/antispyware
software on it, though that I could link to the warning. I did find
a .wmv file masquerading as an .mp3 file that Symantec Security Scan
identified as Trojan.Wimad, however.
[ More Info ]
[/security/malware]
permanent link
Tue, Jan 05, 2010 9:52 pm
Displaying Additional Text When Mouse Hovered Over Text
A simple way to display additional text when someone moves his/her mouse over
text on a webpage, is to use something like the following:
<a title="Text to be displayed on mouse hover">Some text<a>
Which will produce the following:
Some text.
References:
-
Show text on Hover
Date: September 22, 2005
newsgroups.derkeiler.com:
The source for newsgroups news
[/network/web/html]
permanent link

Privacy Policy
Contact


 If you have a Fedora 12 or Red Hat 6 (RHEL) or later versions of Linux on
a system and would like to install the


 and selected
Control Panel. The View by settng was Category. I
changed it to Large icons and then selected Performance
Information and Tools, which showed me the WEI score was 1.0.


